Exporting Assets: SVG & PNG
What This Tutorial Covers
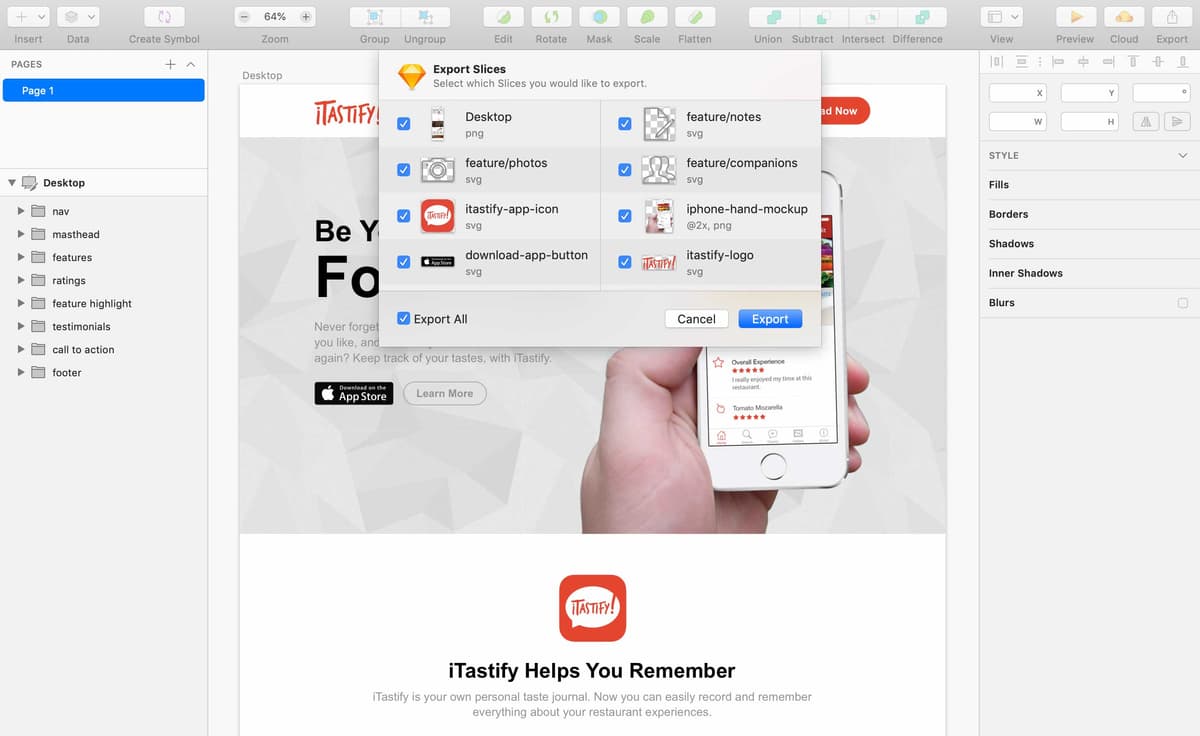
Export Slices
Mark layers as exportable.
SVG vs PNG
Vector for icons; raster for photos.
Multiple Sizes
Generate @1x, @2x, @3x in one click.
Noble Desktop's UX/UI Design Certificate teaches Figma — the modern successor to Sketch.
Learn how to successfully export artboards and files for web as SVG and PNG in our comprehensive Sketch tutorial, which also includes detailed instructions on exporting into folders.
Exercise Preview
Exporting Artboards
Before we export individual graphics, we often need to send the entire page design to a client (or developer). For that purpose we can export the entire artboard.
- In Sketch, go to File > Open Local Document.
- Navigate into Desktop > Class Files > Sketch Class > iTastify and double–click on iTastify Ready for Export SVG & PNG.sketch to open it.
- In the Sidebar, click on the Desktop artboard to select it.
- In the Inspector, click Make Exportable. If you don’t see it, scroll down to the bottom!
Make sure the export Format is set to PNG.
PNG is a high quality format, so a client or developer will see the full quality of the design. If the PNG is too large to easily share, JPEG can be a good alternative.
In the Inspector, notice that some sections of the preview have a transparent background, indicated by the white and gray checkerboard:

- In the Inspector, check on Background color. (Include in Export should also be checked.)
- In the preview, notice that the transparent background has now changed to white, which is how our design is supposed to look.
Go to File > Export.
NOTE: The name of the artboard will be used for the name of the file. The artboard is called Desktop, so the file will be named Desktop.png.
- In the dialog that appears, click Export.
- Make sure Save for web is checked. This sets the appropriate color space and doesn’t include any metadata that’s unnecessary for the web.
- Navigate into Desktop > Class Files > Sketch Class > iTastify > assets-for-developer.
Click Save.
The PNG file was created, which you could send to your client or developer.
Exporting into Folders
- Scroll down to see the three icons below the iTastify Helps You Remember heading.
Drag a selection box over the three icons:
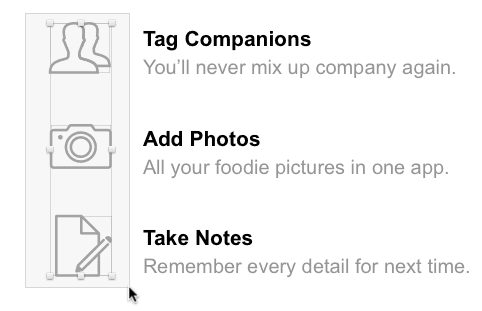
In the Sidebar, notice the three highlighted layer groups start with feature- before their individual names.
This would be fine for organizing in an alphabetical list of files, but we want a folder instead. If you name layers using the folderName/fileName convention, Sketch will create folders when exporting!
- Let’s rename them to put all of these icons into a feature folder. Double–click feature-companions and rename to: feature/companions
For the other two feature layer names, change the - to a / so you end up with:
- Feature/photos
- Feature/notes
- Make sure all three icons are selected before moving on.
- In the Inspector, click Make Exportable.
Set the Format to SVG.
As a reminder, with SVG, we don’t need to worry about 1x vs. 2x. Web browsers will render the vector at full screen resolution.
- Click on a blank area of the canvas to deselect.
- Go to File > Export.
- In the dialog that appears, check Export All.
- Click Export.
- Make sure you’re still in the assets-for-developer folder. If not, navigate into Desktop > Class Files > Sketch Class > iTastify > assets-for-developer.
- Click Export.
- Switch back to the Finder (your Desktop).
- You should still have a window open for the assets-for-developer folder and the new assets have been added here. Notice the new feature folder was created and it contains the three SVG icons.
Feel free to preview any of the assets if you wish.