Creating a Clickable Prototype with Craft (by InVision)
What This Tutorial Covers
Craft Plugin
Sketch plugin for adding prototype functionality.
Clickable Hotspots
Connect screens through interactive areas.
Modern Alternative
Figma's built-in prototyping replaced Craft for most users.
Noble Desktop's UX/UI Design Certificate teaches Figma — the modern successor to Sketch.
Learn how to transform a Sketch design into a clickable prototype using InVision in this comprehensive tutorial, covering topics such as installing Craft, creating overlays and fixed headers, and sharing the prototype.
Exercise Preview
Installing InVision’s Craft Plugin into Sketch
If you’re in a Noble Desktop classroom, we should already have Craft installed, so skip ahead to the next section.
InVision is a web app (it runs in a web browser) which creates interactive prototypes of designs from Sketch and other apps. InVision integrates directly into Sketch using their plugin called Craft. Craft adds multiple features to Sketch, including the ability to create prototypes directly within Sketch and then upload them to InVision! If you’re in a Noble Desktop class, the Craft plugin should already be installed so you can skip ahead to the next section.
- If Sketch is open, quit it now.
- Go to invisionapp.com/craft
Download the Craft plugin installer as follows:
- If you are not logged into your InVision account, you’ll have to enter your email address to download it. If the download doesn’t start automatically, check your email for a download link.
- If you’re logged into your InVision account, you should see a download button.
- Run the Craft installer.
The CraftManager app was installed. This lets you install and update the Craft plugins into Sketch. It lives in the menubar. If CraftManager didn’t appear, click on the Craft icon
 in the menubar to see it.
- In the CraftManager app, if the plugins weren’t automatically installed, click Install to install the plugins into Sketch.
Launch Sketch.
Creating a Clickable Prototype with InVision’s Craft
You can do prototyping in InVision’s web app, or using InVision’s Craft plugin, we create interactions within Sketch. Then we sync that work to the InVision web app so we can share the prototype (or anything else that’s not possible to do within Sketch). Let’s see how this works.
- In Sketch, go to File > Open Local Document.
- Navigate into Desktop > Class Files > Sketch Class and double–click on InVision Craft Prototyping.sketch to open it.
- Let’s start adding prototype interactions. Make sure you can see the Home Page artboard as well as the Autumn Collection artboard to its right.
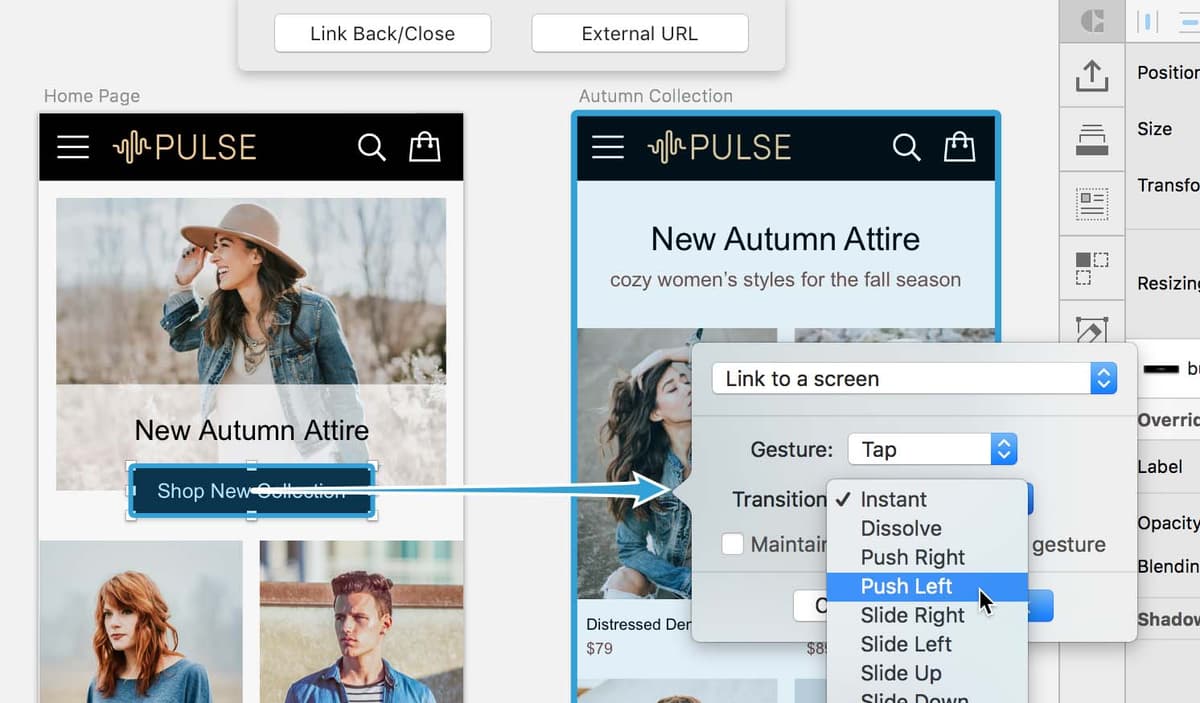
- Let’s tell a button to take us to another screen (artboard). On the Home Page, select the black Shop New Collection button.
To add a link we use a keystroke. Hit the K key (it used to be C for Craft but Sketch took that keystroke for Components, so they switched to K).
NOTE: This is the same as choosing Craft > Prototype > Add Hotspot to Layer.
- An arrow will appear so you can choose what you want to link to. Click on the Autumn Collection artboard.
Set Gesture to Tap.
NOTE: The Desktop Click gesture does not give you the transitions we get with the Mobile Tap gesture.
- Set Transition to Slide Left.
- Click Add Link.
- Let’s create one more link before we preview this. Make sure you can see the Autumn Collection artboard as well as the Product Page to its right.
- On the Autumn Collection artboard select the Distressed Denim Jacket photo. The photo and type will be selected because they are all in a symbol.
- Hit the K key.
- Click on the Product Page artboard.
- Make sure Gesture is set to Tap.
- Set Transition to Slide Left.
- Click Add Link.
- Let’s see the prototype in action. The selected artboard will be loaded into the preview, so make sure to click on something (it doesn’t matter what) on the Home Page artboard.
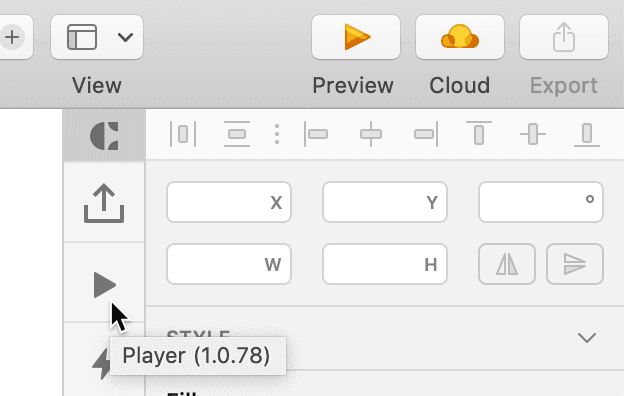
On the right of the window is Sketch’s Inspector. To the left of that is a column of icons for the Craft plugin. As shown below, click the Player icon
 .
.
- If asked to Save, do so. (Do this every time, we won’t remind you.)
- In the preview window, click on Shop New Collection to go to the next screen.
- Click on the Distressed Denim Jacket photo or type to go to the next screen. Cool!
- Let’s see that again. Press the Left Arrow key twice so you end back on the Home Page (or use the menu at the top of the preview window).
- Click on Shop New Collection and then the Distressed Denim Jacket photo. Cool!
- Close the preview window.
- Click outside the artboards so nothing is selected.
- Click the Player button again.
- Notice how the Nav Menu appears. That’s because it’s the top artboard in the Sidebar (the panel on the left of the screen).
- Close the preview window.
- In the Sidebar on the left of the screen, select the Nav Menu artboard.
- Choose Arrange > Send to Back.
- Click outside the artboards so nothing is selected.
- Click the Player button again.
- Notice the Home Page now appears first (because it’s the top artboard).
Close the preview window.
Wiring up the Navbar & Creating a Nav Menu Overlay
We need a link to get back to the Home Page from any screen. The Pulse logo is on all screens, and we can link them all by adding the link inside the symbol.
- In any of the navbars, double–click on the Pulse logo to edit the navbar symbol.
- Click on a blank area of the canvas to deselect.
- Select the Pulse logo.
- Hit the K key.
- In the buttons that appear at the top of Sketch’s canvas, click on Artboard.
In the options that appear:
- The top menu should already be set to Link to a screen.
- Click on the Select Artboard menu below that (don’t worry that it’s grayed out), and choose Home Page.
- Set Gesture to Tap.
- Set Transition to Slide Right.
- Click Add Link.
We need a way to show our navigation menu. Unlike the other links we made, the content on the Nav Menu artboard should overlay the current screen, so we can see through the transparent menu background to the current screen’s content.
Select the 3-lined hamburger menu icon to the left of the logo.
- Hit the K key.
- In the buttons that appear at the top of Sketch’s canvas, click on Artboard.
In the options that appear:
- Change the top menu to Link as Overlay.
- Click on the Select Artboard menu below that (don’t worry that it’s grayed out), and choose Nav Menu.
Then set the following:

Click Add Link.
- Click the Back to Instance button. (If the Back to Instance button has disappeared, so at the top of the Layers panel click on the Screens page.)
- On the Nav Menu artboard, click once on the navbar to select the symbol.
In the navbar symbol, our 3-lined hamburger menu icon is a symbol. We also made a close button symbol that’s the same exact size as the menu icon so we’ll be able to swap it out as an override (as we learned about in a previous exercise).
In the Inspector, under Overrides click on the menu below Menu Icon and chose close (if you don’t see it, look in This Document > icon > close).
We need a way to close the nav menu. We can’t add the Craft link within the close button symbol because it won’t come through (the plugin does not integrate deeply enough into Sketch). Instead we can draw an invisible hotspot over it and set a different action.
Zoom in closer on the X close button on the Nav Menu artboard.
- In the Toolbar, click the Insert button
 and select Hotspot.
 - Drag a rectangle over the X close button (don’t worry about exact position and size yet, you’ll adjust that in a moment).
- Hit the Esc key to cancel Sketch’s native prototyping link.
- Adjust the size and position of the hotspot over the X close button. You won’t see this shape in the final design, but it defines the size of the clickable/tappable area.
- With the hotspot selected, hit the K key (to add a Craft prototyping link).
In the buttons that appear at the top of Sketch’s canvas, click on Link Back/Close, then set the following:
- Set Gesture to Tap.
- Set Transition to Slide Up.
- Click Add Link.
- Let’s see the prototype in action. Click outside the artboards so nothing is selected.
- Click the Player button .
- Click on the menu icon (3 lines) at the top left of the navbar to open the menu.
- Notice that the transparency we used on the black background has been maintained so you can see through the menu to see the current page behind it.
- Click the close button (X) to close the menu.
- Click on the Shop New Collection button to go to the next screen.
- Click the Pulse logo to go back to the Home Page.
- Close the preview window.
Choose View > Zoom To > Fit Canvas.
Creating an InVision Project & Uploading Artboards
To share the prototype, and to do some things you can’t do directly in Sketch, we must upload our work into an InVision project.
- If you have a selection, Craft sync will only upload the selected artboard(s). We want to upload all artboards, so click outside of the artboards so none are selected.
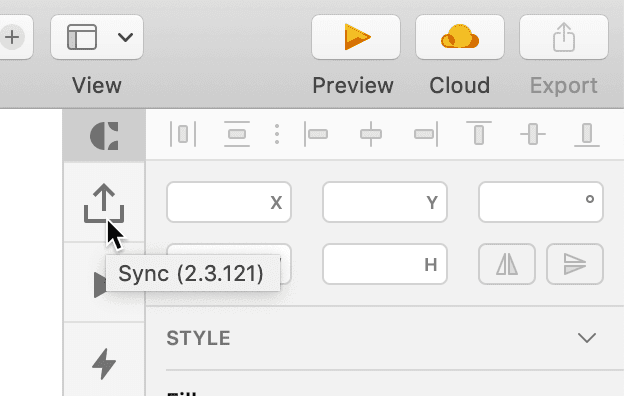
In the Craft panel’s column of icons, click the Sync icon
 .
.
- The CraftManager app will open. If it asks you to sign in, do so now.
We need to create an InVision project (called a prototype), so set the following:
- Publish to: Prototype
- Choose Create new, and name it Pulse
- Set the device type to iPhone.
- Make sure All artboards on page is selected.
- Click Publish.
Let’s see what we just synced to the InVision web app. After it’s done uploading, click on the project name to open it in a web browser.
If you closed the CraftManager app before doing so, in Sketch, click on the Sync icon
again. In the CraftManager app that opens, click Open on web.A web browser should open and you should see that each artboard in Sketch was turned into an InVision screen.
If you’re asked to log in, go ahead and log in. After logging in, you may need to go back to Sketch, click on the Sync icon, and click the Open in web button.
- Hover over Home Page and click View Screen.
- If you see tips, click Skip Tips.
- The design is opened in a mobile phone preview. Scroll down to see the part of the design that’s too tall to fit within the phone.
- Scroll back to the top and notice the design is slightly cut off by the status bar containing the time and battery indicator. Let’s fix that.
- Towards the bottom right of the window, click the ••• button (may be a gear icon if you’re still on an older version of InVision) to open the Configuration settings.
- Check on My design starts below the status bar.
Click Save.
Creating a Fixed Header
Scroll down the home page to see the navbar scrolls with the page and disappears.
We’d like the navbar to be fixed to the top of the screen, so it’s always visible. We can’t do that inside Sketch, but we can do it here in InVision.
- At the bottom of the window below the preview, click the Build mode B button
 or hit the B key.
 Scroll to the top of the design, and notice the Fixed Header option at the top right of the design. Next to Fixed Header is a 3-lined grab handle. Drag it down to the bottom of the black navbar (at 120 PX).
TIP: You can click on the handle and type in the position if you want to be exact.
- We need to repeat this on the other screens. Hit the Right Arrow key to go to the Autumn Collection screen.
- Pull the Fixed Header grab handle down again.
- Hit the Right Arrow key one more time to go to the Product Page.
- Drag the Fixed Header grab handle down again.
- Below the preview, click the Play mode P button
 or hit the P key.
 - Scroll through the design and notice the navbar stays fixed at the top of the design.
In the navbar, click the Pulse logo to return to the home page.
Updating the Design
We need to update some text. Luckily it’s easy to push design changes from Sketch to InVision, and we don’t lose any of the prototyping we’ve done with Craft or InVision.
- Keep the web browser open so we can come back to InVision in a moment.
- Switch back to Sketch.
- If you see all the Craft links, hit the X key to hide them.
- On the Autumn Collection artboard, double–click on the text New Autumn Attire and change it to New Fall Fashion.
- Click the Sync button .
- It detects which artboards have changed, so click Publish.
- Switch back to InVision in your web browser.
If you’re not viewing the Autumn Collection artboard, use the left/right arrow keys to get there (or click through the prototype).
The updated text New Fall Fashion should automatically appear, but you may have to wait a moment for it to load. Notice that the prototype still works. Nice!
Logging Out of Your InVision Account
If you’re on a classroom computer (not your own work/personal computer), you should log out of your InVision account in Sketch.
- In the menubar at the top right of your screen, click on the Craft icon .
- At the top right of the CraftManager window, click the gear icon and choose Sign Out.