Fixing the iPad Layout
iOS Project Setup Checklist
Modern, declarative — UIKit only when you need legacy support.
iOS 16+ covers most users while keeping APIs modern.
Apple Developer account + provisioning profile required.
XCTest framework — catch regressions before users do.
Noble Desktop's Full-Stack Web Development Certificate teaches programming fundamentals that transfer across mobile, web, and desktop development.
Gain a comprehensive understanding of fixing the iPad layout for iOS Development with this detailed tutorial, providing step-by-step instructions and visual aids.
Exercise Preview
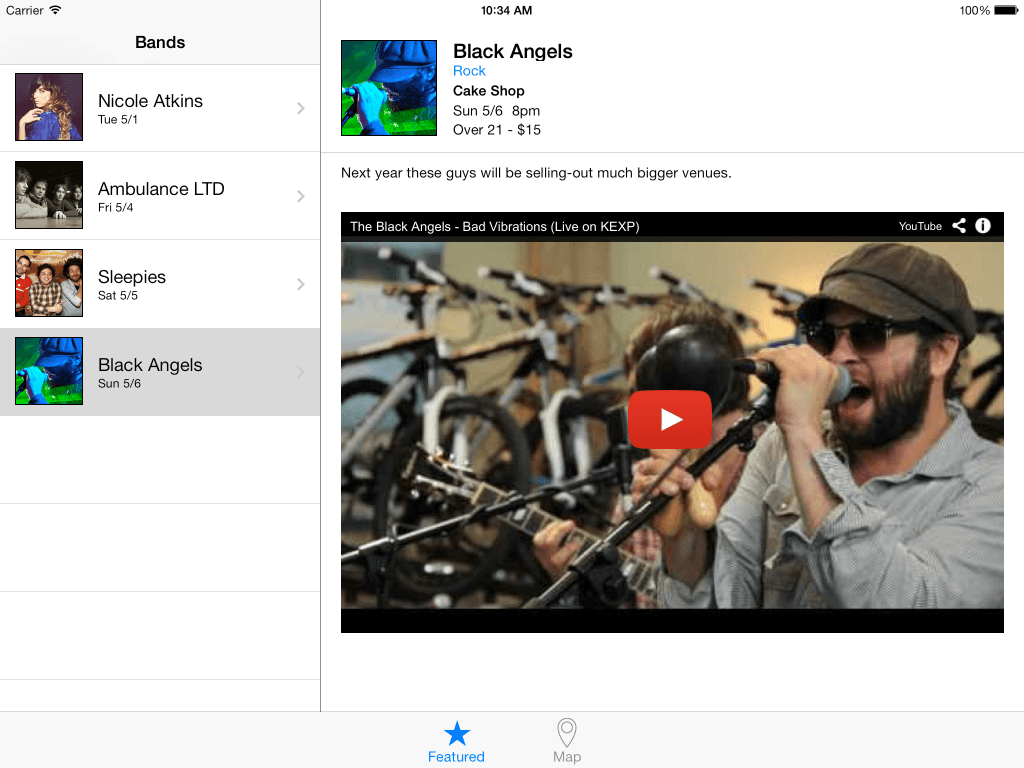
Fixing the Detail View for IPad
- In the Project navigator, click on Main_iPad.storyboard.
- Zoom in on the Bands Detail View Controller by CTRL–clicking or Right–clicking on a blank area of the Editor and choosing Zoom to 100%.
- If the Document Outline is not open, click the Show Document Outline button
 .
. - In the Document Outline, expand into Bands Detail View Controller Scene > Bands Detail View Controller > View and select Band Image.
In the Utilities area, click on the Size inspector tab
 .
.Set the following options:
X: 20 Y: 40 Width: 96 Height: 96 The Y position is slightly different from the iPhone layout because we do not have an area under the status bar in the iPad layout. (Because we are using the split view controller, the iPad layout does not have a Back bar that creates extra unusable space under the status bar.)
Let’s change the Y positions of the rest of the elements to match the photo. Select the Band Name Label.
NOTE: Normally you’d drag the labels into a layout that you like, but because we have a specific layout in mind, we’ll give you the exact positions and sizes.
In the Size inspector
, set Y to 40.Set the remaining labels to the following Y size in the Size inspector:
Band Type Label: 60 Venue Label: 80 Show Date Label: 100 Show Time Label: 100 Show Details Label: 119 Band Description Label: 164 The layout should now look like this (don’t worry about the line yet):

Fixing the Views
Looks good so far, but our line and video web view are too small for the iPad. Let’s make them bigger. It will be easier to use the Document Outline to select the line.
In the Bands Detail View Controller section, inside View there is another View (above Video Web View). Select that nested View.
In the Size inspector
, set the following:Y: 152 Width: 703 The divider line now stretches across the entire width. Let’s fix the Web View next.
In the Document Outline, select Video Web View (you can also click on it on the Editor).
In the Size inspector
, set the following:X: 20 Y: 221 Width: 663 Height: 421 - That’s better. Let’s see how it looks in the Simulator. Click Run.
- When the Simulator finishes loading, notice the layout on the right looks better.
- Click on another band row to see the correct info loads for that band. Cool! Notice the band description text is wrapping onto more than one line. With the increased screen space, we want this description to stay on one line.
- Switch back to Xcode.
- Select the Band Description Label.
- In the Size inspector , set Width to 663.
- In the Utilities area, click the Attributes inspector tab
 .
. - Set Lines to 1.
- Run it.
- When the Simulator finishes loading, click on a band to see all the text stays on one line.
- Switch back to Xcode.
- Click the Stop button.
Leave the project open, we’ll continue working on it in the next exercise.