Exporting Assets for iOS Apps: PNG & PDF
PNG vs PDF for iOS Export
| Feature | Best for |
|---|---|
| PNG @ 1x, 2x, 3x | Most common iOS approach — three resolutions for different Apple device densities. |
| PDF @ 1x | Vector — Xcode generates the 1x/2x/3x assets automatically. Also useful for Illustrator handoff. |
Noble Desktop's UX & UI Design Certificate teaches Figma — the modern successor to Sketch.
Learn how to export graphics for use in iOS apps with this comprehensive tutorial, covering topics including exporting as 1x, 2x, and 3x PNG, and exporting as 1x PDF.
Exercise Preview
Exporting for IOS As PNG or PDF
There are two ways to make graphics for iOS apps (apps for iPhone and iPad):
- PNG files at 1x, 2x, and 3x sizes (the different resolutions of Apple devices). This seems to be the most common approach.
- PDF at 1x size. PDF is vector, so Xcode can turn the PDF into 1x, 2x, and 3x assets.
In this exercise we’ll show you how to create both, but talk to your app developer to see which they prefer.
NOTE: Exporting as PDF can also be a nice way to get art into other apps such as Adobe Illustrator. While you can copy and paste vectors into Adobe Illustrator (look outside Illustrator’s artboard for the pasted graphics if you can’t see them), sometimes you may want to have the art saved as a file. PDF works well for that.
- In Sketch, go to File > Open Local Document.
Navigate into Desktop > Class Files > Sketch Class > iPhone app design and double–click on iPhone app mockup.sketch to open it.
Don’t worry if you see a message about missing fonts, for exporting graphics we won’t need them.
NOTE: When designing iOS apps, you’ll probably want to use Apple’s San Francisco font family, which is the standard system font. You can download it for free at developer.apple.com/fonts
This app design is still in the very early stages, but the developer wants to get started coding and needs the tab icons at the bottom. Let’s start by seeing how to export them as PDF.
NOTE: This file was made with Sketch’s iOS UI Design symbols, which include many elements that have been built in a very smart way to let you swap icons, active/inactive states, and more.
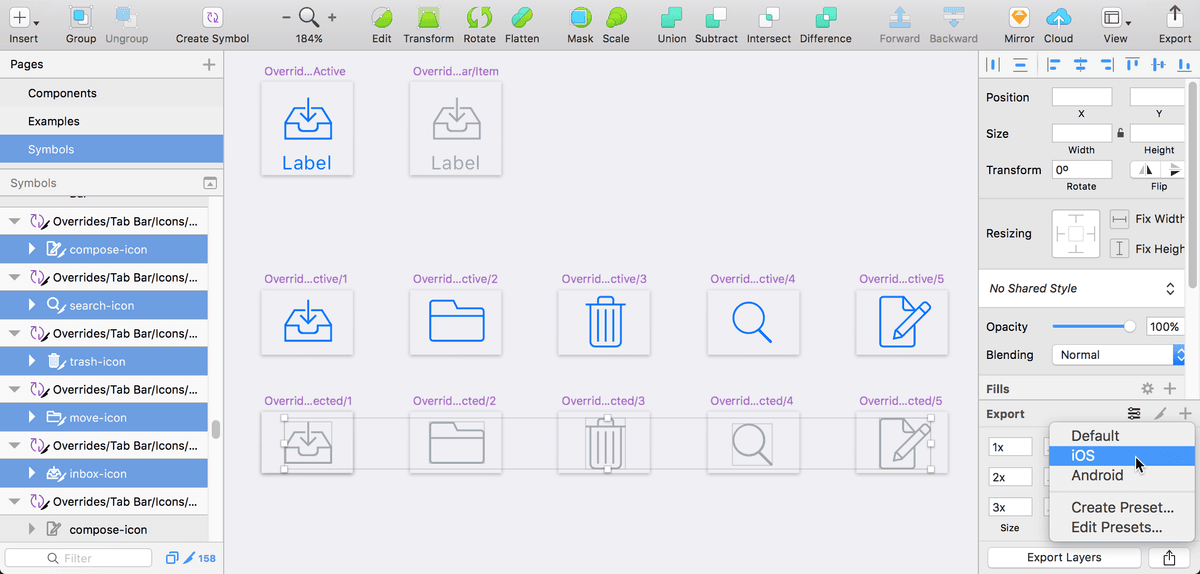
- At the bottom of the iPhone 8 artboard there’s a tab bar with 5 icons. This was made using a symbol provided in the template. Double–click on the tab bar to edit the symbol.
- You should be on the Symbols page, looking at the Bars/Tab Bar/5 Items symbol. This contains the icons and text, but we only need to provide the icons.
Scroll down a little to see the two rows of the 5 icons (one blue and one gray) as shown below.
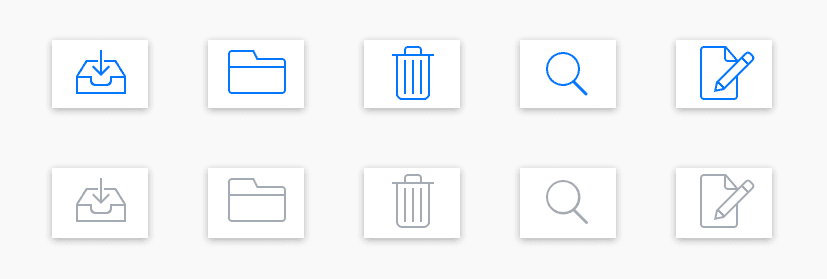
We want to select the 5 gray icons, but not the artboards they’re on. We can drag a selection box to do this, but if we’re not careful, we’ll select the artboards instead of the icons. The trick is to start the drag below the top of the artboard so the selection does not wrap around the entire artboard. Each icon is individually grouped, so as long as the selection touches them they will be selected. As shown below, drag a selection box across all the gray icons to select them:

- In the Sidebar, notice that we named the layers (something-icon) so they’re ready to export.
- In the Inspector, click Make Exportable.
As shown below, click the Apply a slice preset button
 to the right of Presets.
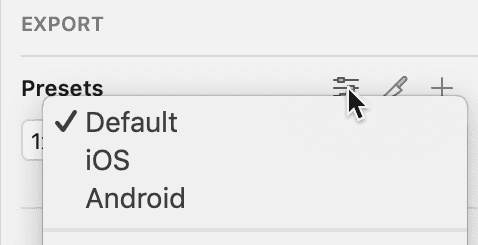
- From the menu that appears, choose iOS.
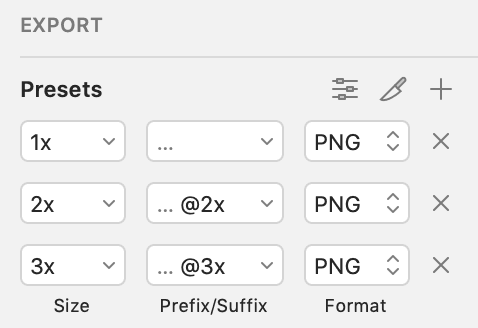
You should now have the 1x, 2x, and 3x PNGs as shown below:
You could export the 1x, 2x, and 3x PNG files and you’d be done, but what if your developer prefers a PDF? Let’s see how to export that.
- In the Inspector’s Export section, to the far right of Presets click the plus button to add a new export format.
For the new export option that was added at the bottom, set the following:
- Format: PDF
- Size: 1x
- Delete any Prefix/Suffix
- At the bottom right of the Inspector, click Export Selected.
- In the dialog that appears, make sure Save for web is checked (you may need to click the Options button to see it).
- Navigate into Class Files > Sketch Class > iPhone app design > assets-for-developer.
Click Export.
The files are now ready for you to send to your app developer!
If you want, on the Desktop navigate into Class Files > Sketch Class > iPhone app design > assets-for-developer and see how each icon has been exported as a PDF as well as 1x, 2x, and 3x PNGs.