Proxies: Working with UHD Footage (Such as 4K) in Premiere Pro
What This Tutorial Covers
Proxy Concept
Edit lighter copies; export with originals.
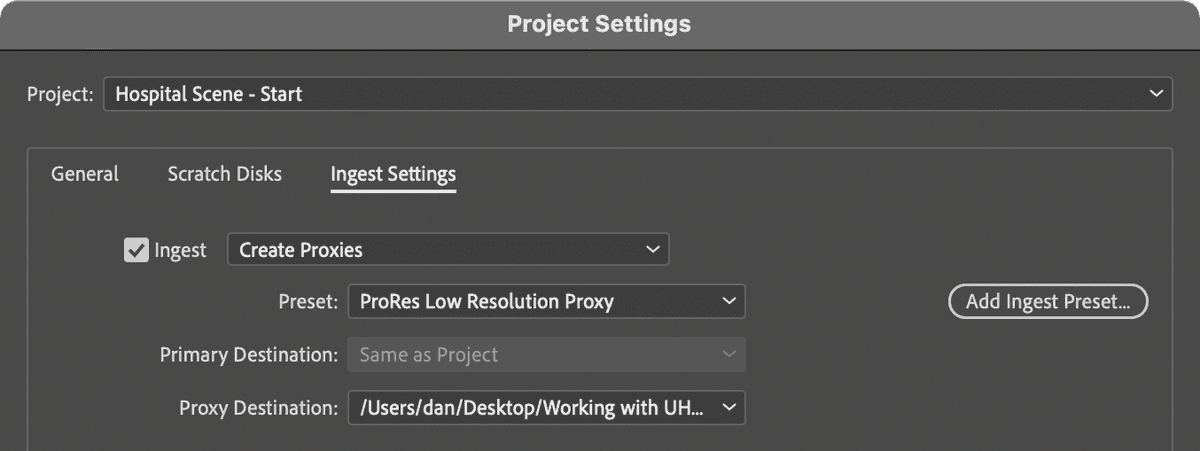
Ingest Settings
Auto-create proxies on import via Media Encoder.
Toggle Proxies
Switch between proxy and full-res in the program monitor.
Noble Desktop's Video Editing & Motion Graphics Certificate teaches Premiere Pro alongside After Effects, DaVinci Resolve, and the full motion design toolkit.
Dive into the comprehensive Premiere Pro tutorial, covering topics such as Proxy workflow, Ultra High Definition (4,000 and 8,000), and Ingest Workflow, along with practical exercises for a hands-on learning approach.
Exercise Preview
Enabling Proxies
Even though the project has the ingest function enabled and set to create proxies, and even though you have manually created a proxy file, the application is not displaying them in either the Source or Program panels.
At the bottom right of the Program panel, click the + button to open the Button Editor.
Locate the Toggle Proxies
 button, drag it to the Transport Controls so it’s the last button on the right.
Click OK to close the button editor.
Click on the Toggle Proxies button you just added to the Program panel to enable proxies to be used in both the Program and Source panels.
NOTE: Proxies can also be enabled in Preferences. Choose Premiere Pro > Preferences > Media (Mac) or Edit > Preferences > Media (Windows) and check on Enable Proxies. The preference and the button we added do the same thing. They both set the same preference, so use whichever method you prefer.
Choose File > Save or Cmd–S (Mac) or CTRL–S (Windows) to save your project.
You can now continue to edit the clips and export your sequence as normal, or close the project.