Printing an Image on a Personal Printer
Personal Printer Workflow
Opens Photoshop's print dialog with Color Management section.
You can let Photoshop OR the printer driver manage color, not both.
Select the profile matching your printer + paper combination.
In Print Settings, find and turn off the printer's own color management — otherwise both will conflict.
Noble Desktop's Photoshop Bootcamp covers retouching, compositing, color correction, and pro editing.
Learn how to properly print an image using color management techniques in Photoshop, with our step-by-step guide including specific instructions for both Mac and Windows users.
Printing an Image
- Go to File > Open.
- Open Smiling Baby-Adobe RGB.tif from the Color Management Seminar Files folder.
- Go to File > Print.
On the right side of the Print dialog you should see the Color Management section shown below:
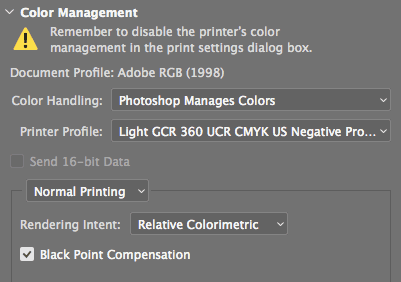
The Color Handling option controls how Color Management works. From that menu choose Photoshop Manages Colors.
You can let Photoshop or the Printer Driver control color management. We’re having Photoshop control the color, so later we will have to remember to disable the Printer Driver’s color management feature.- From the Printer Profile menu, choose the profile for your printer/paper.
- Near the top of the window, click Print Settings.
You should now be in a standard Print window. Here you must find your printer’s color management settings and disable them. Each printer is different, so we can’t be too specific. Here are some general tips that should help you find the settings:
Mac: In the bottom half of the dialog, find the menu that says Layout or Copies & Pages and choose an option such as Color Management or something similar. Windows: One of the tabs should have the settings. - Click Save (Mac) or OK (Windows).
- Back in the Photoshop Print Settings window, click Print.
Close the file.