Matching Tones in Composited Images
Matching Composited Image Tones
Curves Adjustment
Layer → New Adjustment Layer → Curves to fix flat blue sky tones.
Clipping Mask Targets One Layer
Check 'Use Previous Layer to Create Clipping Mask' so the curves only affect the sky layer.
Adjust Individual Color Channels
Switch the Curves channel from RGB to Red, Green, or Blue to neutralize color casts.
Desaturate Excess Color
Hue/Saturation adjustment with clipping mask removes too-vivid blues from a composited sky.
Noble Desktop's Photoshop Bootcamp covers retouching, compositing, color correction, and pro editing.
Master the advanced techniques of Photoshop including matching color, adjusting color channels, desaturating color, and using clipping masks with this comprehensive tutorial.
Exercise Preview
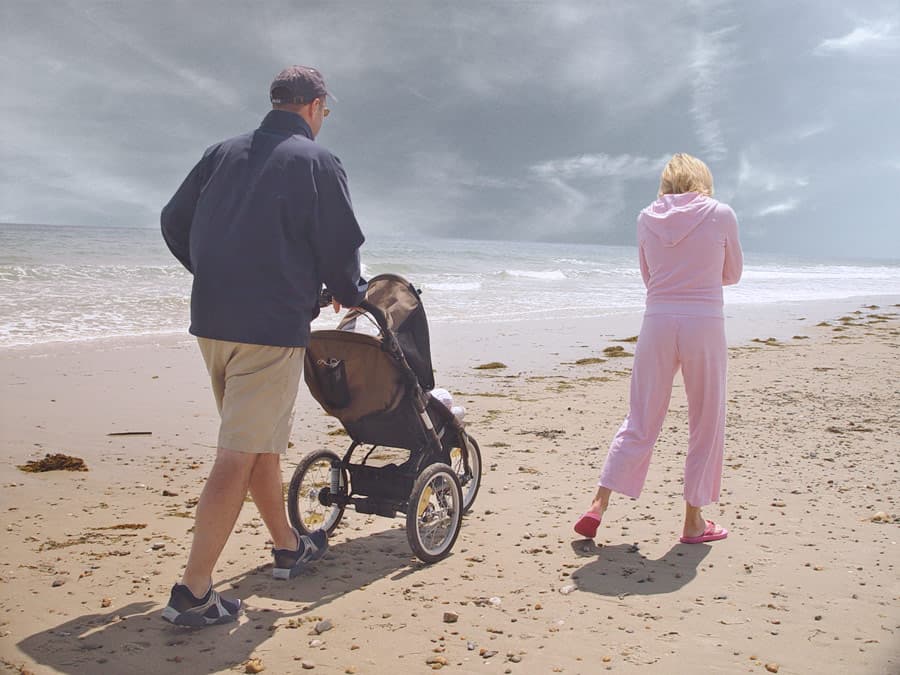
Adjusting the Contrast of Sky1
The sky1 layer is far too blue, and its tones are flat and dark. Let’s fix that now.
Make sure the sky1 layer is selected.
Go to Layer > New Adjustment Layer > Curves. Don’t click OK until we say.
Name it match sky tones.
Check on Use Previous Layer to Create Clipping Mask. (We want this adjustment to only affect the sky. Turning on this option ensures it will not affect other layers.)
Set the blending Mode to Luminosity.
This lets us add contrast without raising the color saturation.
Click OK.
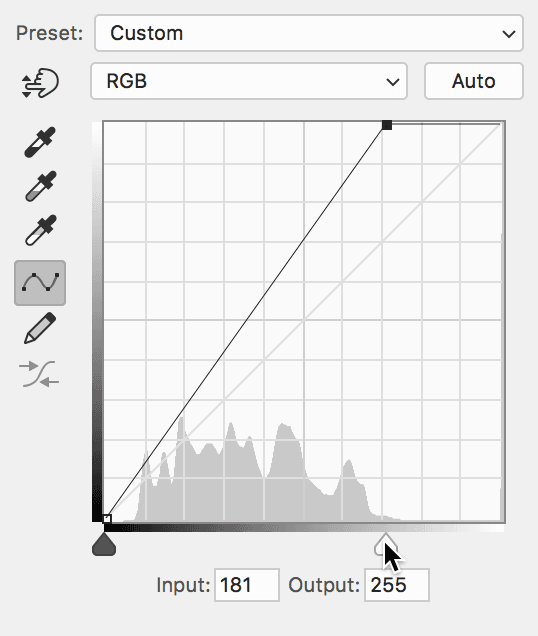
As shown below, drag the white point slider (the white triangle on the bottom) to the left to push the brightest highlights closer to white.
NOTE: The screenshots in this exercise show Photoshop’s lightest interface. Most of the screenshots in this book depict Photoshop’s default medium dark interface. Throughout this book, we may use the light interface when it improves the print quality. (Interface brightness can be changed by going into the Photoshop menu (Mac) or Edit menu (Windows), choosing Preferences > Interface, and clicking on the desired Color Theme.)
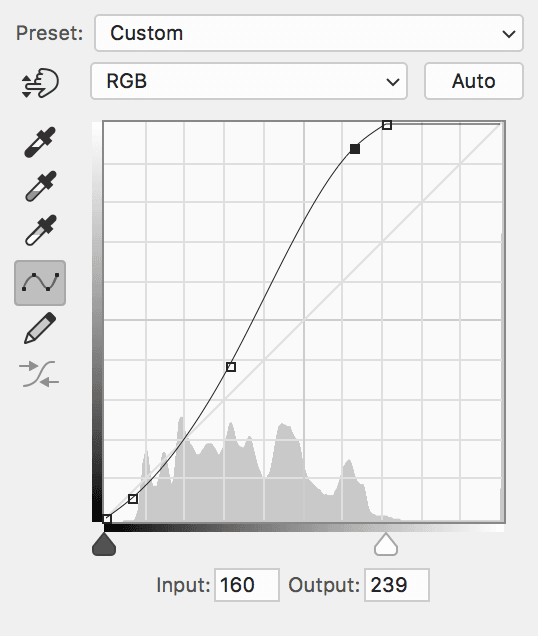
The white clouds are standing out better, but let’s boost the contrast as shown in the screenshot below.
Adjusting the Color of Sky1
Let’s remove some of the blue. Make sure the match sky tones layer is selected.
- Go to Layer > New Adjustment Layer > Curves and:
- Name it remove blue.
- Check Use Previous Layer to Create Clipping Mask.
- Change Mode to Color.
Click OK.
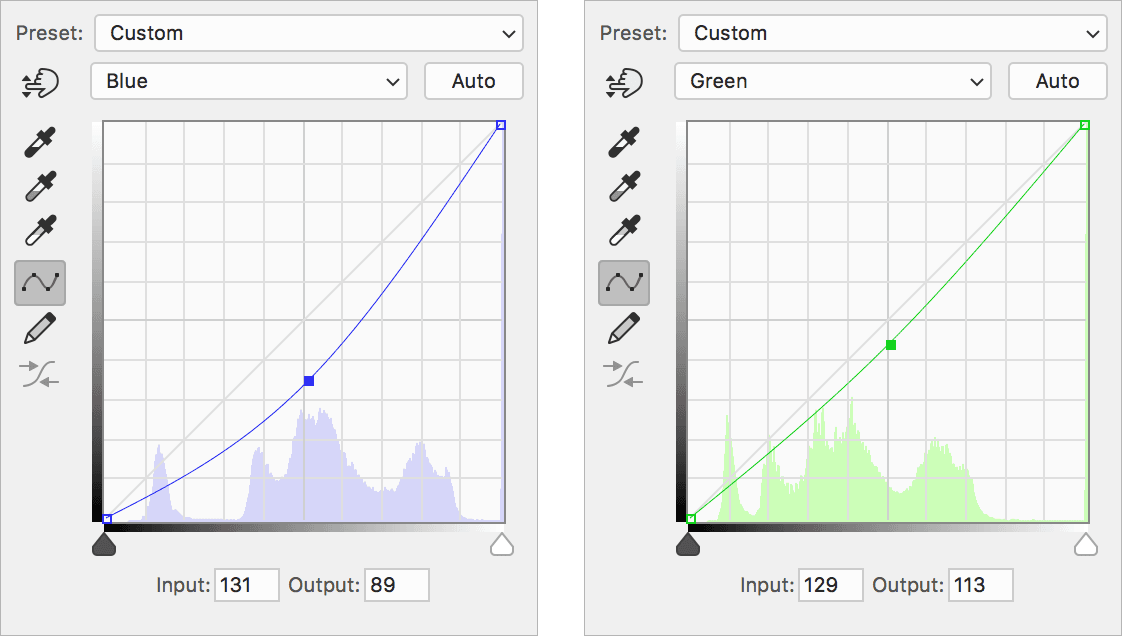
Adjust the color to remove some of the blue. Below are some curve suggestions for the Blue and Green channels.