Brochure Part II
What This Tutorial Covers
Type & Headlines
Add hierarchical typography to the cover.
Image Composition
Layer photographs and apply blending.
Style Consistency
Match interior and exterior visual language.
Noble Desktop's Graphic Design Certificate covers Photoshop alongside Illustrator and InDesign.
Dive into our detailed Photoshop tutorial and learn more about Smart Objects, free transform, layer groups, adjusting curves, and the Bevel & Emboss effect.
Exercise Preview
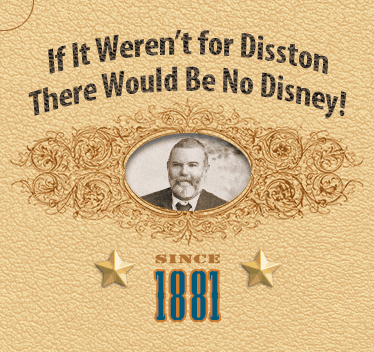
Welcome, Mr. Disston!
You should still have the yourname-Kissimmee brochure.psd file open. If you closed it, re-open it now. If you haven’t done the previous exercise:
- From the Photoshop Class folder, go into the Kissimmee Brochure folder and open Kissimmee Part 1 done.psd.
- Save it as yourname-Kissimmee brochure.psd.
In the Layers panel, make sure the banner ornament layer is selected.
Go to File > Place Embedded.
NOTE: Place Embedded adds a copy of the placed file into the current Photoshop document as a smart object. If you share the Photoshop file with someone else, they will not need the original file to edit the smart object. Place Linked retains a link to the original file on your computer. When changes are made to that linked file on your computer, Photoshop will prompt you to update the smart object. If you share the Photoshop file with someone else, you would also need to give them the linked file for them to be able to edit the linked smart object.
From the Kissimmee Brochure folder, choose portrait.psd and click Place.
Press Return (Mac) or Enter (Windows) to accept the size.
Click the eye
 beside the portrait layer to hide that layer.
Choose the Elliptical Marquee tool
 .
.In the Options bar, from the Style menu, make sure Normal is chosen.
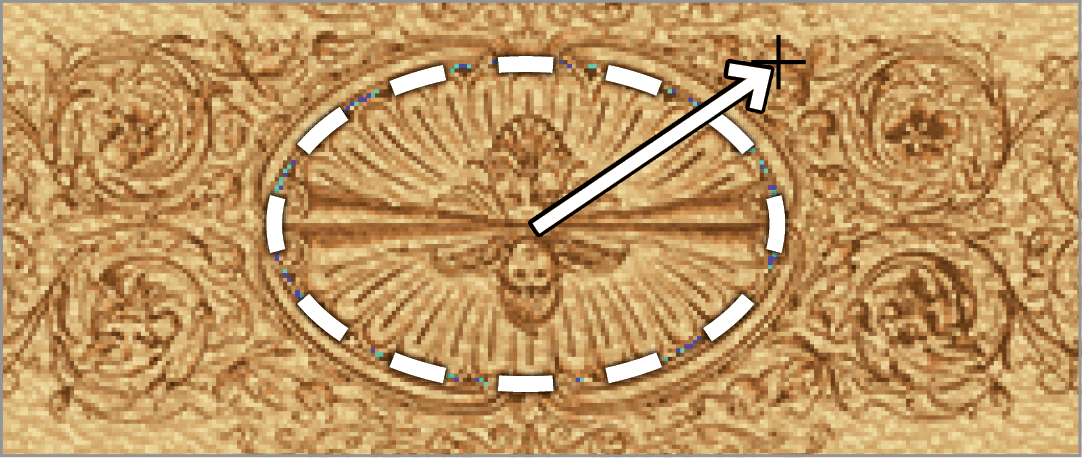
Place the cursor in the center of the decorative oval.
As shown by the arrow below, hold Option (Mac) or ALT (Windows) and click and drag out an oval selection that fits inside the oval in the file (as indicated by the white dashed line).
In the Layers panel, click where the eye was beside the portrait layer to show it.
At the bottom of the Layers panel, click the Add layer mask button
 .
.Click the link icon
 between the layer thumbnail and the mask thumbnail to unlink them.
Click the portrait layer’s thumbnail
 to select the image, instead of the mask, which is currently selected.
Choose the Move tool
 .
.Click and drag to move the photo over the oval mask, so you can see his face.
Go to Edit > Free Transform.
Position the cursor over the corner resize handles to get the resize cursor
 .
.Hold Shift–Option (Mac) or Shift–ALT (Windows) and drag to resize the photo so you can see his head and shoulders.
Move the cursor a little further away from the corner to get the rotation cursor
 .
.Click and drag to rotate the photo so that Mr. Disston is straight up and down.
When finished, press Return (Mac) or Enter (Windows) to accept the changes.
Click between the layer thumbnail and the mask thumbnail, where the link icon
was before, to link them again.In the Layers panel, click the Add a layer style button
 and from the menu, choose Inner Shadow.
Make the following changes:
Opacity: 70% Angle: 90° Size: 6 px Click OK.
Editing the Smart Object
The portrait is too light. It needs to be darkened. Notice the icon
 in the portrait layer thumbnail. That icon means that the portrait is a Smart Object. Double–click the layer thumbnail to open the Smart Object.
A message may appear stating that after making changes in the Smart Object, you should save the file to update changes. Click OK.
The Smart Object opens in a new window with its own set of layers and adjustments. Notice that the name of this document is portrait.psd.
In the Layers panel, expand the photo restoration layer group, and then the contrast & color layer group, if they aren’t already expanded.
Double–click the curve thumbnail
 in the contrast layer (it’s in the contrast & color group). Now we can edit the curve.
In the Properties panel, pull the middle-right point down to the midline.

Go to Window > Arrange > 2-up Vertical. Now you can see both documents open. Take note that the oval portrait in the brochure has not changed.
Make sure the portrait.psd file is still highlighted and go to File > Save. Notice that the portrait in the brochure becomes darker, reflecting the changes you just saved to the smart object.
Close the portrait.psd file to return to yourname-Kissimmee brochure.psd.
Since 1881
Open the file Since 1881.psd.
If you get a message about updating the text layers before they can be used for vector based output, click Update.
In the Layers panel, Shift–click the 1881 layer to select both the type layers.
Go to Layer > Group Layers.
In the Layers panel, double–click Group 1 and rename it Since 1881.
To copy the two text layers into your Kissimmee brochure, do the following:
- With the Since 1881 group still selected, do an Edit > Copy.
- Switch back to yourname-Kissimmee brochure.psd using the tab at the top.
- Go to Edit > Paste.
Close the Since 1881.psd file and don’t bother saving changes.
Back in the yourname-Kissimmee brochure.psd file, make sure the Move tool
is selected.Use the Smart Guides to help you position the Since 1881 layer group below the banner ornament.
In the Layers panel, click the arrow
 next to the Since 1881 group to view the contents of that group.
Select the 1881 layer.
Click the Add a layer style button
and from the menu, choose Stroke.- Set the following options:
- Size: 2 px
- Position: Outside
- Click the color swatch and enter the following CMYK values:
C: 12 M: 57 Y: 95 K: 5
Click OK and OK again.
In the Layers panel, click the arrow
 next to the Since 1881 group to hide the contents of that group.
Thank My Lucky Stars
- Photoshop has a built-in star shape that we want to use, but we must load it first. Open the Shapes panel by choosing Window > Shapes.
- At the top right of the Shapes panel, go into the panel menu
 and choose Legacy Shapes and More.
 - Click and hold on the Rectangle tool
 and choose the Custom Shape tool
  .
. In the Options bar:
- On the left, make sure Shape is selected in the first menu (it might say Path).
- On the right, click on thumbnail icon next to Shape.
- Navigate into Legacy Shapes and More > All Legacy Default Shapes > Shapes.
- Find the 5 Point Star shape
 (the solid white one, not the outlined one) and double–click on it to choose it.
 Hold Shift and drag out a star to the left of the word SINCE as shown below.

- In the Layers panel, double–click the new shape layer and rename it star.
- Double–click the star’s thumbnail and set the following CMYK values:
C: 4 M: 19 Y: 69 K: 0 - Click OK.
- Choose the Move tool .
- Position the star so it looks nice on the left side of Since 1881.
- Click the Add a layer style button and from the menu, choose Bevel & Emboss.
Set the following, but DON’T click OK yet:
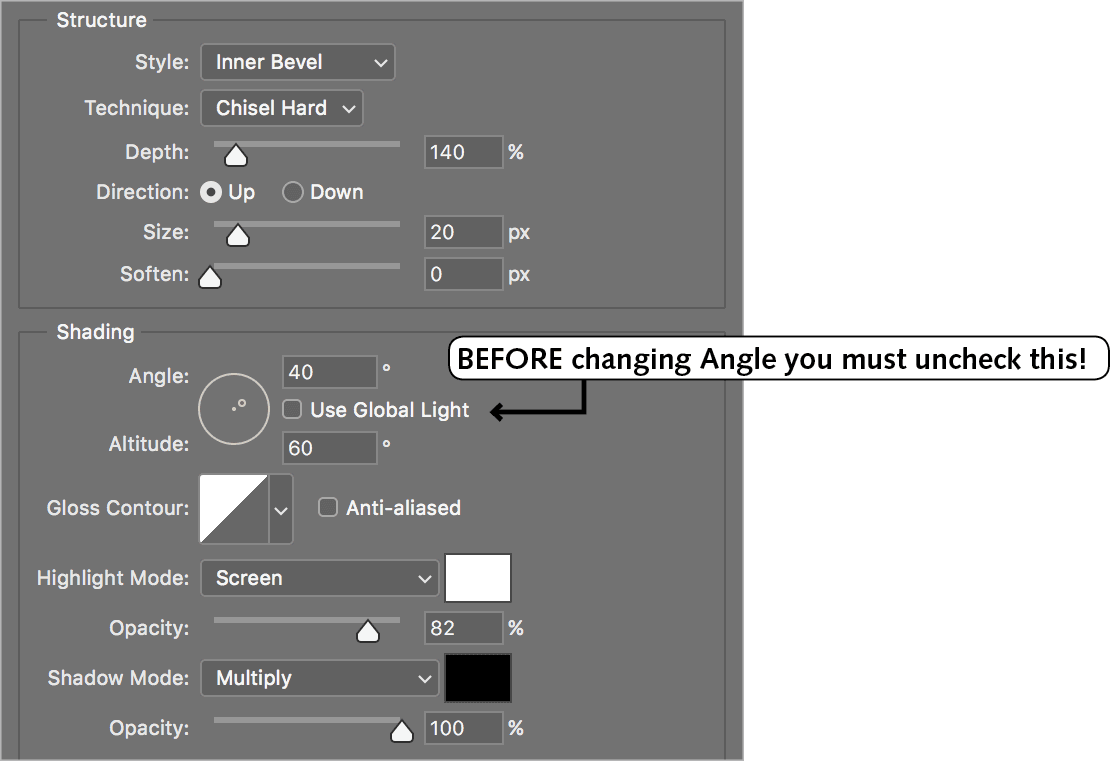
- On the left side of the window, click on the words Drop Shadow so it’s checked on and selected. Click directly on the words. Do not just check the checkbox, or else you won’t see its options on the right.
Set the following:
Use Global Light: Uncheck this first Angle: 60° Distance: 1 px Spread: 2% Size: 3 px - Click OK.
- Hold Shift–Option (Mac) or Shift–ALT (Windows) and drag a copy of the star to the right side of the word SINCE.
- In the Layers panel, Shift–click on the other star layer.
- Press Cmd–G (Mac) or CTRL–G (Windows) to group the layers.
- In the Layers panel, double–click Group 1 and rename it stars.
Go to File > Save and leave the file open. We’ll continue with it in the next exercise. This rodeo’s almost done. There’s just one round left, so hang in there, kiddo!