Ghosting Part of an Image
Photo Retouching Steps
Camera RAW First
Global tone, white balance, and lens corrections in Camera RAW.
Spot Healing
Remove dust, blemishes, and small distractions.
Frequency Separation
Smooth skin texture without losing pore detail.
Final Color Grade
Curves and selective color for the final mood.
Noble Desktop's Photoshop Bootcamp covers retouching, compositing, color correction, and pro editing.
Enhance your Photoshop skills with our detailed tutorial, covering topics like setting a layer's opacity and feathering layers, and featuring a hands-on exercise that teaches you how to make text more readable over photos or patterns.
Exercise Preview

Photo by Dan Rodney
Adding the Text Layer
From the Photoshop Class folder, open the file camel.tif.
Make sure that you can see the entire image.
Press D to make sure you have the default foreground and background colors.
If the rulers are not already showing, go into the View menu and select Rulers.
Use the Rectangular Marquee tool
 to draw a selection over the bottom half inch, across the entire image. Use the Rulers to guide you.
Go to the Layers panel (Window > Layers).
At the bottom of the Layers panel, click the Create new fill or adjustment layer button
 , and from the menu, choose Solid Color.
In the Color Picker that appears, choose white and click OK.
Double–click the layer’s name and rename it ghosted color.
At the top of the Layers panel, adjust the opacity of the ghosted color layer. Try 50% first, then experiment.
TIP: When the mouse is over the word Opacity, it will turn into a hand slider
 . Just click and drag left or right to quickly adjust the value.
Choose the Horizontal Type tool
 .
.In the Options bar at the top of the screen, make the text Myriad Pro Bold, 14 pt, and Left aligned
 .
.Click once in the far left of the ghosted color area so you have a blinking text cursor.
Type in the following: Organic Camel Milk at a Grocery Store Near You!
Choose the Move tool
 .
.Use the Arrow keys to nudge the text into the center of the white ghosted box.
TIP: Pressing Shift–Arrow key moves 10 px at a time to make it faster.
Feathering the Layer to Add More Subtlety
The hard top edge of the ghosted white box is a little abrupt. Let’s soften it.
In the Layers panel, select the layer mask in the ghosted color layer as shown below:
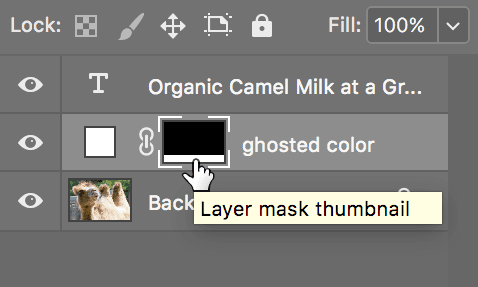
In the Properties panel (Window > Properties), set the Feather to 20 px.
If you don’t like the look of the soft edge and prefer the hard edge, just set it back to 0 px or whatever you think looks good.
The nice thing about feathering the mask in this way is that it is non-destructive so you can change it anytime you want.
Do a File > Save As, make sure Format (Mac) or Save as type (Windows) is set to Photoshop, and name the file yourname-camel.psd