Defining Photoshop’s Color Settings
Photoshop Workflow
Open & Inspect
File → Open. Check resolution, color mode, and bit depth.
Build a Layer Stack
Stack adjustments and effects on separate layers — never edit pixels directly.
Apply Targeted Edits
Use masks to limit each layer to the part of the image that needs it.
Export for Output
File → Export → choose JPG/PNG/PSD based on the destination.
Noble Desktop's Photoshop Bootcamp covers retouching, compositing, color correction, and pro editing.
Master the art of color management in Photoshop with this detailed guide, providing step-by-step instructions to customize settings for optimized image display and printing.
Exercise Overview
Color Management affects how Photoshop displays images on-screen, as well as how they print out. You will customize these settings for your own needs, but for now we must ensure that your color settings are set properly so the following exercises will look and work correctly.
Launch Photoshop.
Go to Edit > Color Settings.
If you can’t see all the options shown below, click More Options on the right.
From the Settings menu at the top, choose North America Prepress 2.
All the settings shown should already be set, but double-check them anyway.
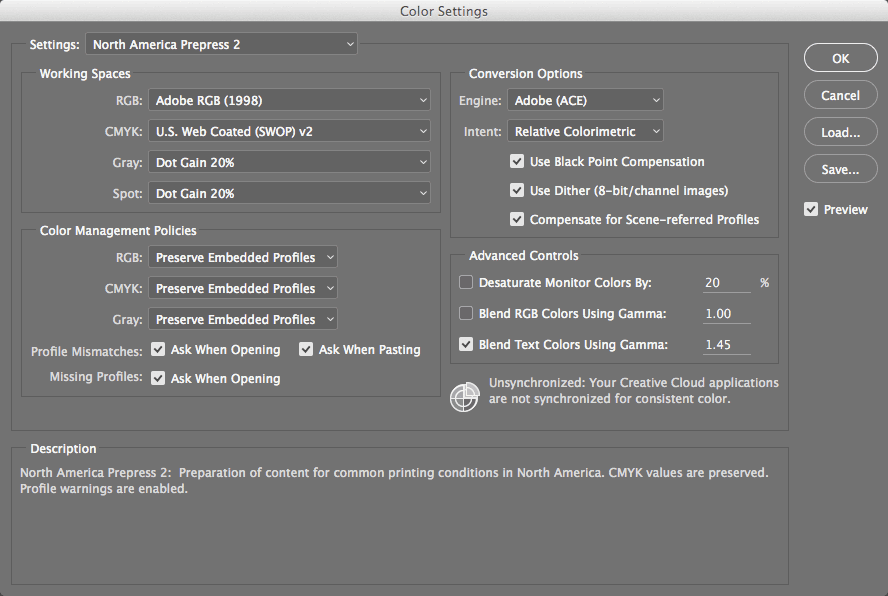
Click OK and you are done.
NOTE: The above settings are what we’re using for this class. Everyone’s workflow is different. While these settings may be correct for your work, we don’t want to say everyone must use them. You’ll soon learn more about how you can customize them to your needs.