Color Settings for the Rest of the Class
Photo Retouching Steps
Camera RAW First
Global tone, white balance, and lens corrections in Camera RAW.
Spot Healing
Remove dust, blemishes, and small distractions.
Frequency Separation
Smooth skin texture without losing pore detail.
Final Color Grade
Curves and selective color for the final mood.
Noble Desktop's Photoshop Bootcamp covers retouching, compositing, color correction, and pro editing.
Delve into color management in Photoshop with this tutorial, covering key topics such as setting preferences and dealing with mismatched or missing profiles.
Exercise Overview
To take control of color management, we’ll tell Photoshop to alert us whenever there are mismatched or missing profiles. That way we can decide how to handle these issues.
Go to Edit > Color Settings.
From the Settings menu at the top, choose North America Prepress 2.
All the settings shown should already be set, but double-check them anyway.
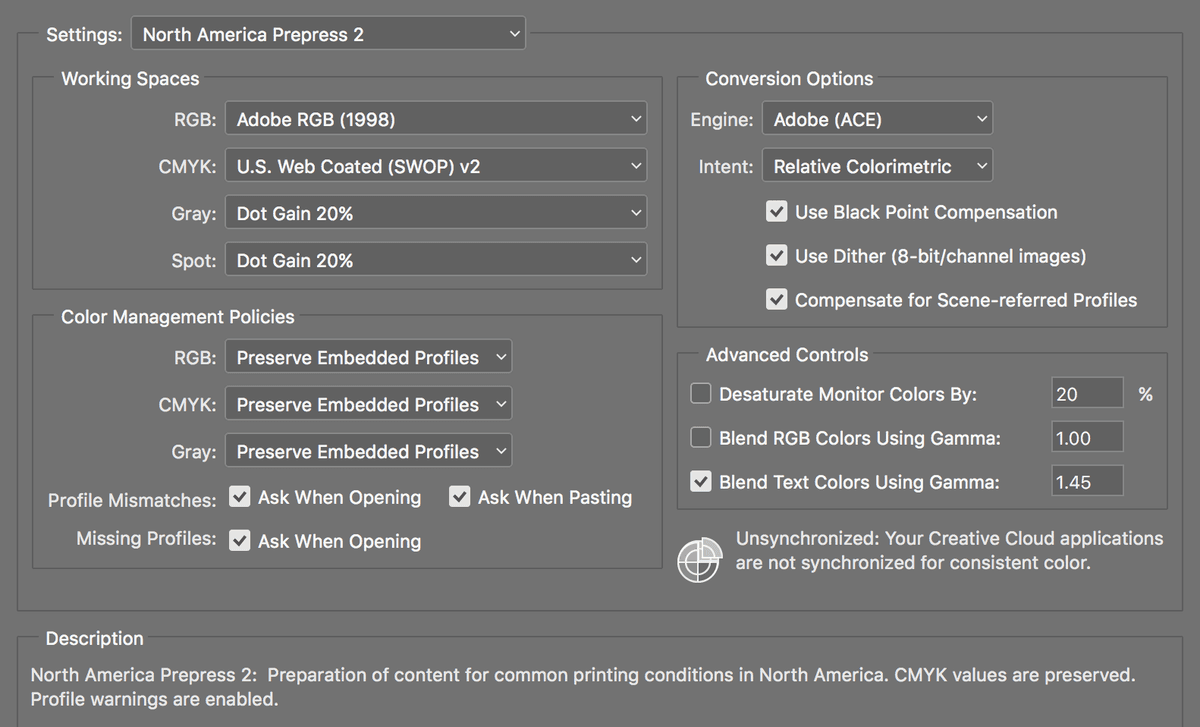
Click OK, and you’re done.
REMINDER: The above settings are what we’re using for the rest of this class. Everyone’s workflow is different. While these settings may be correct for your work, we don’t want to say everyone must use them.