Changing Color With a Blending Mode
Common Photoshop Tools
Brush Tool
Paint with custom brushes, opacity, and flow control.
Clone Stamp
Sample one area and paint it elsewhere — perfect for repairs.
Healing Brush
Smarter than clone — blends texture and tone of the source.
Pen Tool
Create precise vector paths for selections or shapes.
Noble Desktop's Photoshop Bootcamp covers retouching, compositing, color correction, and pro editing.
Discover how to change the color of an object using the Color Blend Mode in Photoshop with our comprehensive tutorial.
Exercise Preview

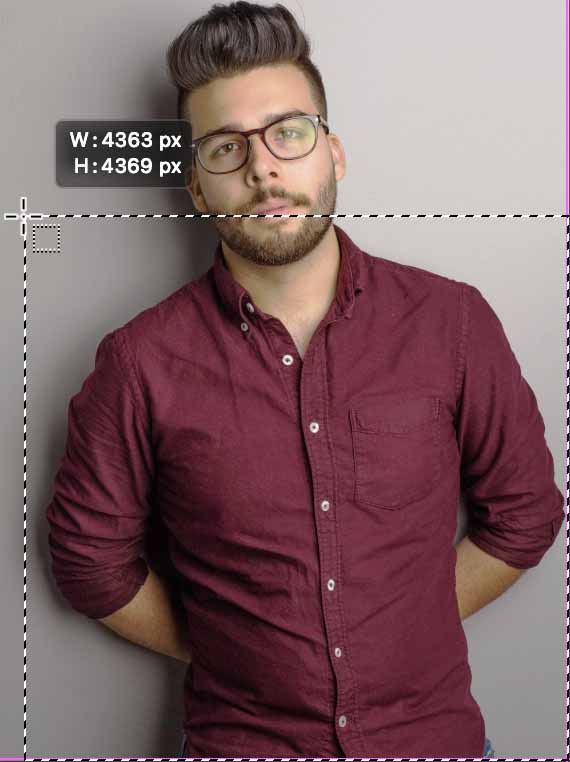
Photo by Jonathon Dorofy on Unsplash
Selecting the Shirt
- From the Photoshop Class folder, open the 5A Shirt.jpg file.
- Choose View > Fit on Screen.
- In the Tools panel, choose the Object Selection tool
 .
. - Hover over the guy to see it wants to select him entirely, but we only want the shirt.
As shown below, drag a selection over just the shirt area.
The selection is decent, but it includes the arms which we don’t want.
Hold Option (Mac) or ALT (Windows) (to subtract from the selection) and drag a selection over the arm on the left.
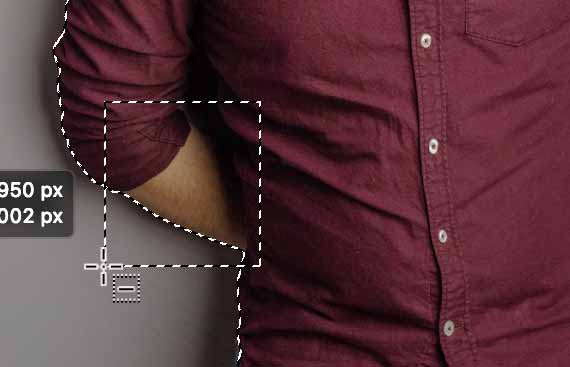
Hold Option (Mac) or ALT (Windows) and drag a selection over the arm on the right (and a small bit of the wall).
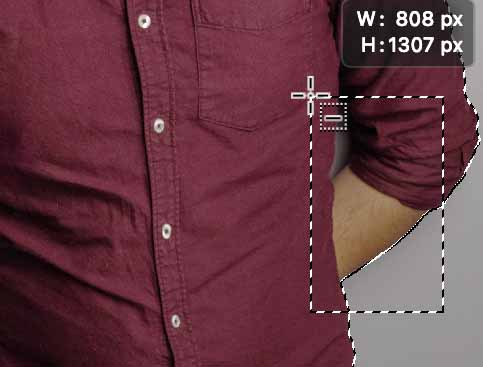
- Let’s get a better look at this selection and refine it as needed. In the Options bar at the top of the window, click Select and Mask.
In the Properties panel on the right:
- Next to View click the thumbnail and choose Overlay
- Set Opacity to 50%
- Below Opacity, change the Indicates menu from Masked Areas to Selected Areas
The red overlay indicates parts that are currently selected.
In the Tools panel on the left, select the Brush tool
 and:
and:- Use the settings in the Options bar to control whether you’re adding or subtracting, and adjust your brush size/hardness as needed.
- Remove any unwanted parts, especially around the arms.
- If parts are missing, paint them in.
In the Properties panel, switch the View to On Black to get a good preview of the edge quality.
Adjust the global refinements like Smooth, Feather, Shift Edge, etc. as needed.
When you’re satisfied with your selection, at the bottom of the Properties panel expand the Output Settings and set:
- Output To: Selection
Click OK.
Coloring the Shirt
At the bottom of the Layers panel, click the Create new fill or adjustment layer button
 and choose Solid Color.
Set the color to #104632 and click OK.
We’ve just filled the shirt with a solid color that’s one lightness/darkness (which is also called luminosity). The original shirt had varying levels of luminosity, which appeared as shadows and highlights. We want the color of this layer, but the luminosity of the underlying layers. Therefore the color blend mode should work.
At the top left of the Layers panel, click on the Normal menu and choose Color.
The new shirt color looks great, but notice the buttons on his shirt are also green. Let’s try a different blend mode.
At the top left of the Layers panel, change Color to Hue.
The Hue blend mode looks very similar to Color, but the buttons are not as green, and the green of the shirt is a bit less saturated.
The Color blend mode applies color regardless of how saturated the underlying image is. Hue applies color according to the underlying image’s saturation. Grays remain gray, so because the buttons didn’t have much color to begin with they don’t get much new color. The shirt gets colored in accordance with how saturated it was.
In the Layers panel, double–click on the layer thumbnail (which is currently green) of the Color Fill 1 layer.
You should be back in the color picker. Choose any color you think looks nice, and appreciate how it blends into the luminosity (lights/darks) of the underlying layer.
Once you have a color you like, click OK.