Color Correction Using Curves
Illustrator vs Photoshop
Illustrator
Vector — scale infinitely, perfect for logos, icons, illustration.
Photoshop
Raster — fixed resolution, perfect for photos and pixel art.
Vectors Print Crisp
Logos and icons stay sharp at any size.
Round-Trip
Place .ai into Photoshop or vice versa — both apps coexist.
Noble Desktop's Illustrator Bootcamp teaches the Pen tool, vector drawing, and pro illustration.
Deepen your understanding of Photoshop with our tutorial that covers color correction using a Curves adjustment layer, setting white, black, and gray points, and working with midpoints.
Exercise Preview
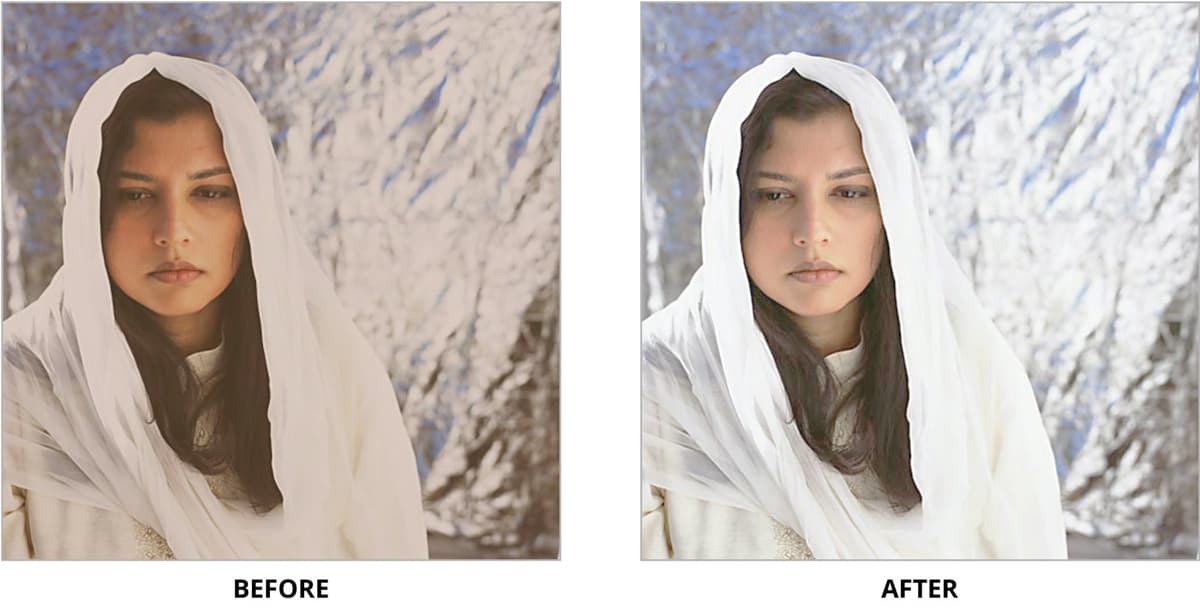
Adjusting Curves
From the Photoshop Class folder, open shawl.jpg.
At the bottom of the Layers panel, click the Create new fill or adjustment layer button
 and from the menu, choose Curves.
In the Properties panel on the right, you’ll see a “curve” line (that is currently straight) comparing the image’s original range of shadows, midtones, and highlights (input) to the corrected range (output). Again, the easy approach here is to use those eyedroppers, but we’ll adjust them a bit before we use them.
Double–click the Set White Point button
 near the left of the panel.
Under the H, S, B settings, make the B (for brightness) setting 96%. Click OK.
If you get a message about saving the new target color as a default, click Yes.
In the image, click on an area that should be white (or in this case, nearly white). Try to use the lightest area of the woman’s shawl.
The image will lighten. If it’s too light, click elsewhere to set a different white point.
Double–click the Set Black Point button
 near the left of the panel.
Set the brightness (B) to 4%, then click OK.
If you get a message about saving the new target color as a default, click Yes.
Click on the darkest point in the image, perhaps in the woman’s hair.
The image will darken. If it’s too dark, click elsewhere in the image to set a different black point instead.
Click once on the Set Gray Point button
 near the left of the panel.
In the image, click on an area that ought to be a perfectly neutral gray. Try clicking on different areas until you’re happy with the results.
NOTE: Remember that while most images have a true white and a true black, they do NOT always have a true neutral gray. So the Set Gray Point tool isn’t used as often as the Set White/Black Point tools.
Working with Midpoints
Curves can do just about anything that Levels can do, with one added advantage: the ability to manipulate multiple midpoints.
In the Properties panel, you may see multiple diagonal lines.
Click on the Properties panel menu
 and choose Curves Display Options.
In the dialog box next to Show make sure Channel Overlays is unchecked.
Click OK.
Only one diagonal line should be left visible. Click on the upper right point of the line. This is the White Point.
Drag the White Point to the left; you’ll find that the image becomes lighter as more and more of the light areas become pure white (it’s like moving the white point in Levels).
Drag the White Point downward; you’ll find that the lightest parts of the image are now a duller gray, rather than a pure white.
Move the point back to the upper-right corner to return the image to its previous appearance.
Click on the bottom left point of the diagonal line. This is the Black Point.
Drag the Black Point to the right; you’ll find that the image becomes darker as more and more of the dark areas become pure black (it’s like moving the black point in Levels).
Drag the Black Point upward; you’ll find that the darkest parts of the image are now a duller gray, rather than a pure black.
Move the point back to the bottom-left corner to return the image to its previous appearance.
Click on the middle of the diagonal line. There’s now a new point on the line. Congratulations—you’ve just created a midpoint that you can manipulate!
Drag the midpoint downward—the image becomes darker overall.
Drag the midpoint upward—the image becomes lighter overall.
Remember, Curves allows multiple midpoints. Click on the diagonal line, somewhere between the Black point and the existing midpoint. There’s now a second point on the line!
Move this midpoint up or down to watch the dark areas of the image (but not pure black areas) get darker or lighter.
Perhaps we don’t really need to control a second midpoint for this image after all. Click on your latest midpoint and drag it out of the window. Release the mouse button and that midpoint control is gone.
Note that at the top of the Curves dialog box, there is a menu for changing the channel from RGB to Red, Green, or Blue (just as in Levels). This can be useful for correcting color casts, but often you’ll be able to do a pretty good job with the eyedroppers alone.
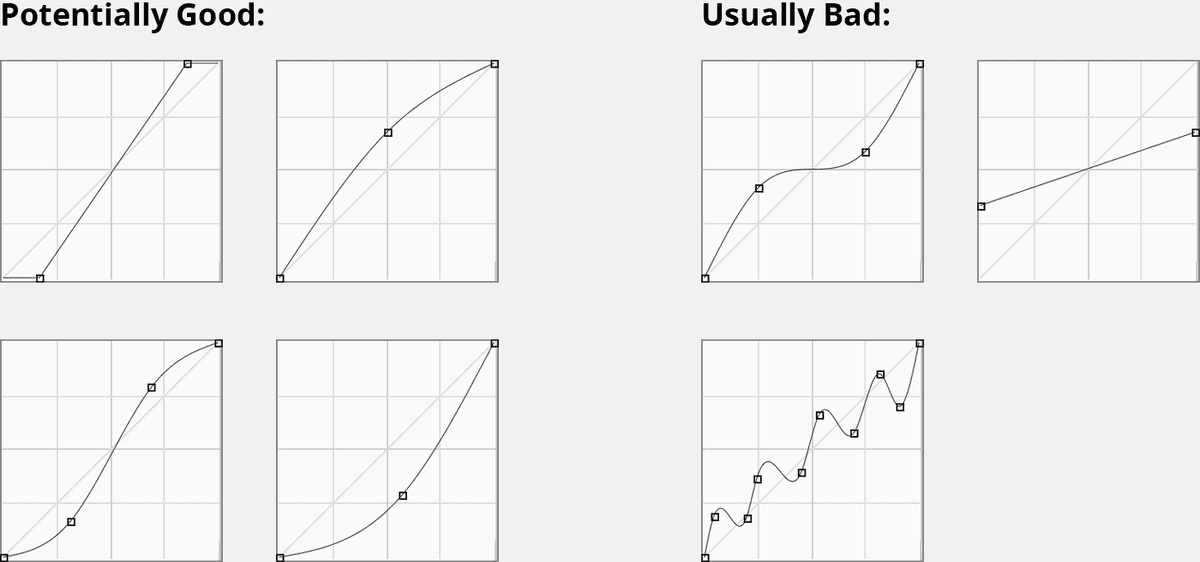
Go ahead and experiment with different curve shapes.
Proper Curves
The way that you adjust the curves will be different for each unique image, but there are some general curve shapes that tend to work much better than others. Each of the potentially good examples here would have a very different effect on the image.