Clipping Masks: Filling Shapes with Images
Photoshop Best Practices
Always use adjustment layers and Smart Objects.
Flatten only at export, not during editing.
filename-v1.psd, filename-v2.psd — never overwrite history.
Color decisions are only as good as the display you make them on.
Noble Desktop's Photoshop Bootcamp covers retouching, compositing, color correction, and pro editing.
Enhance your Photoshop skills with this comprehensive tutorial on masking a graphic with a shape/type, clipping masks, and adding a drop shadow.
Exercise Preview

Photo by Jeremy Bishop on Unsplash
Masking a Photo with a Shape
From the Photoshop Class folder, open the 5B Hawaii turtle.psd file.
In the Layers panel:
- Notice we have a Hawaii logo layer.
- Above that is a hidden coastline layer.
Show the coastline layer by clicking in the empty box where the eye
 should be to the left of the coastline layer.
We want the logo to be filled with this photo. There are two different layers, but we want the logo to be the mask for the photo. To achieve this we’ll use something called a clipping mask.
Hold the Option (Mac) or ALT (Windows) key and position the cursor on the divider line between the coastline and Hawaii logo layers (as shown below). When the cursor changes to
 then click once.
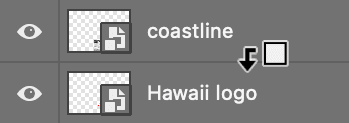
In the image you should see that the logo has “masked” the photo, and your layers should look like this:
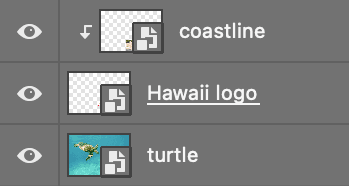
- In the Tools panel choose the Move tool

- In the Options bar at the top of the screen, make sure Auto-Select is unchecked.
- In the Layers panel select the coastline layer.
In the image, drag the coastline photo up a little until you’re mainly see the tan sand (or whatever part you like best).
NOTE: The mask layer can be anything, from vector smart objects like this logo to editable type made in Photoshop (which is how you fill type with a photo).
Adding Additional Layers
We want the Hawaii logo photo to be more saturated. If we simply add an adjustment layer it will affect the entire photo, but we want it to only affect the logo so it also needs to be clipped onto the logo (like the photo layer).
- Hold Option (Mac) or ALT (Windows) and at the bottom of the Layers panel, click the Create new fill or adjustment layer button
 and choose Vibrance.
 Because you held Option (Mac) or ALT (Windows) you’ll see an options dialog:
- Check on Use Previous Layer to Create Clipping Mask.
- Click OK.
In the Properties panel set Saturation to +90
You should see the change only apply to the photo in the logo.
Adding a Drop Shadow to the Logo
- In the Layers panel, select the Hawaii logo layer.
At the bottom of the Layers panel, click the Add a layer style button
 , and from the menu, choose Drop Shadow and then set the following:
- Move the Layer Style window so you can see the logo.
- In the photo, drag anywhere to move the shadow. (This sets Distance and Angle.)
- In the window, adjust the Size to make the shadow’s edge more soft or hard.
Adjust Opacity to control how dark the shadow is.
When done, click OK.
In the Layers panel notice that Drop Shadow now appears on the Hawaii logo layer.
NOTE: To edit the shadow double-click it. To hide the shadow click the eye
. To remove the shadow drag it to the trash.Save the file.