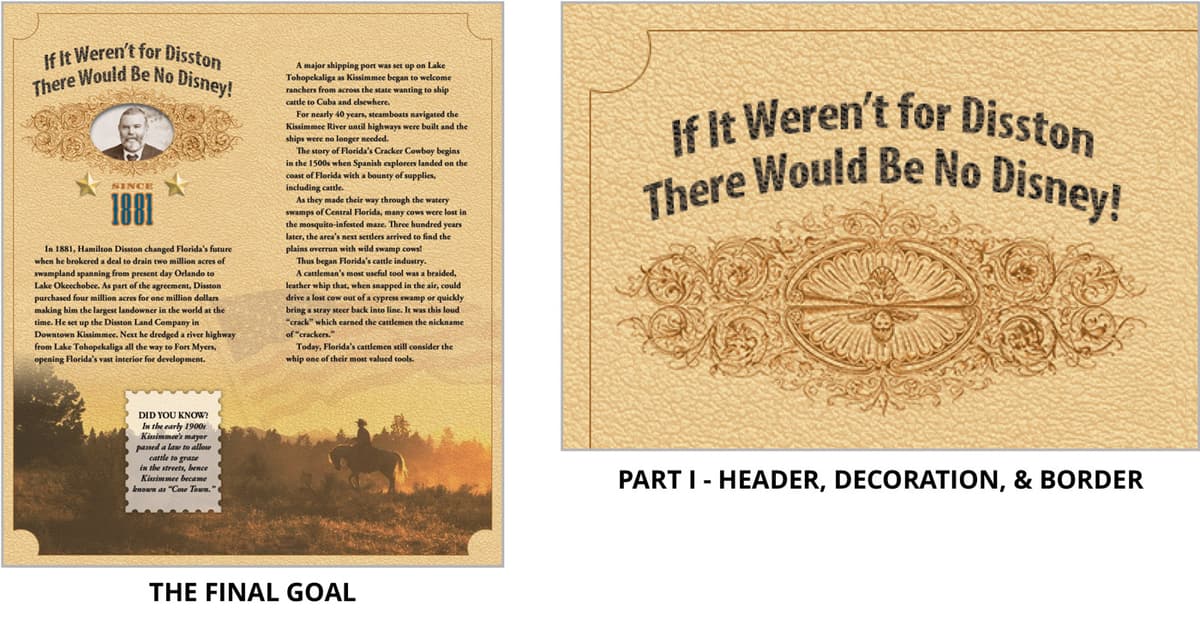
Brochure Part I
What This Tutorial Covers
Document Setup
Brochure dimensions, bleed, and resolution.
Background Layer
Build the cover background with imagery and color.
Layer Hierarchy
Organize layers with groups for the project.
Noble Desktop's Graphic Design Certificate covers Photoshop alongside Illustrator and InDesign.
Dive into this comprehensive Photoshop tutorial and learn to create a textured background, a selection 20 pixels from the edge, a border, and an impressive header as you build a brochure from scratch.
Exercise Preview
Making a Textured Background
From the Photoshop Class folder, go into the Kissimmee Brochure folder and open the file Kissimmee brochure.psd.
Go to File > Save As, go into the Kissimmee Brochure folder, and name it: yourname-Kissimmee brochure.psd.
If the guide we added for you in the middle of the document is hidden, go to View > Show > Guides.
At the bottom of the Layers panel, click the Create new fill or adjustment layer button
 , and from the menu, choose Solid Color.
Enter the following CMYK values:
C: 12 M: 31 Y: 62 K: 0
Click OK.
Double–click directly on the name Color Fill 1 and rename it bg color.
Open the file leather texture.tif.
Select all by pressing Cmd–A (Mac) or CTRL–A (Windows).
Copy by pressing Cmd–C (Mac) or CTRL–C (Windows).
Close the file and return to yourname-Kissimmee brochure.psd.
Paste by pressing Cmd–V (Mac) or CTRL–V (Windows).
Double–click directly on the name Layer 1 and rename it leather.
With the leather layer selected, at the top left of the Layers panel, change the blending mode from Normal to Overlay. Overlay lightens where the image is lighter and darkens where the image is darker.
The leather texture is a little too pronounced. In the Layers panel, lower the Opacity to around 70%.
Creating a Border
Choose the Elliptical Marquee tool
 .
.In the Options bar, from the Style menu, choose Fixed Size and enter 60 px for Width and Height.
Let’s subtract some circle shapes from the four corners of the selection. Hold Option (Mac) or ALT (Windows) and click and hold down while you drag the circle into the upper-left corner, then release when you see two intersecting pink Smart guides (as shown below).

Continue this process for the remaining three corners. Hold Option (Mac) or ALT (Windows) and click and drag the circle into the corner, then release.
In the Options bar, change the Style from Fixed Size back to Normal.
In the Layers panel, click the Create new fill or adjustment layer button
, and from the menu, choose Solid Color.Choose white and click OK.
Double–click directly on the name Color Fill 1 and rename it page border.
Click the Add a layer style button
 and from the menu, choose Stroke.
- Set the following options:
- Size: 1 px
- Position: Outside
- Click the color swatch and enter the following CMYK values:
C: 31 M: 61 Y: 100 K: 18
Click OK, then OK again to close the Layer Style dialog.
Near the top right of the Layers panel, reduce the Fill to 0%. This should remove the white but leave the border.
Depending on your zoom level, the border might disappear in certain areas. Choose View > 100% to see how things really look.
Adding the Header
Scroll to the top-left corner of the document.
Press D to set black as the foreground color.
Choose the Horizontal Type tool
 .
.In the Options bar, make the font Myriad Pro, Bold Condensed, 25 pt, and click the Center text button
 .
.Near the top, centered in the left “column” of the document, click once to place the cursor. Type the following two lines of text:
If It Weren’t for Disston There Would Be No Disney!
Select all the lines of text and go to Window > Character.
In the Character panel, set the Leading
 to 26 pt.
In the Options bar, click the Create warped text button
 .
.In the dialog that opens, from the Style menu, choose Arc and set the following:
Bend: +21% Horizontal Distortion: 0% Vertical Distortion: −2% (that’s negative 2) Click OK.
If it’s there, click the checkbox
 at the right of the Options bar to finish.
Use the Move tool
 to position the text so it is centered at the top of the left column.
To capture the texture of the leather for the text we’ll use a piece of the leather as our mask. At the bottom of the Layers panel, click the Add layer mask button
 .
.In the Layers panel, select the leather layer.
Choose the Rectangular Marquee tool
 .
.Drag a selection box that covers all the text plus some extra.
Copy by pressing Cmd–C (Mac) or CTRL–C (Windows).
Hold Option (Mac) or ALT (Windows) and click the warped text’s white layer mask to enter that mask. If done correctly, the document will be completely white.
Paste by pressing Cmd–V (Mac) or CTRL–V (Windows).
In the Layers panel, click the warped text thumbnail to exit the mask.
To get rid of the selection, press Cmd–D (Mac) or CTRL–D (Windows).
Zoom in so you can see how the mask looks.
Bringing in Some Decoration
Open the file ornamentation.tif.
Select all by pressing Cmd–A (Mac) or CTRL–A (Windows).
Copy by pressing Cmd–C (Mac) or CTRL–C (Windows).
Close the file and return to yourname-Kissimmee brochure.psd.
Paste by pressing Cmd–V (Mac) or CTRL–V (Windows).
Double–click directly on the name Layer 1 and rename it banner ornament.
With the banner ornament layer selected, change the blending mode from Normal to Multiply.
NOTE: The Multiply blend mode always darkens. White disappears, while other colors darken whatever is underneath.
Choose the Move tool
.Position the ornamentation so it is centered under the text. (Release the mouse when you see a vertical Smart Guide.)
Go to File > Save and leave the file open. We will continue with it in the next exercise.
Tighten up those bootstraps, partner; the next part could get pretty wild!