Working with Virtual Copies
Color Grading Steps
White Balance First
Get neutral colors right before any creative grading.
HSL Panel
Shift, lighten, or darken individual color ranges.
Color Grading
Set highlight, midtone, shadow color tints for mood.
Match Across the Set
Sync settings across selected images for consistency.
Noble Desktop's Graphic Design Certificate covers Photoshop alongside the broader Adobe toolkit that complements Lightroom in any photography workflow.
Discover the power of Virtual Copies in Lightroom with this comprehensive tutorial, which guides you through creating, editing, and reviewing Virtual Copies for enhancing your photo editing capabilities.
Exercise Preview

Creating Virtual Copies
We will work with one of the photos you imported in the first exercise.
Make sure you are in the Library module.
In the Catalog panel, click on All Photographs.
Double–click the picture of the trees (20110831_YourName_037) to open it in Loupe View.
Press the D key to go to the Develop module.
We are going to create two virtual copies of this photo.
Make sure the Filmstrip panel is showing at the bottom. If it isn’t, go to Window > Panels > Show Filmstrip.
In the Filmstrip panel at bottom, CTRL–click (Mac) or Right–click (Windows) the photo of the trees (20110831_YourName_037), and select Create Virtual Copy.
Repeat the previous step one more time to create a second virtual copy.
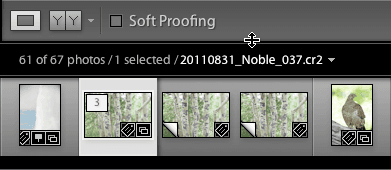
In the Filmstrip panel, notice that the virtual copies are identified by an upturned page symbol
 at the lower left of the photo.
NOTE: If you don’t see this, resize the Toolbar panel as seen below, to make it larger so that you can see the icons:
Editing Virtual Copies
In the Filmstrip panel at the bottom, click on the first virtual copy of the trees to select it (2 of 3).
In the HSL / Color / B & W panel on the right (you may have to scroll down to see it), click B & W to convert the photo to black & white.
In the T1Curve panel on the right (you may have to scroll up to see it), make the following adjustments:
Highlights: Increase to + 62 Shadows: Decrease to – 66 In the HSL / Color / B & W panel, decrease Green to – 47.
At the top-left corner of the HSL / Color / B & W panel, click the Targeted Adjustment tool
 .
.With the tool selected, hover over the tree limbs in the upper-right corner and notice that Yellow becomes highlighted in the HSL / Color / B & W panel.
In the HSL / Color / B & W panel, raise Yellow to + 16 to add some pop to the trees.
Click the Targeted Adjustment tool
again to deselect it.In the Basic panel on the right (you may have to scroll up to see it), make the following adjustments:
Exposure: Decrease to – 0.30 Contrast: Increase to + 14 Now we have the original photo, a black & white virtual copy of the photo, and an unedited virtual copy. Let’s try some color corrections using the second virtual copy.
In the Filmstrip panel at the bottom, select the second virtual copy of the trees (3 of 3).
In the Basic panel on the right, make the following adjustments:
Exposure: Reduce just a little bit to – 0.10 Contrast: Increase to + 11 Highlights: Decrease to – 27 Clarity: Increase to + 24 Vibrance: Increase to + 17 In the HSL / Color / B & W panel, click on Luminance if it’s not already highlighted.
Bring Green down to – 55 to darken the background a bit.