Creating a Panorama
Lightroom Best Practices
Lightroom prompts on exit — accept it. Catalog corruption is fatal.
Edit on the road without the master files attached.
Year/Month/Shoot — predictable and chronological.
Future you will be unable to find anything without keywords.
Noble Desktop's Graphic Design Certificate covers Photoshop alongside the broader Adobe toolkit that complements Lightroom in any photography workflow.
Dive into the process of creating a panorama using Lightroom and Photoshop in this detailed tutorial that covers photo adjustment, panorama creation, and final processing.
Exercise Preview
Adjusting Photographs in Lightroom
If you have not imported the photos that were imported in Exercise B6, import them now (from Desktop > Class Files > Lightroom Class in the Bonus folder).
Make sure you’re in the Library module.
In the Catalog panel on the left, click All Photographs.
Find the seven pictures of the city at dusk (from 20130203_ben_2130 to 20130203_ben_2136).
Select the final image, 20130203_ben_2136.
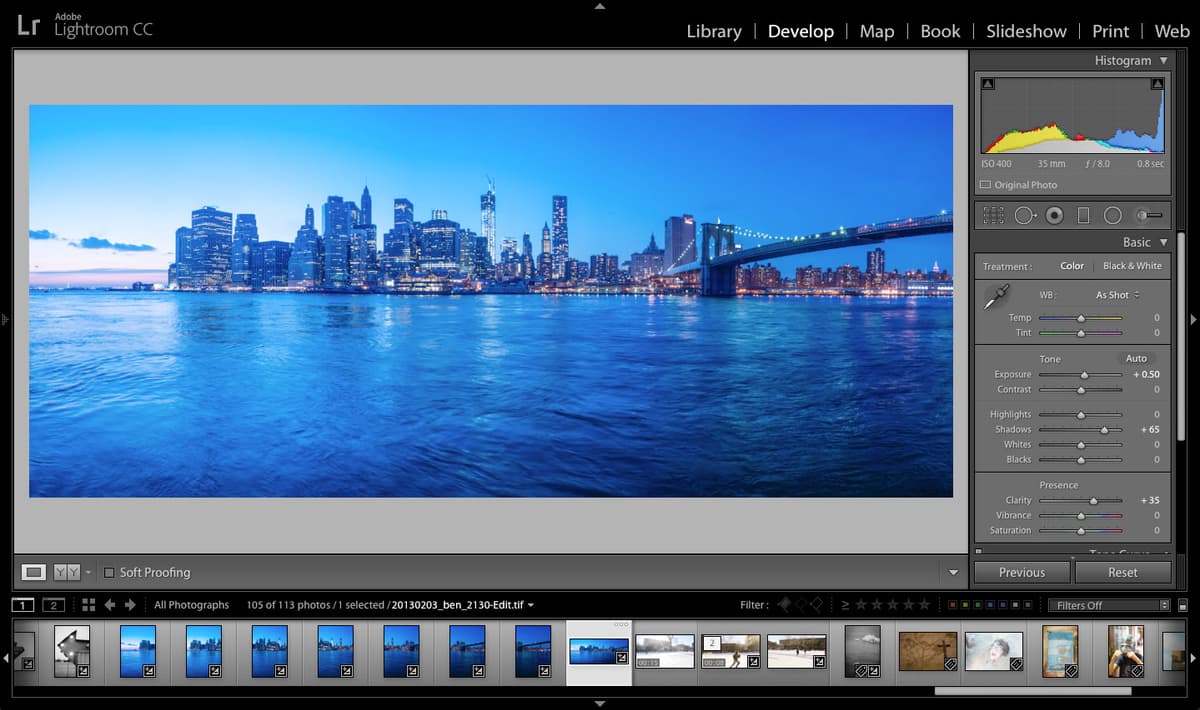
Press D to enter the Develop module.
Expand the Basic panel on the right, if it’s not already open.
In the Tone section, move the Shadows slider to + 65.
Move the Exposure slider to + 0.50.
Switch back to the Library module. We are going to quickly and painlessly apply the Shadows and Exposure settings to all seven photos.
Make sure the photo you just edited (20130203_ben_2136) is still selected.
Shift–click the first city photo (20130203_ben_2130) to select all seven photos.
At the bottom right, click the Sync Settings button.
In the Synchronize Settings dialog, click the Check None button.
Under Basic Tone, check only Exposure and Shadows (the two settings that we just changed).
There may be a warning message regarding process version. To get rid of the error, check the box next to Process Version.
Click the Synchronize button.
The Exposure and Shadow changes will be applied to each of the images. A small +/- icon
 is shown on the bottom right of each of the synced photos.
Creating a Panorama in Photoshop
With all seven photos still selected, CTRL–click (Mac) or Right–click (Windows) on the last image (20130203_ben_2136) and select Edit In > Merge to Panorama in Photoshop.
If there is a warning message that Lightroom requires a different plug-in version of Photoshop Camera Raw, click the Open Anyway button.
It may take a while for Photoshop to open with the images. In Photoshop, a Photomerge dialog window will appear with a list of the photos that will be included in the Panorama.
In the Photomerge dialog under Layout, select Auto.
Click the OK button.
It may take up to 10 minutes for the file to process. When the processing is finished, the Panorama image opens in Photoshop.
To crop the ragged edges, go into the Tools panel on the left side of the Photoshop window and select the Rectangular Marquee tool
 .
.Drag the Rectangular Marquee over the image just inside the ragged edges.
In the top menu bar, go to Image > Crop. The Panorama will now have nice, clean edges.
Save the Photoshop file (File > Save). It may take a few minutes to finish. (To see the save progress, you can look to the right of the filename at the top of the window or next to the zoom level box to the bottom left.)
Once it’s done saving the file, close Photoshop.
Go back into Lightroom and the new Panorama image will be in the Library adjacent to the seven images used to create it.