Converting a Photo to Black & White
Lightroom Workflow
Import & Organize
Import to a dated folder, add keywords as you go.
Cull
Flag picks and rejects — edit only the keepers.
Apply Global Adjustments
Basic panel: exposure, contrast, highlights, shadows, white balance.
Local & Export
Brushes and gradient masks for spot work, then export at target size.
Noble Desktop's Graphic Design Certificate covers Photoshop alongside the broader Adobe toolkit that complements Lightroom in any photography workflow.
Gain an in-depth understanding of how to convert a color image to black and white, adjust the tone curve, and add a vignette through this detailed Lightroom tutorial.
Exercise Preview
Converting to Black & White
- If you have not imported the photos that were imported in Exercise 2E:
- Go into the Library module.
- At the bottom left of the screen, click Import.
- In the dialog box that appears, on the left under Source, navigate to Desktop > Class Files > Lightroom Class and select the Develop folder.
- At the top, above the photos, make sure Add is selected (highlighted).
- On the bottom right, click Import.
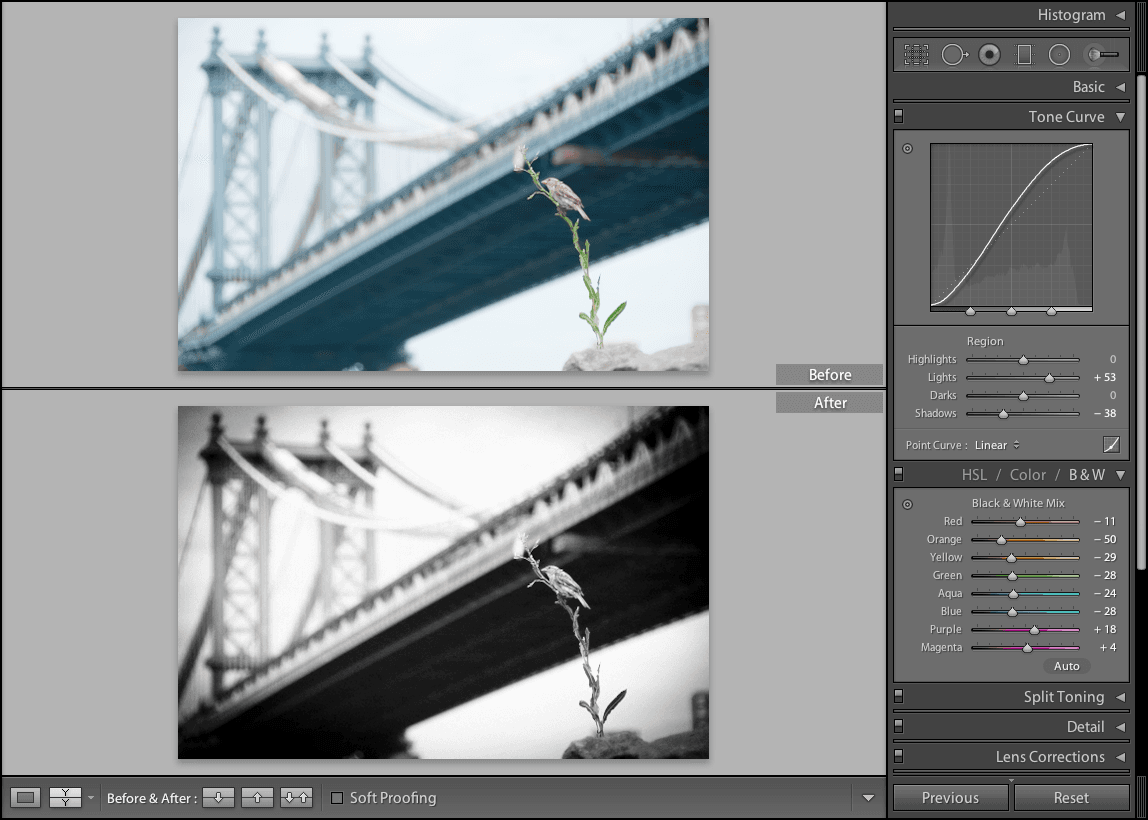
In the Library module, in the Catalog panel, click on All Photographs.
Click on the bridge photo (20120714_untitled_204).
Press D to go into the Develop module.
Expand the HSL / Color / B & W panel on the right if it isn’t already expanded.
Click on B & W to convert this image to black & white.
Although we’re looking at a black & white image, the colors are still present, represented by the various shades of gray. Let’s darken and lighten the “colors” one by one.
At the top-left corner of the panel, click the Targeted Adjustment tool
 .
.Near the bottom-right of the photo, click on the rocks.
Let’s darken them. Press the Down Arrow key about 6−8 times.
Click on the bridge’s dark underside.
Let’s darken it too. Press the Down Arrow key about 10 times.
Click the Switch
 off and on a few times to check out your work, leaving it on before proceeding to the next step.
Adjusting a B&W Photo’s T1Curve
Let’s increase contrast by adjusting the photo’s T1Curve.
Above the HSL / Color / B & W panel, expand the T1Curve panel.
- On the graph, form an S curve to your liking:
- Drag the top-right part of the line up
- Drag the bottom-left part down
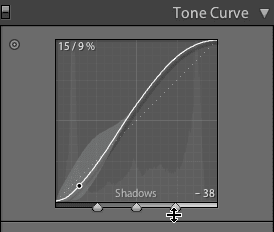
Click the Switch
off and on a few times to check out your work.
Adding a Vignette to B&W Photos
On the right, expand the Effects panel.
Under Post-Crop Vignetting, drag the Amount slider to the left to − 55.
Zoom in once on the bird.
In the Effects panel under Grain, drag the Amount slider to 55.
Zoom out.
At the bottom of the screen, click the Before & After icon
 .
.As you can see, converting a color photo into an elegant black & white image is quick and looks impressive!