April 1, 2026Noble Desktop Publishing Team/12 min read

Programming the Split View Controller

Master Split View Controllers in Professional iOS Applications

Core iOS Development Concepts

Split View Controller

A container view controller that manages two side-by-side view controllers, typically used in iPad applications for master-detail interfaces.

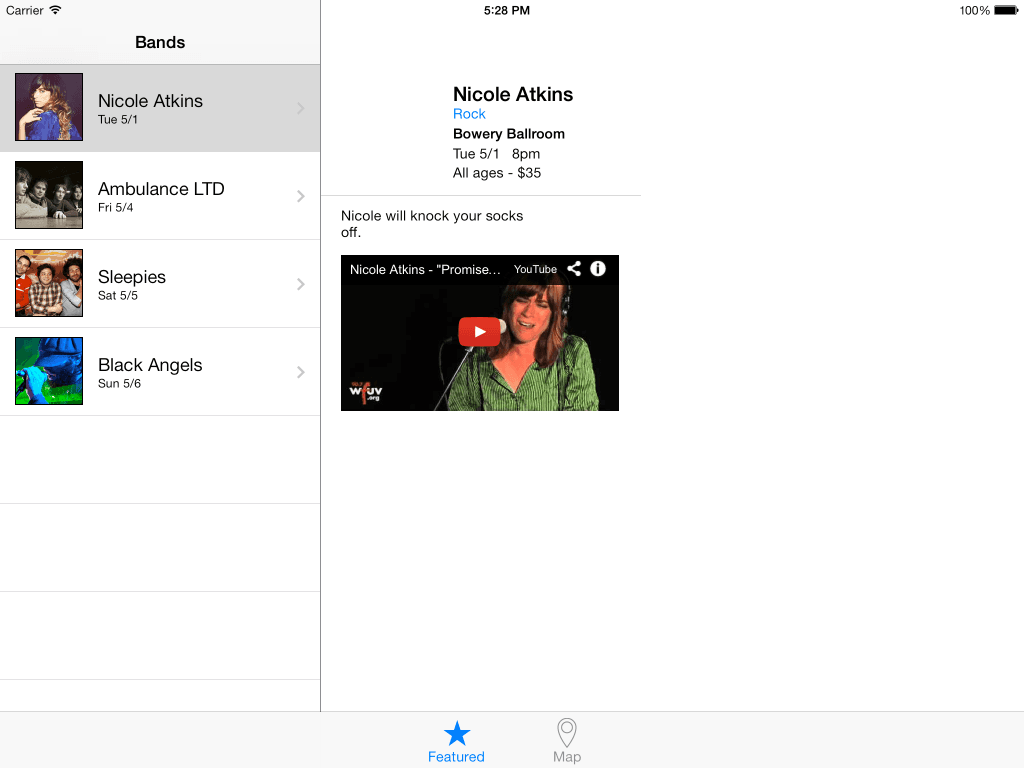
Master-Detail Pattern

An architectural pattern where a master view displays a list of items, and a detail view shows information about the selected item.

View Controller Communication

The process of passing data and coordinating behavior between different view controllers in an iOS application.

Topics Covered in This iOS Development Tutorial:

Setting iPad-only Code, Connecting the Master & Detail View Controllers, Getting the Detail View to Appear in Split View on Load, Setting an Initial Detail View

Exercise Preview

preview programming split view

Exercise Overview

In the previous exercise, we established the foundation of a Split View Controller, but it's currently non-functional. When users tap on a band in the master view, the corresponding details should seamlessly appear in the detail view on the right. This exercise will teach you to implement that critical functionality, transforming your static interface into a dynamic, responsive Split View Controller that provides the smooth user experience iOS users expect.

Prerequisites

This exercise builds on the previous Split View Controller setup. You should have completed exercises B1-B2 or use the provided starter project to follow along.

Getting Started

Before diving into the programming aspects, let's ensure your project environment is properly configured.

  1. If you completed the previous exercise you can skip the following sidebar. We strongly recommend completing the previous exercises (B1–B2) before proceeding, as this exercise builds directly on their foundational concepts.

    If you completed the previous exercise, Jive Factory.xcworkspace should still be open. If you closed it, re-open it from yourname-iOS Dev Level 2 Class > Jive Factory.

    Project Setup Process

    1

    Open Existing Project

    If you completed the previous exercise, open Jive Factory.xcworkspace from your iOS Dev Level 2 Class folder.

    2

    Use Starter Files

    If starting fresh, duplicate the 'Jive Factory Ready for Split View Programming' folder and rename it to 'Jive Factory'.

    3

    Launch Workspace

    Open the Jive Factory.xcworkspace file to begin working with the split view implementation.

If You Did Not Complete the Previous Exercises (B1–B2)

  1. Close any files you may have open and switch to the Desktop.
  2. Navigate to Class Files > yourname-iOS Dev Level 2 Class.
  3. Duplicate the Jive Factory Ready for Split View Programming folder.
  4. Rename the folder to Jive Factory.
  5. Open Jive Factory > Jive Factory.xcworkspace.

Setting iPad-Only Code

One of the critical aspects of modern iOS development is creating adaptive interfaces that behave appropriately across different device families. Our approach here demonstrates a fundamental principle: the same codebase can serve both iPhone and iPad while providing device-optimized experiences.

  1. In the Project navigator, click on BandsTableViewController.swift.
  2. Find the code for the prepare method.

    The prepare method serves as our data-passing mechanism when segueing from the Table View Controller to the Bands Detail View Controller on iPhone. This method handles the critical task of transferring band information to the detail view and triggering its display. However, our iPad storyboard employs a different architectural pattern—it uses a Split View Controller instead of segues—which means this method is never invoked. We need to implement an alternative approach for iPad that achieves the same data-passing functionality while respecting the Split View Controller's design paradigm.

  3. Below the MARK:—Navigation comment, add the following method:

    // MARK:—Navigation
    
    override func tableView(_ tableView: UITableView, didSelectRowAt indexPath: IndexPath) {
    
    }
    
    // In a storyboard-based application, you will often want to do a little preparation

    Notice that we added override before the keyword func in our code.

    The didSelectRowAt method is part of the UITableViewDelegate protocol and fires immediately when a user taps any row in our table view. This method provides the perfect hook for handling iPad-specific data passing. However, since this code serves both iPhone and iPad versions of our app, we must implement device-specific logic. The iPhone app functions correctly using segues, so we'll add conditional code to ensure this new functionality executes only on iPad devices.

  4. Add the following bold code to implement device detection logic:

    override func tableView(_ tableView: UITableView, didSelectRowAt indexPath: IndexPath) {
       if (UIDevice.current.model.range(of: "iPad")!= nil) {
    
       }
    }

    This device detection pattern is essential for creating universal apps that adapt their behavior based on the user's device. While modern iOS development often favors trait collections and size classes for responsive design, device model detection remains valuable for scenarios where you need fundamentally different behaviors rather than just layout adaptations.

    Now we have our iPad-specific execution context, but we still face an architectural challenge: passing band detail information from the Master View Controller to the Detail View Controller within the Split View Controller. Currently, only the Split View Controller maintains references to both child controllers. We need to establish a communication pathway from the Master to the Detail View Controller.

    Our solution involves creating a property in the BandsTableViewController (Master) that references the BandsDetailViewController (Detail). We'll then configure this reference through the Split View Controller, which has access to both controllers. This pattern creates a clean separation of concerns while enabling the necessary data flow.

  5. Scroll up to the top of the file. At the top of the class, add the following bold code:

    let bandsModel = BandsModel()
    var detailViewController: BandsDetailViewController!
    
    override func viewDidLoad() {

    This property declaration establishes our communication bridge between the master and detail controllers. The implicitly unwrapped optional (!) indicates that while this property starts as nil, we guarantee it will be assigned a value before any code attempts to use it.

Device Detection Pattern

Use UIDevice.current.model.range(of: "iPad") to detect iPad devices and execute platform-specific code paths in universal iOS applications.

iPhone vs iPad Navigation Patterns

FeatureiPhoneiPad
Navigation MethodSegues between viewsSplit view selection
View Controller CreationNew instance per segueSingle persistent instance
Data Passingprepare methodDirect property assignment
Recommended: iPad requires different approach due to split view architecture

Connecting the Master & Detail View Controllers

With our communication property in place, we now need to establish the actual connection between controllers. This requires creating a custom Split View Controller class that can access and configure both child controllers during initialization.

  1. In the Project navigator, select MapViewController.swift (so the new file will be created after it).
  2. Hit Cmd–N to create a new file.
  3. Under iOS and Source, double–click on Cocoa Touch Class to choose it.
  4. From the Subclass of menu, choose UISplitViewController (or start typing it and let Xcode autocomplete it for you).
  5. Edit the name of the Class to be: MySplitViewController
  6. Make sure Also create XIB file is NOT checked.
  7. Make sure Language is set to Swift.
  8. Click Next.
  9. You should already be in the Jive Factory folder, so click Create.
  10. In the Project navigator, notice MySplitViewController.swift has been added.
  11. In the Project navigator, click on Main_iPad.storyboard.
  12. Click on a blank area of the Editor so nothing is selected.
  13. Select the Split View Controller so that it's outlined in blue.
  14. In the Utilities area, click on the Identity inspector tab identity inspector icon.
  15. Next to Class, type M and it should autocomplete to MySplitViewController. Hit Return to apply it. Now it's connected to the new class.
  16. In the Project navigator, click on MySplitViewController.swift.
  17. Find the viewDidLoad method.
  18. To save you some typing, we've already written the code that sets the views in the split view. Go to File > Open.
  19. Navigate to the Desktop > Class Files > yourname-iOS Dev Level 2 Class > Code Snippets and open the file splitViewConnectMasterDetail.txt.
  20. Press Cmd–A to select all the code.
  21. Press Cmd–C to copy all the code.
  22. Close the file.

  23. Paste the code over the comment in the viewDidLoad method:

    override func viewDidLoad() {
       super.viewDidLoad()
    
       let leftNavController = self.viewControllers.first as! UINavigationController
       let masterViewController = leftNavController.topViewController as! BandsTableViewController
       let detailViewController = self.viewControllers.last as! BandsDetailViewController
       masterViewController.detailViewController = detailViewController
    }

    This code demonstrates the power of the Split View Controller's architecture. We're accessing the viewControllers array, which contains references to both the master and detail controllers. The first line extracts the navigation controller that wraps our master view, while the second line gets the actual table view controller from within that navigation controller.

    programming split view segues for split composite

    programming split view segues for nav composite

    The navigation controller maintains a stack of view controllers stored in an array structure. The third line of code retrieves the BandsDetailViewController using the last property, which safely accesses the final element in the viewControllers array. This approach is more robust than using array indexing, as it automatically adapts if the view controller hierarchy changes.

    programming split view segues for split composite3

    The final line completes our communication bridge by assigning the detail view controller reference to the master controller's property. This establishes the pathway we need for data transmission when users interact with the master view.

  24. Hit Cmd–S to save.
  25. In the Project navigator, click on BandsTableViewController.swift.

  26. Scroll to the Navigation MARK and find the following code statement that checks if a user is on an iPad:

    if (UIDevice.current.model.range(of: "iPad")!= nil) {
  27. We need to extract the appropriate band detail object from our data model and prepare it for transmission to the detail view. The indexPath.row property tells us exactly which band the user selected. Add the following bold code:

    if (UIDevice.current.model.range(of: "iPad")!= nil) {
       let bandDetail = bandsModel.bandDetails[indexPath.row]
    }

    This line demonstrates a key principle of MVC architecture: the controller acts as the mediator between the model (our data) and the view (the user interface). We're extracting the specific band data that corresponds to the user's selection, preparing it for display in the detail view.

Creating Custom Split View Controller

1

Create New Class

Generate a new Cocoa Touch Class file inheriting from UISplitViewController, named MySplitViewController.

2

Assign to Storyboard

In Main_iPad.storyboard, select the Split View Controller and set its class to MySplitViewController in the Identity inspector.

3

Implement Connection Logic

Add code to viewDidLoad that connects the master and detail view controllers through property references.

Getting the Detail View to Appear in Split View on Load

Now we need to address a fundamental difference between our iPhone and iPad implementations. The iPhone version creates new view controller instances with each segue, triggering viewDidLoad each time. Our iPad Split View Controller, however, creates both controllers once and reuses them, requiring a different approach to view updates.

  1. In the Project navigator, click on BandsDetailViewController.swift.

  2. Find the viewDidLoad method that's currently commented out.

    The current view update logic resides in the viewDidLoad method, which worked perfectly for our iPhone implementation. Each segue created a new detail view controller instance, ensuring viewDidLoad executed with fresh data every time. Our iPad Split View Controller, however, follows a different lifecycle pattern—it creates both controllers once during initialization and reuses them throughout the app's session.

    This architectural difference requires us to separate our view update logic from the viewDidLoad lifecycle method. Instead, we'll create a dedicated refresh method that can be called whenever new band data needs to be displayed, regardless of the view controller's lifecycle state.

  3. Select the following code within the viewDidLoad method shown below:

    //        bandNameLabel.text = currentBandDetail?.bandName
    //        bandTypeLabel.text = currentBandDetail?.bandType
    //        venueLabel.text = currentBandDetail?.venue
    //        showDateLabel.text = currentBandDetail?.nextShowDate
    //        showTimeLabel.text = currentBandDetail?.nextShowTime
    //        showDetailsLabel.text = currentBandDetail?.showDetails
    //        bandDescriptionLabel.text = currentBandDetail?.bandDescription
    //        bandImage.image = UIImage(named: currentBandDetail!.fullImageName!)
    //        
    //        let htmlString = "<html><body><iframe style=\"position:absolute; top:0; left:0; width:100%; height:100%;\" src=\"\(currentBandDetail!.videoURL!)\" allowfullscreen></iframe></body></html>"
    //        
    //        videoWebView.loadHTMLString(htmlString, baseURL: nil)
  4. Uncomment the lines by hitting Cmd–/.

  5. With the lines still selected, hit Cmd–X to cut them.

  6. Below the viewDidLoad method, create a new method by adding the following code. It should start after the ending } of the viewDidLoad method.

    func refreshView() {
    
    }
  7. Paste the code into this new method:

    func refreshView() {
       bandNameLabel.text = currentBandDetail?.bandName
       bandTypeLabel.text = currentBandDetail?.bandType
       venueLabel.text = currentBandDetail?.venue
       showDateLabel.text = currentBandDetail?.nextShowDate
       showTimeLabel.text = currentBandDetail?.nextShowTime
       showDetailsLabel.text = currentBandDetail?.showDetails
       bandDescriptionLabel.text = currentBandDetail?.bandDescription
       bandImage.image = UIImage(named: currentBandDetail!.fullImageName!)
    
       let htmlString = "<html><body><iframe style=\"position:absolute; top:0; left:0; width:100%; height:100%;\" src=\"\(currentBandDetail!.videoURL!)\" allowfullscreen></iframe></body></html>"
    
       videoWebView.loadHTMLString(htmlString, baseURL: nil)
    }

    This refactored method encapsulates all view update logic in a reusable function. The method updates all interface elements with data from the currentBandDetail object, including text labels, images, and even embedded video content. This pattern of separating update logic from lifecycle methods is a best practice that makes your code more maintainable and flexible.

  8. For the iPhone app we still need to run this code inside the viewDidLoad method. Add the following bold code to maintain iPhone compatibility:

    override func viewDidLoad() {
       super.viewDidLoad()
    
       if (UIDevice.current.model.range(of: "iPad") == nil) {
          self.refreshView()
       }
    }

    This conditional ensures that iPhone devices still receive the view update during viewDidLoad, while iPad devices will rely on explicit calls to refreshView() when data changes.

  9. Hit Cmd–S to save.
  10. In the Project navigator, click on BandsTableViewController.swift.
  11. We want this method to run when a user taps a band row on the iPad. Find the if statement that checks to see if a user is using an iPad (in the Navigation MARK section).

  12. Add the following bold code to complete the data flow:

    if (UIDevice.current.model.range(of: "iPad")!= nil) {
       let bandDetail = bandsModel.bandDetails[indexPath.row]
       detailViewController.currentBandDetail = bandDetail
       detailViewController.refreshView()
    }

    These two lines complete our data flow implementation. First, we assign the selected band's data to the detail controller's currentBandDetail property. Then we immediately call refreshView() to update the interface with the new data. This pattern ensures that iPad users see immediate feedback when they make a selection.

  13. Click the Run button.

  14. Click on a couple of the band rows and their info should now load on the right! This demonstrates the power of the Split View Controller in providing a seamless, desktop-class user experience on iPad.

View Controller Lifecycle Difference

Split view controllers create view controllers once, unlike segues that create new instances. Move view updating logic from viewDidLoad to a reusable method.

RefreshView Method Approach

Pros
Can be called multiple times without creating new view controllers
Separates view updating logic from view controller initialization
Works consistently across both iPhone and iPad platforms
Allows for dynamic content updates in split view architecture
Cons
Requires additional method calls to update the interface
Adds complexity to the view controller's public interface

Setting an Initial Detail View

A polished user experience requires thoughtful attention to initial states. Currently, when users first enter our Split View Controller, no band is selected, leaving the detail view displaying only placeholder content. Professional iOS apps typically present meaningful content immediately, guiding users toward engagement rather than presenting empty states.

  1. Switch back to Xcode.

    We'll implement an initial selection that automatically highlights the first band and displays its details when the app loads. This approach follows iOS design guidelines by providing immediate value and context to users, while also demonstrating how the interface functions.

  2. To implement this enhancement, we'll add code to the viewDidLoad method that triggers after we receive our data from the model. Go to File > Open.
  3. Navigate to the Desktop > Class Files > yourname-iOS Dev Level 2 Class > Code Snippets and open the file setInitialRow.txt.
  4. Press Cmd–A to select all the code.
  5. Press Cmd–C to copy all the code.
  6. Close the file.
  7. Back in BandsTableViewController.swift, paste the code as shown in bold:

    if let strongSelf = self {
       loader.stopAnimating()
       strongSelf.tableView.reloadData()
    
       let indexPath = IndexPath(row: 0, section: 0)
       if (UIDevice.current.model.range(of: "iPad")!= nil) {
    
          strongSelf.tableView.selectRow(at: indexPath, animated: false, scrollPosition: UITableViewScrollPosition(rawValue: 0)!)
    
          let bandDetail = strongSelf.bandsModel.bandDetails[indexPath.row]
          strongSelf.detailViewController.currentBandDetail = bandDetail
          strongSelf.detailViewController.refreshView()
    
       }
    }

    This code demonstrates several important concepts. First, we create an IndexPath pointing to the first row (row: 0, section: 0). Then we programmatically select that row using selectRow(), which provides the visual selection indicator. Finally, we execute the same data-passing logic we implemented for user selections, ensuring the detail view displays the first band's information immediately upon app launch.

  8. Click the Run button.

    Excellent! The first row now appears selected automatically, and its corresponding details populate the right side immediately. This creates a much more professional and engaging user experience.

  9. Click on some of the other band rows to confirm the selection behavior works correctly and the interface responds smoothly to user interactions. The combination of automatic initial selection and responsive touch handling creates the fluid, intuitive experience that iPad users expect from quality applications.
  10. Switch back to Xcode.
  11. Click the Stop button.
  12. Leave the project open—we'll continue refining and enhancing the interface in the next exercise, where we'll focus on layout optimizations and additional user experience improvements.

Initial State Configuration

0/4
Implementation Complete

The split view controller now properly handles row selection, data passing, and initial state configuration for a professional iPad user experience.

Key Takeaways

1Split view controllers require different navigation patterns compared to traditional iPhone segue-based navigation
2Device detection using UIDevice.current.model allows for platform-specific code execution in universal iOS apps
3Custom split view controller subclasses provide necessary connection points between master and detail view controllers
4View controller lifecycle differences in split views require moving update logic from viewDidLoad to reusable methods
5Direct property assignment replaces segue-based data passing in split view controller architectures
6Initial state configuration improves user experience by automatically selecting and displaying relevant content
7The refreshView pattern enables dynamic content updates without creating new view controller instances
8Proper master-detail communication requires establishing property references between view controllers in the split view setup

RELATED ARTICLES