The Lawyer Joke Book: Styling the Text
What This Tutorial Covers
Paragraph Styles
Reusable text formatting across the book.
Character Styles
Inline formatting for emphasized words and quotes.
Body Text Hierarchy
Headings, body, captions, and pull-quotes.
Noble Desktop's Graphic Design Certificate covers InDesign alongside Photoshop and Illustrator.
Dive into this comprehensive tutorial on InDesign, covering everything from paragraph rules and baseline grids to advanced Find/Change techniques, all illustrated through a series of practical exercises.
Exercise Preview
Creating Style Sheets
The text is not formatted yet. Whenever creating long documents, style sheets are essential. Luckily we only need a few for this book. Let’s create the first one.
Go to the Paragraph Styles panel. If it’s not open, go into Type > Paragraph Styles.
Hold Option (Mac) or ALT (Windows) and click the Create new style button
 at the bottom of the panel.
A New Paragraph Style dialog will open. We have a lot of specs we will be entering into this window, so it’s very important that you don’t click OK until we tell you. Let’s start by naming our style. Set the following:
Style Name: Body Text Add to CC Library: Uncheck this option if shown Go to Basic Character Formats (select this section on the left) and set:
Font: Adobe Caslon Pro Regular Size: 12 pt Leading: 16 pt Go to Indents and Spacing (select this section on the left) and set:
Alignment: Left Justify First Line Indent: 1p Align to Grid: All Lines - Go to Keep Options (select this section on the left) and:
- Check Keep Lines Together.
- Then select At Start/End of Paragraph and set both Start and End to 2.
- Go to Hyphenation (select this section on the left) and set:
- Check Hyphenate.
- Set the following:
Words with at Least: 5 After First: 2 Before Last: 2 Hyphen Limit: 1 Hyphenation Zone: 3p - Leave the hyphenation slider in the default middle position.
- Uncheck the last three options at the bottom of that window.
Go to Justification (select this section on the left) and enter the following:
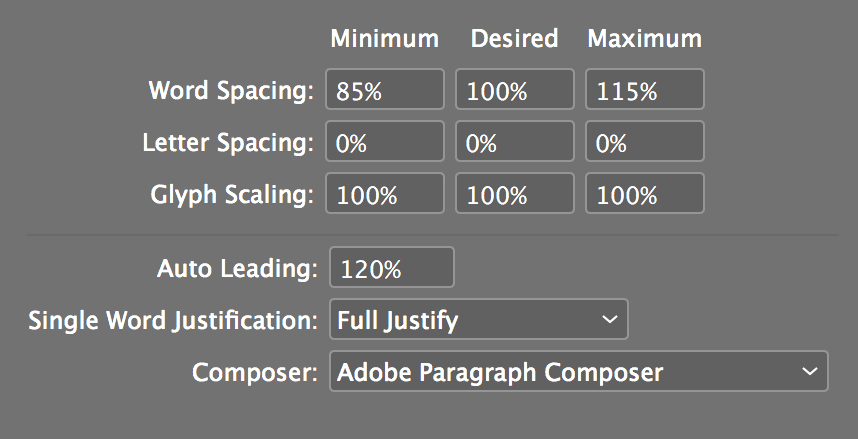
Click OK.
Make sure you’re viewing any one of the book’s pages (not the Master Page).
Using the Type tool
 , click anywhere in the main text box.
Select all of the text (Edit > Select All).
In the Paragraph Styles panel, click on the Body Text style to apply it.
Formatting the First Paragraphs of Each Joke
We need to create another style to separate the jokes. In the Paragraph Styles panel, select the Body Text style and from the panel menu
 , choose Duplicate Style.
Name it 1st Paragraph but don’t click OK till we say!
- On the left, click on the Indents and Spacing section and:
- Change First Line Indent from 1p to 0p.
- Change Space Before from 0p to 5p.
- Click on the Paragraph Rules section on the left and put in these specs:
- Choose Rule Above and check Rule On.
- Set the following:
Weight: 1 pt Color: (Text Color) Width: Column Offset: 3p6 Left Indent: 8p Right Indent: 8p Click OK.
Whenever you see five dollar signs $$$$$, that indicates the start of a joke. Any paragraph with $$$$$ in front should be styled with the 1st Paragraph style. Go to pages 1 and 2 and try it with the first three jokes.
You should see the jokes separate with a rule between them, but the rule doesn’t work when the joke is at the top of the column. It goes way too high into the running head. We’ll fix this in a bit, but let’s first just style all the 1st paragraphs.
Instead of styling them by hand as you did with those few jokes, we can do it really fast. Go into Edit > Find/Change.
At the top of the panel, click on the Text tab.
Make sure the Direction is set to Forward.
From the Search menu, choose Document.
Under Find what, type in $$$$$
Leave Change to blank, don’t type anything, and delete anything that is there.
Click the More Options button. (If you see a Fewer Options button instead, this was already done.)
Under Find Format, click Clear specified attributes
 if available.
Under Change Format, click Clear specified attributes
if available.Under Change Format, click the Specify attributes to change button
 .
.For Paragraph Style, choose 1st Paragraph and click OK.
Just to see what happens, click Find Next. Then click Change. Then click Find Next again. After you get tired of changing each one, click Change All, then click OK to dismiss the dialog but not the Find/Change panel.
Removing the Dollar Signs
We’re done with those $ signs, so we can do another search to remove them. In the Find/Change panel, the previous find/change items should still be there:
Find what: $$$$$ Change to: Make sure nothing is typed here Under Change Format, click Clear specified attributes
.Click Fewer Options.
Then click Change All to do it throughout the whole document.
Click OK, then close the Find/Change panel.
Go back to page 1 by choosing Layout > First Page. (Or you can press Cmd–J (Mac) or CTRL–J (Windows), type 1 and click OK.)
Finishing up
Go to the last page by pressing: Cmd–Shift–Page Down (Mac) or CTRL–Shift–Page Down (Windows). (Users without a Page Down key may be able to press Cmd–Shift–Fn–Down Arrow (Mac) or CTRL–Shift–Fn–Down Arrow (Windows).)
You should now be at the end of the document (around page 108). But wait, these pages are blank. InDesign adds pages for us as needed but it doesn’t remove them if the document gets shorter. When our baseline grid made our document double-spaced, our book was briefly this long, but now we no longer need these extra pages.
In the Pages panel, scroll until you see where the text actually finishes (it’ll be a few pages after page 90). Click the first blank page after the text ends, scroll to the end of the Pages panel, and Shift–click the last page of the document. Then click Delete selected pages
. If you get a warning, just click OK.- Congratulations, you have typeset your first book! If you’d like to print, go to File > Print and you’ll need to do a few things:
- First, have mercy on us and only print a couple of pages. (To print a page range, under Range: type 12–15. This will print only those pages.)
- Select Spreads.
- In the Setup section, choose Orientation: Landscape
 (the second option).
 - Keep referring to the Preview to make sure things will come out right.
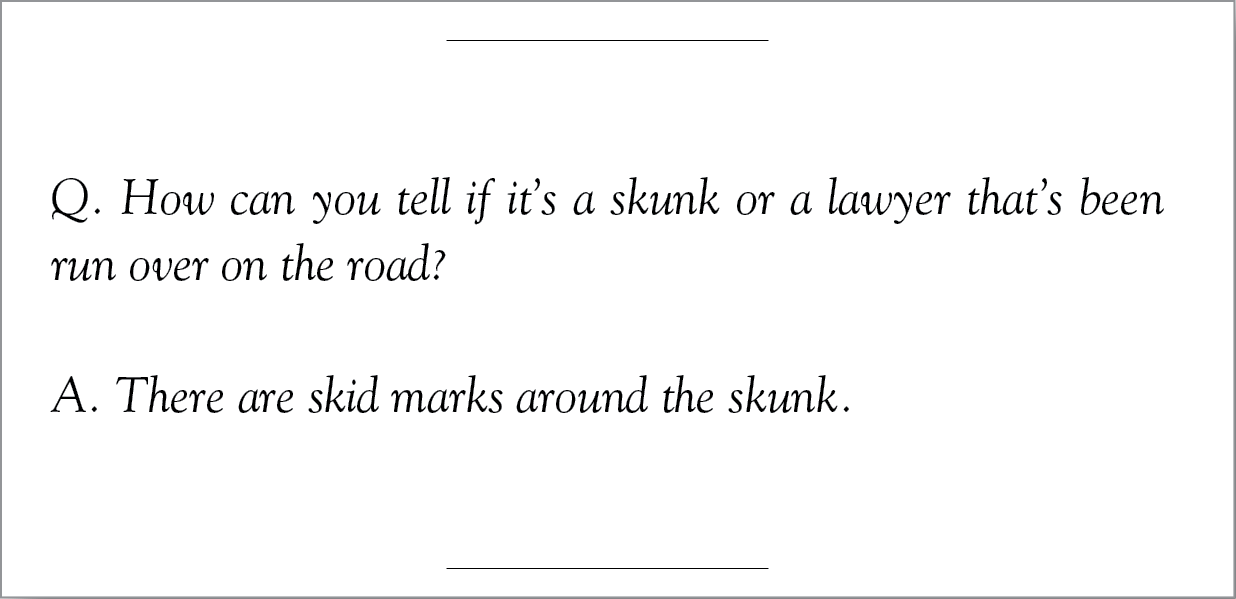
Bonus If You Have Extra Time: Making a Question/Answer Style
Some jokes are question/answer jokes. We’re going to create a style sheet for them. Go to Edit > Deselect All.
In the Paragraph Styles panel, select Body Text and from the panel menu
, choose Duplicate Style.Name the new style Answer.
- In the Indents and Spacing section:
- Change First Line Indent from 1p to 0p.
- Change Space Before from 0p to 1p4.
- Click OK.
Scroll through the document and look for any Q & A format joke. When you see one, select the “A” paragraph and give it the Answer style. Keep looking for those and styling them. When you want to go faster, go to the next step.
- Go into Edit > Find/Change. At the top, click on the Text tab and:
- Make sure the Direction is set to Forward.
- From the Search menu, choose Document.
- Click the Case Sensitive option
 .
. - Under Find what: type A. and then a space (be sure to include the period!)
- Click More Options.
- Under Change Format, click the Specify attributes to change button .
- Under Paragraph Style, choose Answer.
- Click OK.
Click Find Next.
Then click Change to make sure it works.
Do some changes, then when you know it is working right, click Change All.
Close the Find/Change panel, then save the document.