Books: Creating
InDesign Pre-Press Checklist
Window → Output → Preflight catches missing fonts, links, low-res images.
All linked images present and correct version.
0.125" bleed standard for print; trim marks visible in export.
Press-ready PDF preset preserves color and prevents font issues.
Noble Desktop's Graphic Design Certificate covers InDesign alongside Photoshop and Illustrator.
Learn how to use InDesign to create a book by linking multiple documents, synchronizing files, and updating a table of contents across all documents in this detailed tutorial.
Exercise Preview
Creating the Book
Create a new book by going to File > New > Book.
Name it yourname-wine book.indb and save it into the InDesign Class folder.
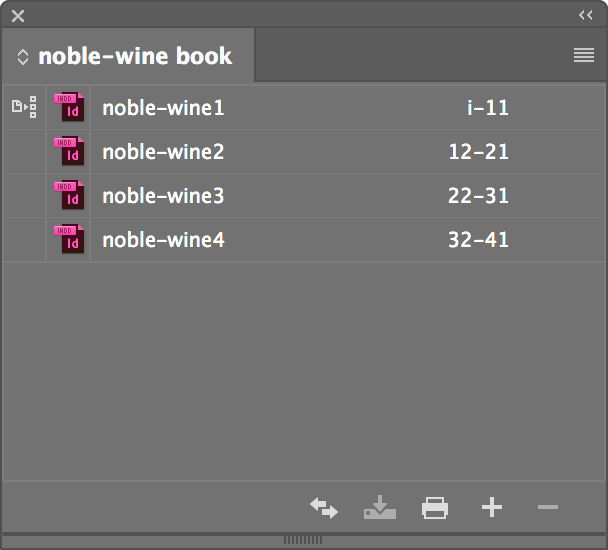
In the Book panel that appears, click the Add documents button
 .
.The first chapter will be the master chapter. This means any subsequent chapters will be formatted so that any Paragraph and Character Styles, Swatches, etc. can be made consistent with those of the master chapter. Choose yourname-wine1.
Click the Add documents button
again to add a second chapter. Choose yourname-wine2. Repeat this with yourname-wine3 and yourname-wine4.NOTE: To add multiple files all at once, you can click on the first file, then Shift–click the last file to select them, then click Open.
Synchronizing the Book
Now that all the chapters have been added to the book, let’s make sure all the style sheets, etc. are consistent throughout the files.
In the Book panel, make sure none of the “chapters” are selected. This is important because we want all documents to be synchronized. If any are selected, only the selected documents would be synchronized.
Click the Synchronize button
 . (If you get a message saying some files may have changed, just click OK.)
Updating the Table of Contents for the Entire Book
Now that we have a book, let’s update the TOC in yourname-wine1 to include listings from the other documents in the book.
In the Book panel, double–click yourname-wine1 to open it.
Go to Layout > Table of Contents.
- Don’t change anything except these options at the bottom left of the window:
- Make sure Replace Existing Table of Contents is checked.
- Check on Include Book Documents.
- Click OK.
The TOC should now be longer, so you’ll need to add some pages. Let’s do that now.
Open the Pages panel.
Click on the Table of Contents master page’s left page and drag as shown below:
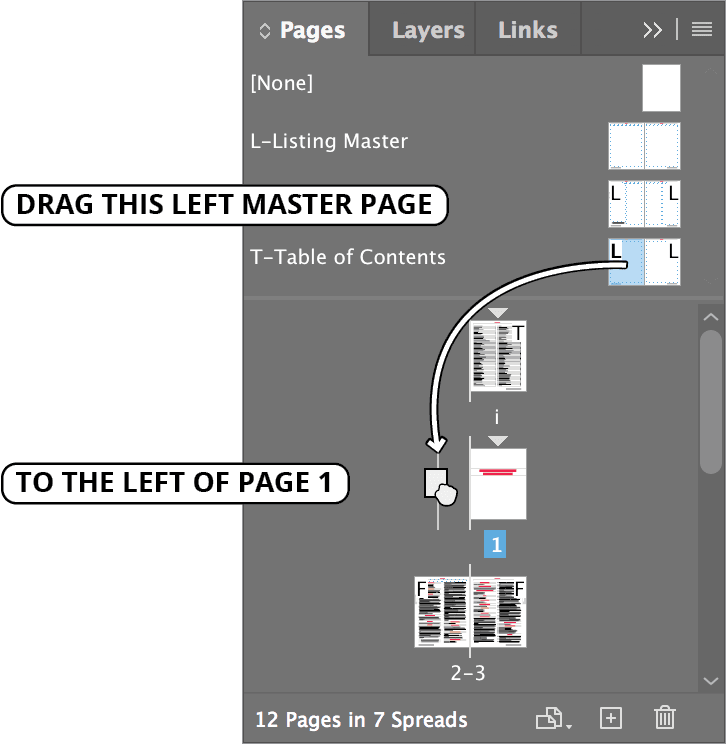
Go to page i of the document.
Notice the red text overflow symbol
 at the bottom-right corner of the TOC’s text frame. Click it with the Selection tool
  to load up the overset text.
Go to page ii.
Click on the main 2-column text frame and you should see text flow into it.
- Unfortunately, there is more text so you’ll need to create a few more pages. To drag out two new pages at once, go to the Pages panel and drag as shown below:
- From the T-Table of Contents master PAGE NAME (not the page icons).
- To the PAGE NUMBER area of the spread ii–1 (in the number area BELOW the icons).
- Make sure the cursor looks like
 (the one in the screenshot below).
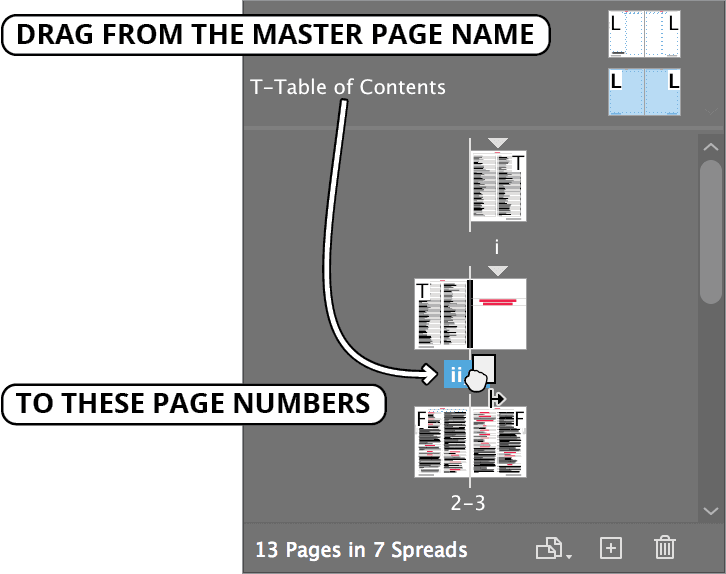
Notice that this created two more pages (iii–iv) before page 1.
Go to page ii of the document.
Click the red text overflow symbol
at the bottom-right corner.Click in the 2-column main text frame on page iii to flow the text into it.
Do the same for the overflow on page iii.
Save the file and close it.
In the Book panel, click the Save the book button
 . Alternately, you can click the panel menu
  , then choose Save Book.
Close the Book panel.