Creating & Naming Slices in Photoshop
Common Email Pitfalls
CSS Grid/Flexbox
Outlook ignores them — fall back to tables.
Background Images
VML hacks for Outlook; modern email clients support natively.
Web Fonts
Limited support — provide system font fallbacks.
Forms in Email
Don't — most clients block. Link to a landing page instead.
Noble Desktop's Web Design Certificate teaches HTML, CSS, and the responsive design patterns behind every modern email and web project.
Dive into this comprehensive HTML email tutorial to learn about slicing a Photoshop file, naming slices, adding ALT text, and adding link URLs for a seamless email creation experience.
Exercise Preview
Slicing the File
Launch Photoshop.
Go to File > Open, and navigate into the yourname-HTML Email Class folder. In the Lunch Menu folder, open Lunch Menu.psd.
If you get a warning about missing fonts, proceed through the dialog(s) and Don’t Resolve missing fonts. You will not need to edit the text in these files.
Go to File > Save As and name the file yourname-Lunch Menu.psd.
If you get a warning about maximizing compatibility, just click OK.
We need to slice this into the areas that will link to different webpages. In the Tools panel on the left, select the Slice tool
 . You might have to click and hold the Crop tool
  to find it.
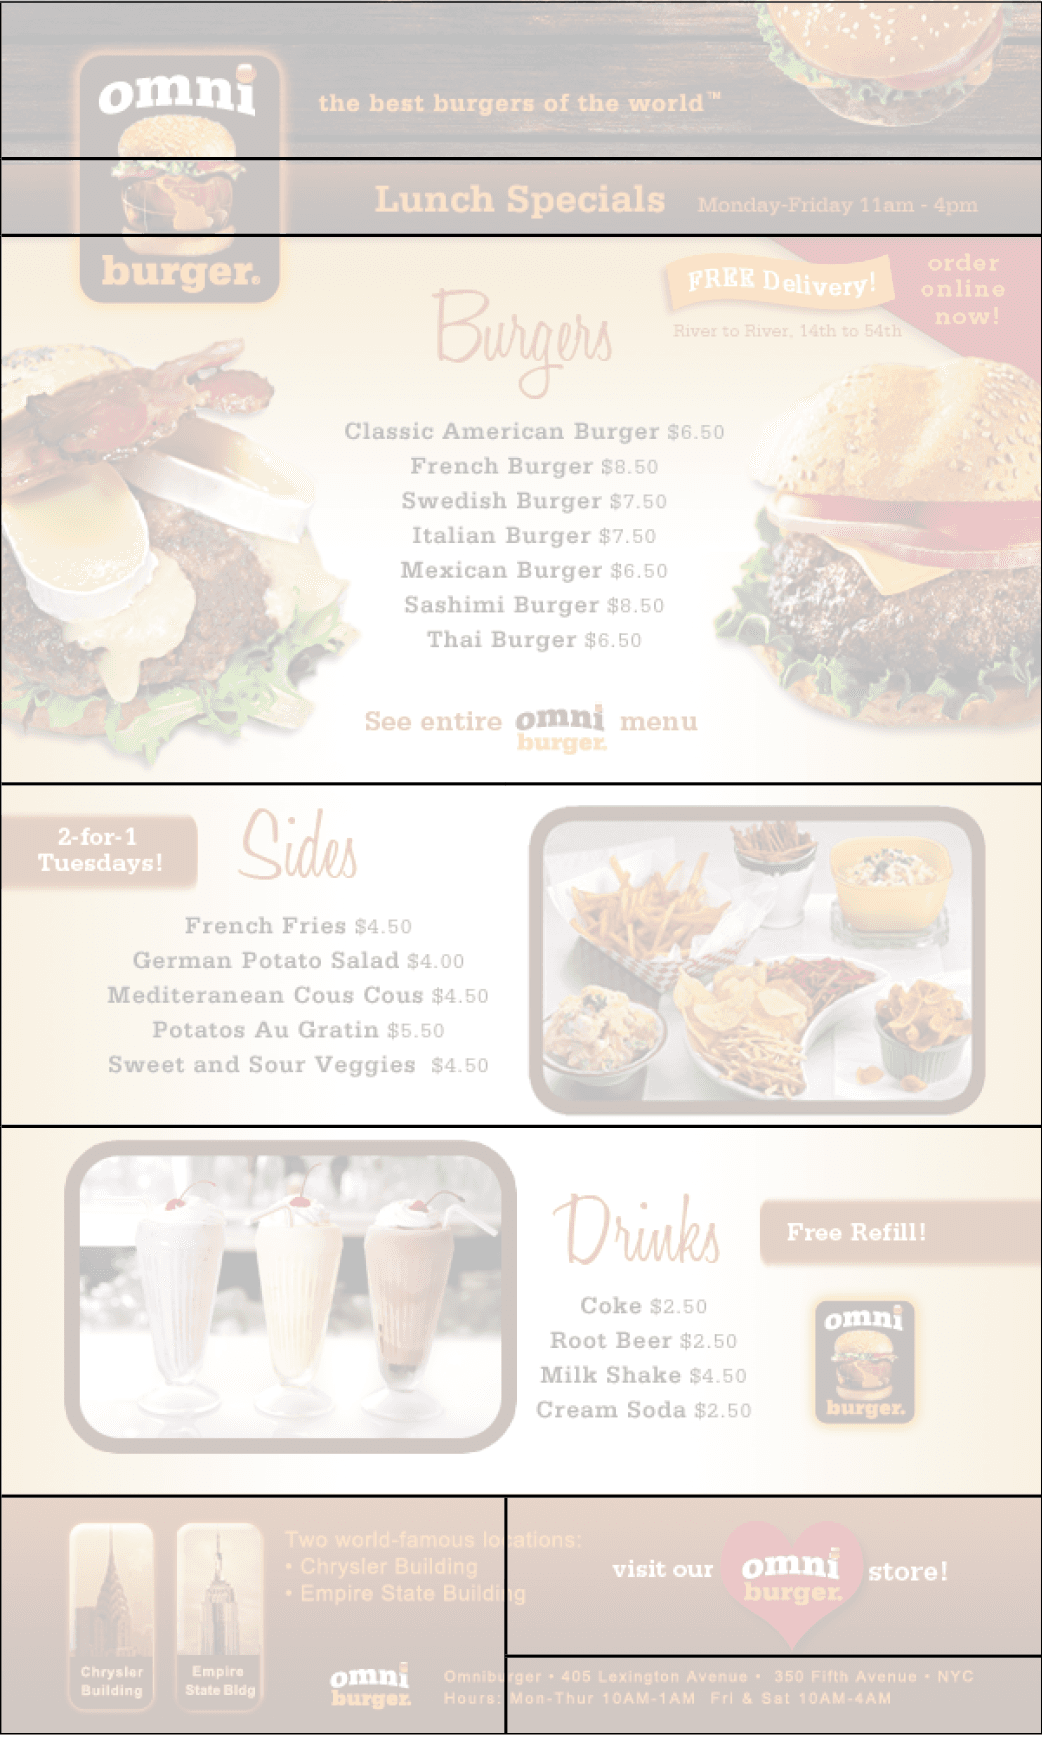
Drag a slice over the top wood area, using the pink Smart Guides to help you position the slice.
If you need to adjust the slice, move the cursor over an edge and drag to resize it.
Drag another slice over the Lunch Specials bar—just below the first slice.
Continue slicing the email as shown below:
Naming Slices
The names of slices are important because they will become the filenames when we export. Each slice should have a name that describes the content inside it.
Choose the Slice Select tool
 . You’ll have to click and hold the Slice tool .
Double–click the top slice.
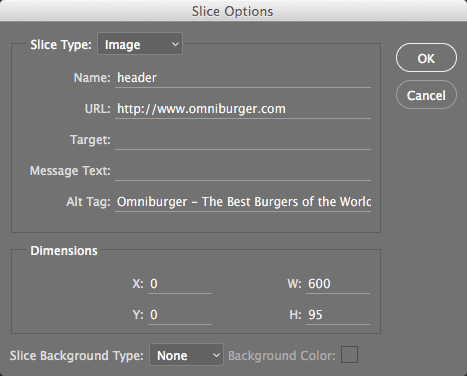
In the dialog that appears, next to Name, type: header
Click OK.
Double–click the Lunch Specials slice.
In the dialog that appears, next to Name, type: lunch-specials and click OK.
Continue naming slices according to the diagram below:
Creating ALT Text & Links
Photoshop can also set the ALT text and link for each image. When we export HTML later, it will put the ALT text and links in the code for us.
With the Slice Select tool
chosen, double–click the top slice.In the dialog that appears, set the following before clicking OK:
URL: http://www.omniburger.com ALT Tag: Omniburger—The Best Burgers of the World Double–click the Lunch Specials slice.
In the dialog that appears, set the following before clicking OK:
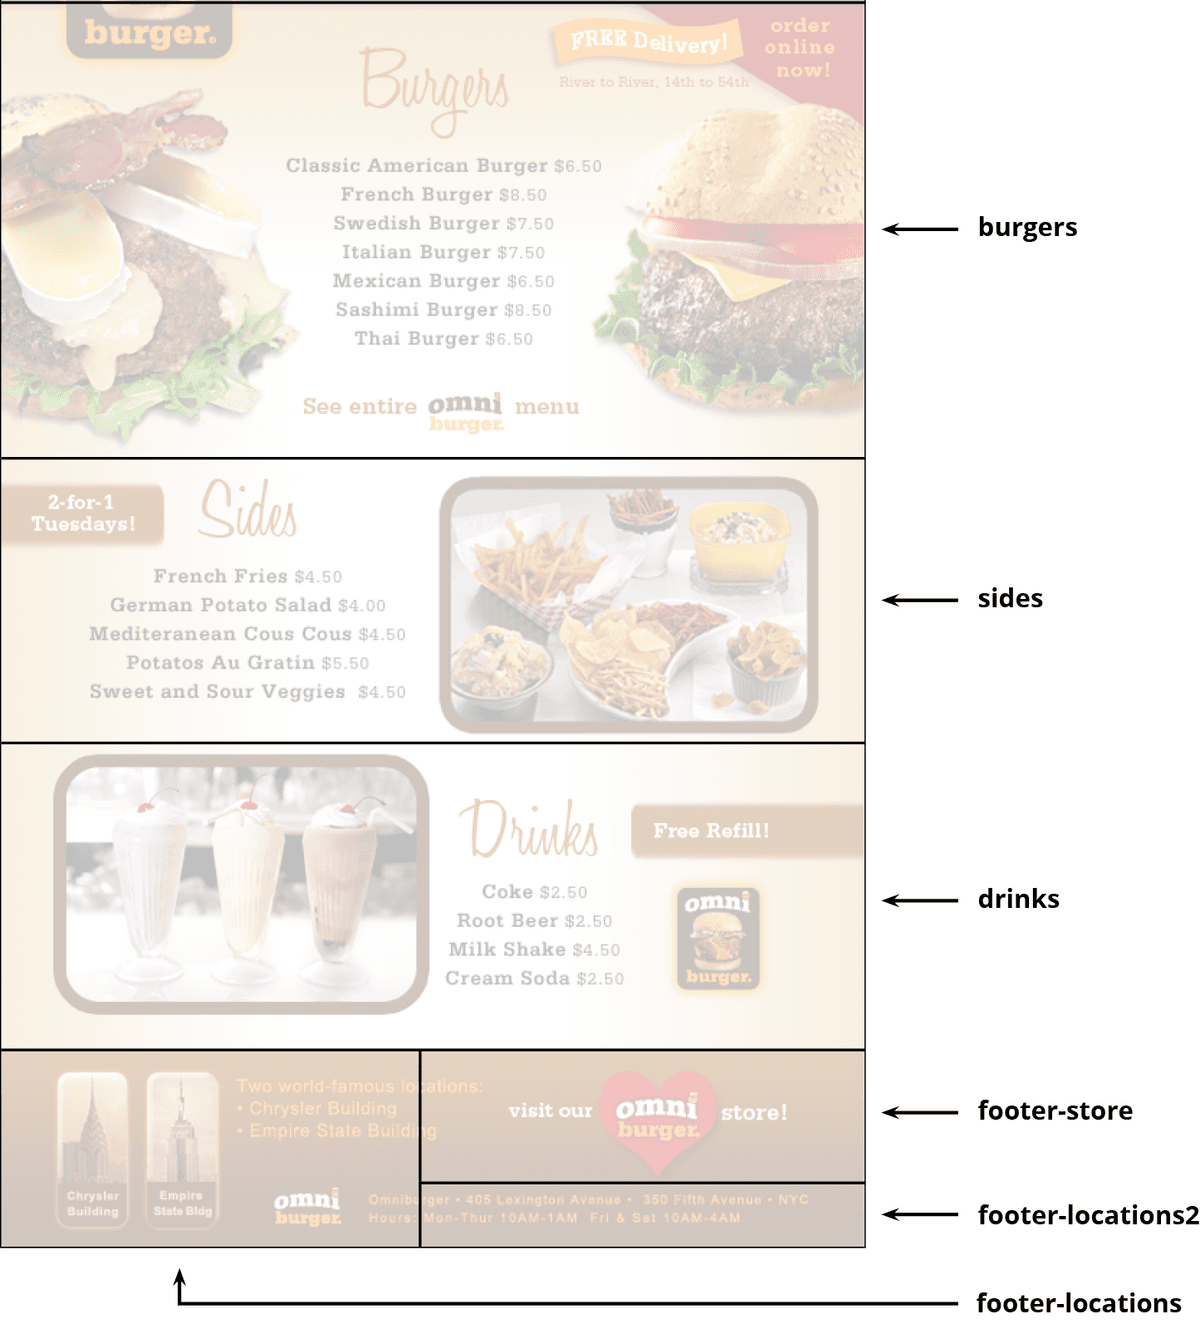
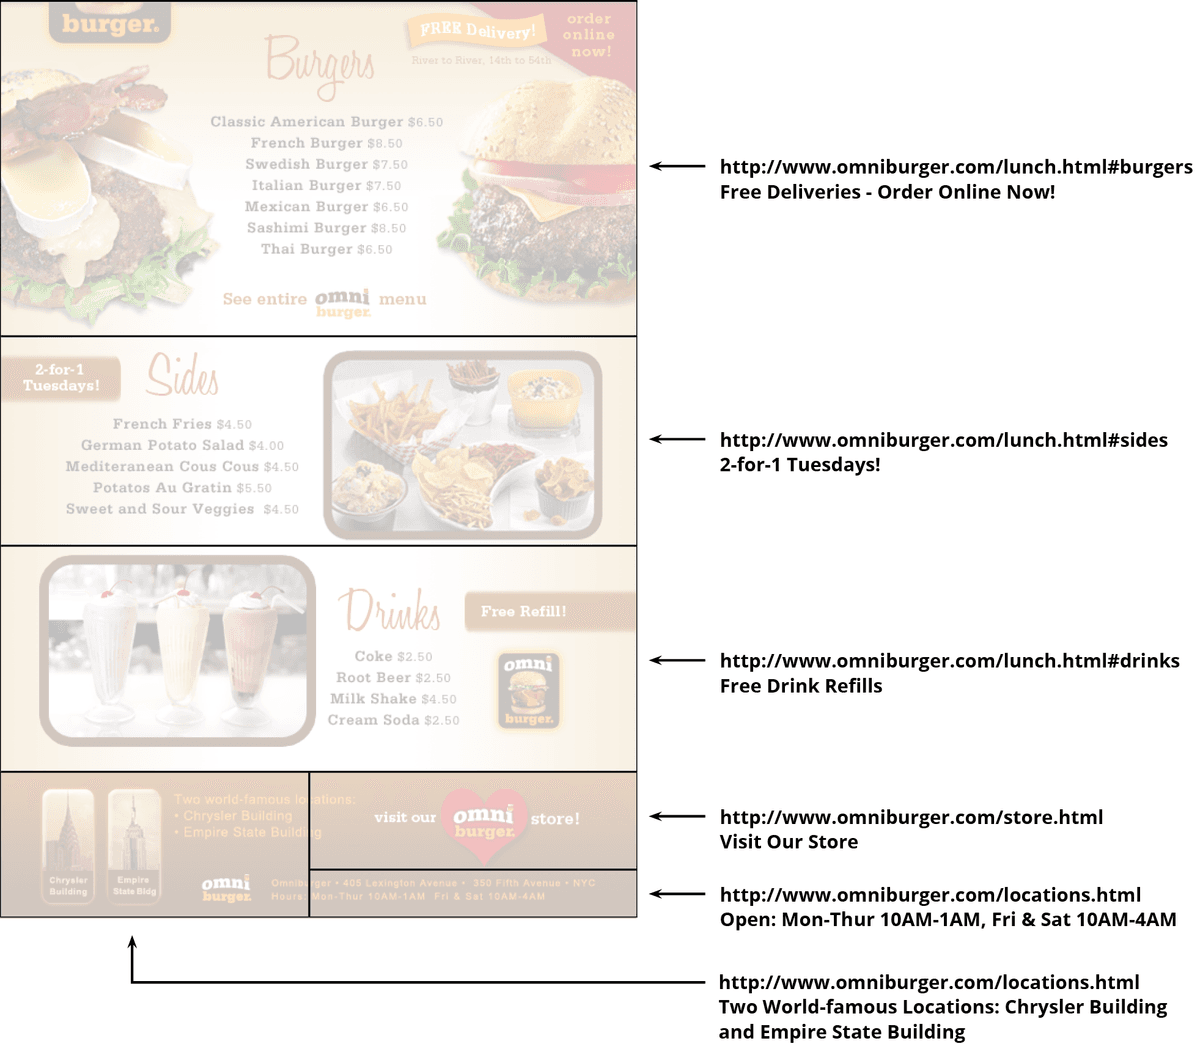
URL: http://www.omniburger.com/lunch.html ALT Tag: Lunch Specials Mon-Fri, 11am-4pm Continue setting URLs and ALT text according to the diagram below:
When finished, Save the file.
Keep it open; you’ll be using it in the next exercise.