TweenMax
What This Tutorial Covers
TweenMax Basics
Single tween creation with from, to, and fromTo.
Eases & Timing
Easing curves that add character to motion.
Modern GSAP
TweenMax features now consolidated into the unified gsap class.
Noble Desktop's JavaScript Development Certificate teaches modern JavaScript — the foundation behind GSAP and other animation libraries.
Dive deep into GreenSock's animation capabilities with our comprehensive tutorial, covering topics such as TweenMax, repeat features, callbacks, and creating seamless animations using GSAP.
Exercise Preview
Images courtesy of istockphoto: AtomA, Image #20846177; Jamie Farrant (enjoynz), Image #11822906
Previewing the Finished Animation
To take a look at the animation we’ll be building, open up Google Chrome.
Hit Cmd–O (Mac) or CTRL–O (Windows), navigate to Desktop > Class Files > yourname-GSAP Class > TweenMax, and double–click on finished.html.
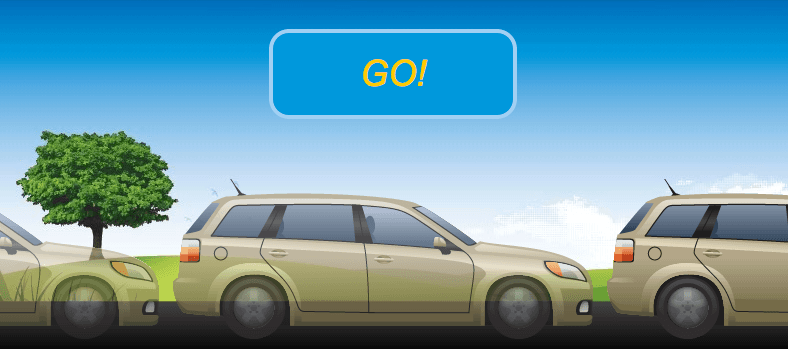
For a split second, all you see is a background. After a short delay, notice that a GO! message appears in the sky. A tan station wagon “drives” into the landscape from the left and moves to the right until it is off-screen, as shown in the exercise preview.
The rest of the animation involves various cars moving at a steady pace into and off the screen. In the screenshot with the second and third cars shown below, notice that the message changes to show how many times the tween has repeated.

Images courtesy of istockphoto: AtomA, Image #20846177; Jamie Farrant (enjoynz), Image #11822906
Once the tween ends, the message The End is displayed. Reload the page as many times as you need to get a feel for the animation.
Examining the DOM Structure & JavaScript
In a code editor, open start.html from the TweenMax folder.
Take a look at the code from lines 45–48 to familiarize yourself with the simple DOM structure, as shown below:
<div id="demo">
   <div id="message"><em>GO!</em></div>
   <div id="car"></div>
</div>
We are going to animate both of the elements enclosed within the div with the ID of demo. We’ll tween the element with an ID of message to initially display the word GO, then switch over to the repeat count for most of the animation, ending with an end message. We will also animate the element with an ID of car.
In the JavaScript around lines 58–61, notice the following four variables that we will use in our animation:
$(document).ready(function() { var $car = $("#car"), $message = $("#message"), count = 0, tween;- We will change the
$message’s text with callback functions. - The count variable keeps track of the number of times the animation has played.
- We will assign the tween variable to our TweenMax.to() tween that targets the
$car element.
- We will change the
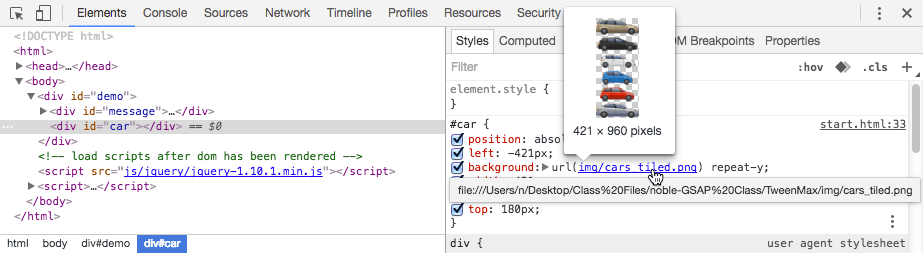
Preview start.html in a browser. Notice that all the cars appear in a single long vertical strip to the left of the landscape illustration in the demo div.
CTRL–click (Mac) or Right–click (Windows) on the cars and select Inspect to open the DevTools. Note that the strip of cars is a background image in the car div: