
Rocket Launch: Special Eases

Master Advanced GSAP Animation Easing Techniques

Animation Techniques Covered

RoughEase Animation

Create realistic jitter and shake effects for your rocket animations. Learn to customize strength and points parameters for precise control.

SteppedEase Transitions

Master frame-by-frame animations with abrupt steps instead of smooth transitions. Perfect for sprite-based flame animations.

Timeline Synchronization

Use labels to perfectly coordinate multiple animations. Achieve professional-level timing and sequence control.

Topics Covered in This GreenSock Tutorial:

Animating the Rocket with RoughEase, Animating the Flames with SteppedEase, Fine-tuning the Timing & Launching the Rocket

Exercise Preview

rocketlaunch easeexercise preview

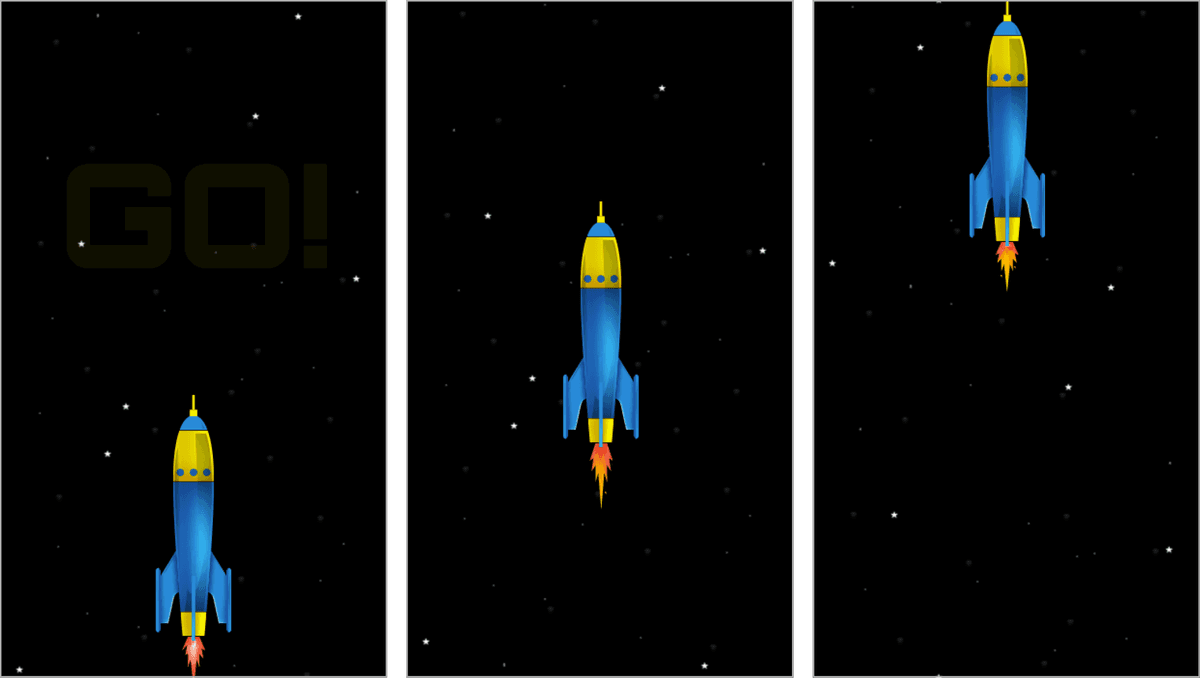
Image courtesy of istockphoto: visual go, Image #22009478

Exercise Overview

In this exercise, we'll elevate our Rocket Launch sequence by integrating two of GSAP's most powerful specialized eases: RoughEase and SteppedEase. These tools will transform a basic animation into something truly compelling—RoughEase will create realistic jitter and shake effects for our rocket's pre-launch sequence, while SteppedEase will seamlessly cycle through flame sprite animations. By the end of this tutorial, you'll understand how these advanced easing functions can add professional polish and visual sophistication to your animations with minimal code overhead.

  1. If you skipped the previous exercise or want to review the completed animation, navigate to Desktop > Class Files > yourname-GSAP Class > Rocket Launch Done > index.html and open it in your browser.

    Take a moment to observe the final result—this will help you understand where we're headed. If you're ready to dive in, proceed to the next step.

Project Setup Process

1

Open Project Files

Navigate to yourname-GSAP Class > Rocket Launch Special Eases > index.html in your code editor

2

Preview Current State

Check the browser to see the existing countdown animation from the previous exercise

3

Add Rocket Timeline

Insert the rocket animation code at the end of the timeline around line 82

Experimenting with RoughEase

Now we'll explore RoughEase, one of GSAP's most versatile specialty eases. This powerful tool can simulate everything from subtle mechanical vibrations to dramatic earthquake effects, making it invaluable for creating realistic motion.

  1. In your code editor, open yourname-GSAP Class > Rocket Launch Special Eases > index.html (or the entire folder if your editor supports project-based workflows).

  2. Preview the page in your browser to establish our starting point. The animation should be identical to where we concluded the previous exercise.

  3. Let's implement the core rocket animation. Add the following code at the end of your timeline (approximately line 82):

    .to($countDown, 0.5, {scale:2, opacity:0})
    .to($rocket, tl.duration(), {y:-400}, 0)

    Notice that this tween's duration equals the timeline's total duration(), with the position parameter set to 0. This configuration ensures the rocket animation begins immediately when the timeline starts and continues for the entire sequence duration—a common pattern for creating layered, synchronized animations.

  4. Save and preview in your browser. You'll see the rocket gliding smoothly upward as the countdown plays—functional, but lacking the dynamic energy we're after.

  5. Now let's add character to this motion. Incorporate RoughEase with its default settings to introduce realistic shake:

    .to($rocket, tl.duration(), {y:-400, ease:RoughEase.ease}, 0)
  6. Save and preview the results.

    The transformation is immediately apparent—the rocket's motion now appears choppy and erratic. While dramatic, this default behavior is just the beginning. RoughEase offers extensive customization options, allowing you to create effects ranging from subtle mechanical tremors to wildly chaotic movement patterns.

How RoughEase Works

RoughEase operates by taking a base easing function (defaulting to Linear.easeNone) and strategically inserting randomized deviation points along its curve. This creates controlled irregularities that simulate real-world imperfections in motion. The visual comparison below illustrates this concept:

roughease example

The ease accepts up to six optional parameters for precise control:

template: The foundational ease pattern that RoughEase modifies. Defaults to Linear.easeNone, though Circ.easeOut is demonstrated above for variety.
strength: Controls the maximum deviation distance from the template ease curve—higher values create more dramatic effects.
points: Defines the number of deviation points plotted along the ease curve—more points create finer detail but potentially more chaotic motion.
clamp: Boolean value that constrains deviation points within specific boundaries, preventing extreme outliers.
taper: Gradually increases or decreases roughness intensity toward the animation's beginning or end, enabling smooth transitions.
randomize: Boolean toggle between random deviation patterns (true) and predictable zigzag patterns (false).

For hands-on experimentation with these parameters and real-time curve visualization, explore the interactive Ease Visualizer at: greensock.com/docs/Easing/RoughEase

RoughEase Configuration Parameters

Template & Strength

Template defines the base ease pattern (default Linear.easeNone). Strength controls how far points wander from the template curve.

Points & Clamp

Points determine the number of plotted ease points. Clamp keeps points within specified ranges for controlled motion.

Taper & Randomize

Taper adjusts roughness at beginning or end. Randomize creates either even zigzag patterns or random value distributions.

RoughEase Visualization Tool

Visit greensock.com/docs/Easing/RoughEase to experiment with parameters and see resulting graphs in the Ease Visualizer.

Adding Strength & Points Parameters to RoughEase

The default RoughEase behavior provides a solid foundation, but the real power lies in customization. Let's refine our animation by experimenting with the strength and points parameters to achieve the exact effect we need.

  1. Return to your code editor and enhance the $rocket tween with increased strength:

    .to($rocket, tl.duration(), {y:-400, ease:RoughEase.ease.config({strength:5})}, 0)
  2. Save and preview the animation. The increased strength value creates significantly more dramatic motion—the rocket now exhibits much more pronounced movement variations.

  3. Let's explore the impact of the points parameter by adding it to our configuration:

    .to($rocket, tl.duration(), {y:-400, ease:RoughEase.ease.config({strength:5, points:100})}, 0)

    Adding more points creates additional deviation markers along the ease curve, resulting in much more frequent directional changes and creating an almost frantic bouncing effect.

  4. Save and preview this version. The result is visually striking but completely unsuitable for our rocket launch—the motion is far too chaotic and distracting.

  5. Now let's harness this power for a more subtle, realistic effect. Modify the coordinates to create gentle pre-launch tremors:

    .to($rocket, tl.duration(), {y:1, x:2, ease:RoughEase.ease.config({strength:5, points:100})}, 0)

    These minimal coordinate values restrict movement to just 1 pixel vertically and 2 pixels horizontally. Combined with our high-frequency RoughEase settings, this creates convincing mechanical vibration—exactly what we'd expect from a rocket preparing for launch.

  6. Save and preview this refined version. Perfect! The rocket now exhibits realistic pre-launch jitters that add tremendous authenticity to the scene.

    Feel free to experiment with different coordinate values to find your preferred intensity level. RoughEase demonstrates how sophisticated visual effects can be achieved with minimal code investment—a hallmark of professional animation development.

RoughEase Parameter Effects

FeatureLow ValuesHigh Values
Strength ParameterSubtle motion variationsDramatic range of motion
Points ParameterSmooth irregular motionExtreme bouncing effects
Coordinate Limitsy:1, x:2 for gentle shudderLarger values for dramatic effects
Recommended: Use coordinate limits like y:1, x:2 for subtle, professional-looking rocket jitter effects.

Animating the Flames with SteppedEase

With our rocket properly animated, it's time to bring the flame sprites to life. We'll use SteppedEase to cycle through the four flame states, creating the illusion of flickering rocket exhaust. This technique is fundamental in sprite-based animation and demonstrates how GSAP can streamline complex visual effects.

Our flame sprite sheet contains four distinct flame states, each 24 pixels wide. To create convincing animation, we need to shift the background position in precise 24-pixel increments while ensuring only one flame state is visible at any given moment.

  1. Return to your code editor and examine the CSS controlling our flames element (lines 33–41):

    #flames {
       position:absolute;
       top:249px;
       left:27px;
       width:96px;
       height:84px;
       background:url(img/flames.png);
       overflow:hidden;
    }

    The sprite sheet's total width is 96 pixels (24 pixels × 4 states). We'll eventually reduce the visible width to 24 pixels, but temporarily maintaining the full width helps illustrate SteppedEase behavior.

    Unlike traditional easing functions that provide smooth transitions, SteppedEase creates discrete jumps between values—essential for sprite animation where intermediate positions would create unwanted blending between frames.

How SteppedEase Works

SteppedEase divides any tween into a specified number of equal steps, with the animation jumping instantly between values rather than smoothly transitioning. This behavior is perfect for sprite animations, slideshow effects, and any scenario requiring discrete state changes.

For example, to move an element from X position 0 to 100 in exactly 5 discrete steps over 2 seconds:

TweenLite.to(element, 2, {x:100, ease:SteppedEase.config(5)});

This code would snap the element to positions: 20px, 40px, 60px, 80px, and finally 100px—no intermediate positions.

Explore SteppedEase interactively in the official documentation: greensock.com/docs/Easing/SteppedEase

  • Before implementing SteppedEase, let's create a basic background position tween. Add this code at the end of your timeline:

    .to($rocket, tl.duration(), {y:1, x:2, ease:RoughEase.ease.config({strength:5, points:100})}, 0)
    .to($flames, 2, {backgroundPosition:"-72px 0px", repeat:25})

    This tween shifts the background from the first frame (0px) to the fourth frame (-72px), demonstrating the full range of sprite positions.

  • Save and preview to observe the smooth transition between flame states—interesting, but not the discrete frame-by-frame effect we need.

  • Now let's implement SteppedEase to create proper sprite animation:

    .to($flames, 2, {backgroundPosition:"-72px 0px", ease:SteppedEase.config(3), repeat:25})

    Notice we're using 3 steps for 4 flame states. This is crucial: SteppedEase with 3 steps creates 4 distinct positions (including the starting position):

    Start Position: 0px (Frame 1)
    Step One: –24px (Frame 2)
    Step Two: –48px (Frame 3)
    Step Three: –72px (Frame 4)
  • Save and preview the result. Excellent! The flames now cycle through all four states with perfect positioning beneath the rocket.

  • Let's increase the animation speed to create more convincing flame flicker:

    .to($flames, 0.2, {backgroundPosition:"-72px 0px", ease:SteppedEase.config(3), repeat:25})
  • Now hide the extra flame states by reducing the visible width in the CSS (lines 33–41):

    #flames {
       position:absolute;
       top:249px;
       left:27px;
       width:24px;
       height:84px;
       background:url(img/flames.png);
       overflow:hidden;
    }
  • Save and preview the final result. The flame animation now displays rapid, realistic flickering with perfect frame transitions—exactly the professional effect we were targeting.

  • Understanding Step Positions

    A SteppedEase with 3 steps creates 4 positions: Start (0), Step One (-24), Step Two (-48), Step Three (-72). Each step represents a boundary position.

    SteppedEase Implementation

    1

    Calculate Sprite Dimensions

    Each flame image is 24 pixels wide, total sprite width is 96 pixels (24 x 4 frames)

    2

    Configure Step Count

    Use SteppedEase.config(3) to create 4 positions for the 4 flame states

    3

    Set Background Position

    Animate backgroundPosition from 0px to -72px to cycle through all flame frames

    Fine-Tuning the Timing

    Great animations require precise timing coordination. Our rocket launch should feel like a unified event where multiple elements activate simultaneously. Let's use GSAP's label system to synchronize our various animation components with surgical precision.

    1. Let's strategically plan our launch sequence. Several critical events must occur simultaneously when the countdown reaches GO!:

      • Flame sprites should become visible and begin animating
      • The rocket should begin its upward trajectory
      • The starfield background should start scrolling
      • All timing must be perfectly synchronized for maximum impact
    2. We'll implement a timeline label to coordinate these events seamlessly. Return to your code editor.

    3. Create a synchronization label at the beginning of the GO! sequence (around line 80):

      .set($countDown, {text:"GO!", scale:0}, "go").to($countDown, 0.5, {scale:2, opacity:0})

      This label creates a named reference point that other tweens can target, ensuring perfect synchronization regardless of timeline complexity.

    4. Apply the same label to our flame animation for precise timing coordination:

      .to($flames, 0.2, {backgroundPosition:"-72px 0px", ease:SteppedEase.config(3), repeat:25}, "go")
    5. Save and preview the refined timing. The flames now activate at the precise moment GO! appears, creating much tighter visual coordination.

      Let's enhance this further by hiding the flames until launch and making them appear dramatically at the critical moment.

    6. Add a complementary tween to create the flame entrance effect:

      .to($flames, 0.2, {backgroundPosition:"-72px 0px", ease:SteppedEase.config(3), repeat:25}, "go")
      .from($flames, 0.2, {y:-40, opacity:0}, "go")

      This creates a dramatic flame appearance—they fade in while sliding up from below, perfectly synchronized with the countdown completion.

    7. Save and preview this enhanced version. The flames now appear and animate with perfect timing at the "go" label, demonstrating GSAP's exceptional capability for complex animation synchronization.

    Synchronization Requirements

    0/4

    Launching the Rocket

    We've mastered the sophisticated easing techniques and timing coordination—now it's time for the dramatic finale. Let's complete our rocket launch sequence with the satisfying payoff of actual liftoff.

    1. Add the rocket launch tween to your timeline:

      .from($flames, 0.2, {y:-40, opacity:0}, "go")
      .to($rocket, 1, {y:-800, ease:Power2.easeIn}, "go")

      Using Power2.easeIn creates acceleration that feels natural for a rocket overcoming gravity—slow initial movement that rapidly increases speed.

    2. Save and preview the launch sequence. Houston, we have liftoff! The rocket now blasts off with convincing physics and perfect timing.

    3. Complete the illusion by animating the starfield background to simulate motion through space:

      .from($flames, 0.2, {y:-40, opacity:0}, "go").to($rocket, 1, {y:-800, ease:Power2.easeIn}, "go")
      .to($demo, 3, {backgroundPosition:"0px 4000px", ease:Power1.easeOut}, "go")

      The scrolling starfield creates the illusion of the rocket traveling through space, while Power1.easeOut provides a gradual deceleration that feels natural.

    4. Save and preview the complete animation. The effect is compelling and professional!

      Let's add one final touch by repositioning the rocket to appear as though it's launching from a ground-based pad. This creates better visual storytelling by establishing the launch context.

    5. Modify the rocket's initial CSS position (around line 22):

      #rocket {
         position:absolute;
         top:446px;
         left:160px;
         width:78px;
         height:254px;  
      }
    6. Save and preview the final animation sequence.

      Excellent! We've created a sophisticated, multi-layered animation featuring 10 coordinated tweens working in perfect harmony. This exercise demonstrates how RoughEase and SteppedEase can dramatically enhance animation quality while streamlining development workflow. These specialized easing functions represent just a fraction of GSAP's professional animation toolkit—mastering them opens doors to increasingly complex and visually impressive projects.

    Final Animation Sequence

    go label

    Countdown Completes

    GO text appears and scales up with fade effect

    go label

    Flames Ignite

    Flames appear from bottom and begin rapid animation cycle

    go label

    Rocket Launches

    Rocket moves upward with Power2.easeIn for realistic acceleration

    go label

    Background Scrolls

    Starry background creates motion parallax effect

    Animation Specifications

    10
    synchronized tweens in sequence
    24px
    pixel flame sprite width
    4
    flame animation states

    Key Takeaways

    1RoughEase creates realistic jitter effects by inserting random points outside the natural ease curve, perfect for simulating mechanical vibration.
    2SteppedEase provides abrupt transitions in specific steps rather than smooth animations, essential for frame-by-frame sprite animations.
    3Timeline labels enable precise synchronization of multiple animations, allowing complex sequences to trigger simultaneously.
    4RoughEase accepts six optional parameters including template, strength, points, clamp, taper, and randomize for complete motion control.
    5Coordinate limits in RoughEase (like y:1, x:2) create subtle professional effects instead of overwhelming motion ranges.
    6SteppedEase with n steps actually creates n+1 positions, important for calculating sprite frame positions correctly.
    7CSS overflow:hidden combined with precise width settings ensures clean sprite frame transitions without visual artifacts.
    8GSAP's ease visualizer tools provide real-time parameter experimentation for understanding complex easing behaviors.

    RELATED ARTICLES