Prototypes Triggers: After Delay (Time Interactions)
What This Tutorial Covers
After Delay
Auto-advance after specified milliseconds.
Splash Screens
Common use case: app intro animations.
Looping States
Combine delays for continuous animation cycles.
Noble Desktop's UX/UI Design Certificate teaches Figma in depth alongside the full UX process.
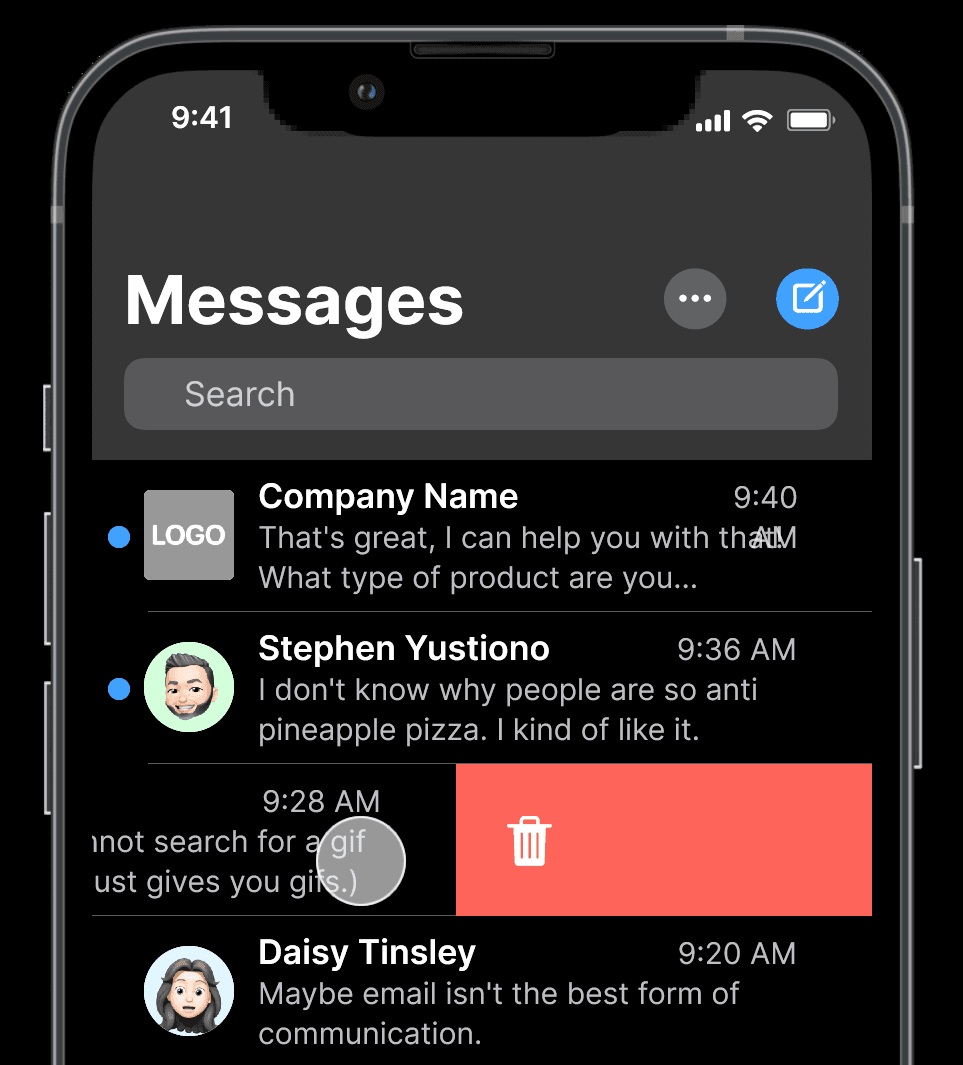
Learn to add a drag interaction, time interaction, and keystroke in Figma through this step-by-step tutorial, starting with designing a "drag to delete" feature for a Messages app.
Exercise Preview
Opening the File
In Figma, if you’re not on the homescreen (file browser), do the following:
- In the Desktop app: Click the
 Home tab (Mac users can also choose File > Open File Browser).
 - In the Web app: At the top left, click the Main menu button
 and choose Back to files.
- In the Desktop app: Click the
- To open a local file, click
 Import file (may be an icon near the top right).
 Navigate into Desktop > Class Files > Figma Class and double–click on Messages App.fig to choose it.
Once the file has uploaded, click Done and double–click on the file to open it.
Adding a Drag Interaction
- In the right panel, at the top click on Prototype.
- In the first frame Messages, select the Erin Steed message row.
- A blue circle will appear to the right of the row (far outside the frame). Drag the blue circle to the Delete frame.
In the Interaction details panel that opens on the right:
- Change On tap to On drag.
- Under Animation, make sure Smart animate is selected.
- At the top right of the window, click Present
 or hit Cmd–Option–Return (Mac) or CTRL–ALT–Enter (Windows).
 - Drag right to left over the Erin Steed message row to reveal the red delete bar. If you don’t drag very far it will snap back to the initial appearance, but if you drag far enough it will snap so the full red bar is shown.
Close the presentation tab/window.
Adding a Time Interaction (After Delay)
We need the red delete row to disappear without us doing any additional interaction. How do we tell Figma to do something automatically? With a time interaction!
- Click on the Delete frame’s name to select it.
- Duplicate it by hitting Cmd–D (Mac) or CTRL–D (Windows).
- Double–click on the new frame’s name Delete and change it to Done.
- In the Done frame, select the red delete row.
In the Design panel:
- Set H (height) to 0
- Under Layer, change the Opacity from 100% to 0%
- The lower messages must be moved up to fill the empty space. We’ve grouped all those messages, so drag them up (hold Shift as you drag up) to fill the gap.
- In the right panel, at the top click on Prototype.
- Select the Delete frame by clicking its name.
- Hover over any side of the frame and a blue circle will appear. Drag the blue circle to the Done frame.
In the Interaction details panel that opens on the right:
- Change On tap to After delay.
- Change 800ms to 1ms (that’s the shortest delay Figma allows, which is virtually instantaneous).
- Under Animation, change Instant to Smart animate.
- Click in an empty area of the canvas to make sure nothing is selected.
- At the top right of the window, click the Present button .
- Drag right to left over the Erin Steed message row and release to see the red bar appear and then animate away!
Close the presentation tab/window.
Adding a Keystroke
Finally, let’s add a keystroke to undo the message deletion.
- Select the Done frame by clicking its name.
- Hover over any side of the frame and a blue circle will appear. Drag the blue circle to the Messages frame.
In the Interaction details panel that opens on the right:
- Change On tap to Key/gamepad.
- Click on Click to select and press Cmd–Z (Mac) or CTRL–Z (Windows).
- Under Animation, make sure Smart animate is selected.
- Click in an empty area of the canvas to make sure nothing is selected.
- At the top right of the window, click the Present button .
- Drag right to left over the Erin Steed message row to delete the message.
- Hit Cmd–Z (Mac) or CTRL–Z (Windows) to undo and the Erin Steed message should reappear!
Close the presentation tab/window.