Exporting Assets for Web: SVG, JPEG, & PNG
Master Professional Asset Export for Modern Web Design
Asset Export Formats for Web
SVG (Vector Graphics)
Perfect for logos and icons. Scalable at any resolution without quality loss. Ideal for crisp graphics on all screen types.
JPEG (Pixel Graphics)
Best for photographs and complex images. Excellent compression but no transparency support. Smaller file sizes for photos.
PNG (Transparent Graphics)
Supports transparency for layered compositions. Larger file sizes but essential when you need transparent backgrounds.
Exercise Preview
File Access Methods
Desktop App Navigation
Click the Home tab or use File > Open File Browser to access your file library
Web App Navigation
Click Main menu button and choose Back to files to return to file browser
File Import Process
Use Import file button to upload local files, navigate to Desktop > Class Files > Figma Class > Pulse
Opening or Uploading the File
If you still have Pulse—Prototyping Done.fig open from the previous exercise, you can skip ahead to the export section. Otherwise, follow these steps to open the file:
Navigate to Figma's home screen (file browser) using the method appropriate for your platform:
- In the Desktop app: Click the
 Home tab (Mac users can also choose File > Open File Browser).
 - In the Web app: Click the Main menu button
 and choose Back to files.
- In the Desktop app: Click the
If you previously uploaded the file, double–click on Pulse—Prototyping Done to open it.
If you haven't uploaded the file yet, click
 Import file (located near the top right). Then navigate to Desktop > Class Files > Figma Class > Pulse and double–click on Pulse—Prototyping Done.fig to open it.
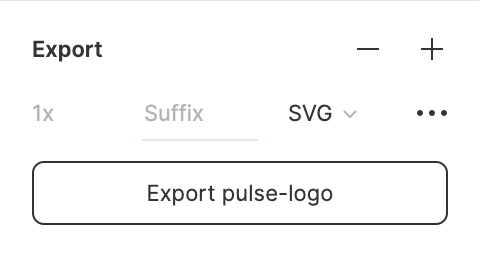
The layer name becomes the exported file name. Use web-friendly names with dashes instead of spaces (e.g., pulse-logo instead of Pulse logo) to ensure compatibility across all web servers and platforms.
SVG Export Checklist
Ensures precise selection of the intended graphic element
Prevents file naming conflicts and improves organization
SVG maintains vector quality at any scale
Maintains organized file structure for web development
Figma cannot set JPEG quality levels. For file size control, export as PNG first, then use Photoshop to create optimized JPEG versions with custom compression settings.
2x Image Compression Strategy
Recommended JPEG Quality Settings
| Feature | 1x Images | 2x Images |
|---|---|---|
| Photoshop Quality | 60% | 30% |
| Compression Level | Conservative | Aggressive |
| File Size Impact | Larger per pixel | Smaller per pixel |
| Visual Quality | Direct viewing | Scaled down display |
Exporting Pixel-Based Graphics As PNG
PNG format excels when you need to preserve transparency or when working with graphics that have sharp edges and limited color palettes. Unlike JPEG, PNG uses lossless compression, making it ideal for screenshots, UI elements, and any image requiring a transparent background.
- Switch back to the Figma application or browser tab.
Return to Figma's home screen using your platform's appropriate method:
- Desktop app: Click the Home tab (Mac users can also access via File > Open File Browser).
- Web app: Click the Main menu button and select Back to files.
- Desktop app: Click the
If you have iTastify Design Done available from a previous exercise, double–click to open it.
If the file isn't available, follow these steps to import it:
- Click Import file (typically located near the top-right corner).
- Navigate to Desktop > Class Files > Figma Class and double–click iTastify Design Done.sketch. Note that Figma seamlessly imports Sketch files, maintaining most design elements and layer structures.
- After the upload completes, click Done and double–click the file to open it.
- If prompted about missing fonts, select Arial as a replacement, or continue without font substitution since we're focusing solely on graphic elements.
- Click
Locate the hand holding an iPhone near the top of the frame. This image requires transparency preservation for proper integration with the webpage's background pattern. Since JPEG doesn't support transparency, PNG is the only viable option for this asset type.
The image is nested within multiple groups. Hold Cmd (Mac) or Ctrl (Windows) while clicking directly on the hand holding the iPhone to select through the group hierarchy.
- With the photo selected, navigate to the Design panel's Export section and click the Plus(+) button.
- Confirm that the file format dropdown displays PNG—this is the default and correct format for transparent graphics.
- Add a high-resolution variant by clicking the Plus(+) button again, creating the essential 2x export for Retina and high-DPI displays.
Click the Export iphone-hand-mockup button to generate both resolution variants.
- Web app: Files automatically download to your Downloads folder.
- Desktop app: When prompted, navigate to Desktop > Class Files > Figma Class > Pulse > Web Assets and click Save to maintain organized asset management.
- Close this file to return to the main workspace, keeping your project organized and preventing confusion between different design files.
Figma can open and work with Sketch files seamlessly. When importing Sketch files, you may encounter missing font warnings, but you can substitute with Arial or ignore for graphics-only work.
When to Choose PNG Over JPEG
Transparency Requirements
PNG supports transparent backgrounds essential for layered web compositions. JPEG cannot preserve transparency channels.
Composite Graphics
Images that need to blend with background patterns or colors require PNG format to maintain visual integration.
UI Elements
Interface components like buttons, icons with shadows, or decorative elements benefit from PNG transparency support.
Exporting All Marked Assets in One Pass
Professional workflows often involve exporting dozens of assets across multiple formats and resolutions. Rather than exporting each asset individually, Figma's batch export feature enables you to process all marked assets simultaneously, dramatically improving efficiency and reducing the likelihood of missed exports.
- Access the batch export feature by clicking the Main menu and selecting File > Export (Mac users can access this via the top menu bar's File > Export).
The Export panel displays all assets you've marked for export across your entire document. Review the list carefully, unchecking any assets you don't need for the current export batch. When ready, click Export to process all selected items.
- Web app: Multiple files are automatically zipped and sent to your Downloads folder. You'll need to unzip the archive to access individual assets.
- Desktop app: You'll be prompted to select a destination folder for all exported files, maintaining your organized asset structure.
Professional Tip: Establish a consistent export routine by marking all assets for export during the design phase, then using batch export at project milestones. This prevents the common issue of discovering missing assets during development handoff.
Batch Export Process
Mark All Assets
Set export formats and resolutions for all desired assets before initiating batch export
Access Export Menu
Use Main menu > File > Export or File menu > Export to open batch export panel
Review and Execute
Uncheck unwanted items in export panel, then click Export to process all marked assets
Web app users receive multiple files as a zip download that requires extraction. Desktop app users can choose the destination folder for direct file placement.
Optional Bonus: Exporting Frames (Artboards) As PDF
While Figma's collaborative sharing features represent the modern standard for design handoffs, PDF exports remain valuable for client presentations, design documentation, and offline reviews. Multi-page PDFs provide a comprehensive view of your design system that stakeholders can review without requiring Figma access.
- If you closed the Pulse—Prototyping Done file, reopen it to access the complete frame structure.
- Click on an empty area of the canvas to ensure no individual elements are selected—this ensures all frames are included in the PDF export.
Access the PDF export function by clicking the Main menu
and selecting File > Export frames to PDF (Mac users can access this via the menu bar's File > Export frames to PDF).- Web app: The PDF generates automatically and downloads to your Downloads folder.
- Desktop app: You'll be prompted to choose a save location. Navigate to Desktop > Class Files > Figma Class > Pulse > Web Assets and click Save to keep your project assets organized.
- Return to the Web Assets folder on your Desktop to examine the exported PDF.
- Double–click the PDF file to open it in your default PDF viewer and explore its structure.
- Navigate through the PDF pages to verify that each Figma frame has been converted to a separate page, maintaining the logical flow of your design sequence.
- Close the PDF viewer when you've finished reviewing the export quality and page organization.
- Return to Figma to continue with your next design tasks.
- Close the Figma file to maintain workspace organization and optimize application performance.
PDF Export vs Online Sharing
| Feature | PDF Export | Figma Online Sharing |
|---|---|---|
| Best Use Case | Client presentations | Developer handoff |
| Interactivity | Static pages only | Interactive prototypes |
| File Management | Downloadable file | Live web link |
| Update Process | Re-export required | Automatically updated |
Key Takeaways