Inserting Blocks with the Tool Pallets & Dynamic Blocks
Essential AutoCAD Commands
OFFSET
Create parallel lines at a set distance — fundamental drafting move.
TRIM / EXTEND
Clean intersection of geometry — speeds up every drawing.
MIRROR
Reflect geometry across an axis — symmetric layouts in seconds.
ARRAY
Rectangular or polar duplication — handles repeating elements.
Noble Desktop's AutoCAD Certification teaches drafting, layouts, blocks, and dimensions.
Learn how to insert blocks with the tool pallets and utilize dynamic blocks in this comprehensive AutoCAD tutorial that walks you through the process step by step.
Exercise Preview
Inserting Blocks with the Tool Pallets & Dynamic Blocks
Keep the Blocks-Studio.dwg open. Press CTRL–3 to open the Tool Pallets Window. You can also open the Tool Pallet window in the Standard Toolbar or the Pallets Panel in the View tab of the Ribbon (as shown below). The Tool Pallets Window is made up of tabs from which you can access tools, tables, hatches, 3D materials, lights, cameras, visual styles and blocks.

Only some of the tabs will be displayed, to see all the available tabs, Right–click on small square of overlapping tabs under tab names. Click on the Architectural Tab so you can access the architectural blocks.
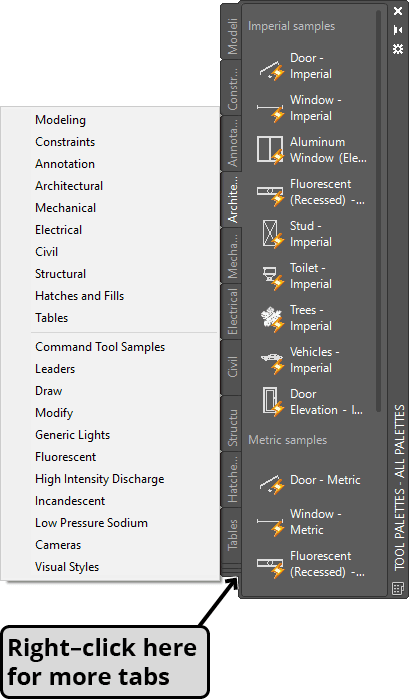
Unlike the Insert command which can only access blocks that are already attached to the drawing, the Tool Palettes access blocks that are stored on the hard drive, so you can insert them in any drawing at any time without having the unused blocks attached to your drawings. The blocks available are default blocks that are installed with AutoCAD. You can make custom pallets accessing your own blocks, which will be covered in the Level 2 class.
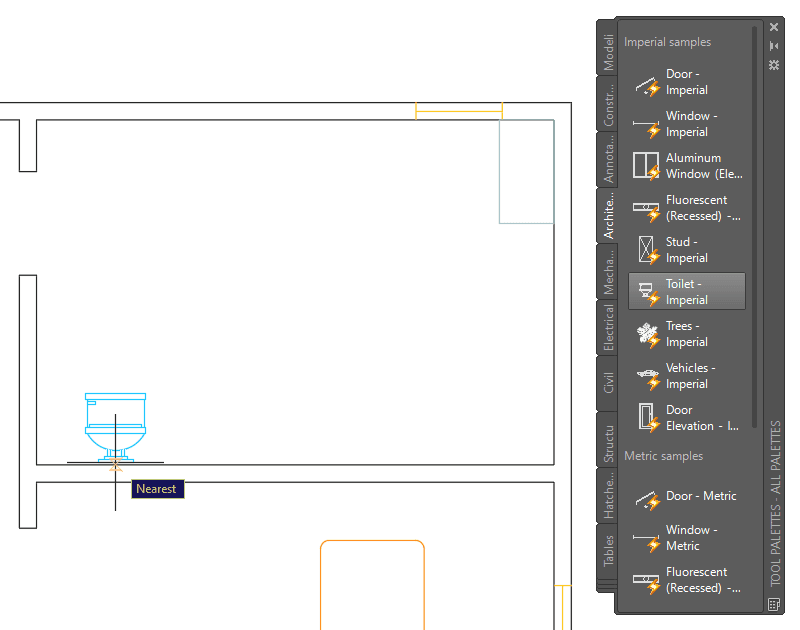
Change the Current Layer to A-Plumbing. In the Architectural Tab of the Tool Palette Window, click the Toilet-Imperial block. Move the cursor away from the palette and Right–click. Select Nearest from the Snap Overrides menu. Place the block against the bottom wall toward the left as demonstrated below. This room will be the bathroom.
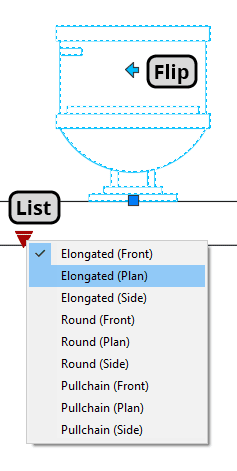
You may notice that this block is incorrect. The block is an elevation (front) view, but the drawing is a plan (top down) view. Fortunately, this is a Dynamic Block. Dynamic Blocks have special grips that will give you options depending on what actions were added to the block when it was created. You will learn how to use Dynamic Blocks in this class, but creating them will be covered in Level 3. In this exercise you will insert several Dynamic Blocks and all of the dynamic grips will be covered.
Click on the block to select it. Two dynamic grips will appear, Flip and List, as shown below. On this block, the Flip grip will flip the handle to the other side, and List grip will show options to see different versions of the block at different views. Click the Flip grip to see the effect. Click the List grip and select Elongated (Plan). The block will change to a top down plan view.
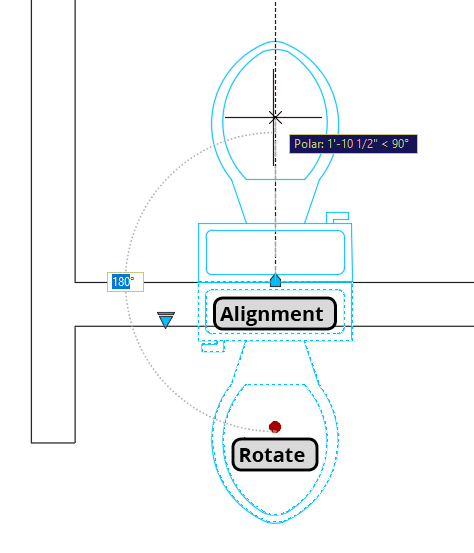
Now the block is at the correct view, but it’s at the wrong angle and intersects the wall. You can fix this problem easily because in this view there is a Rotate grip. The Rotate grip is the round grip in the middle of the seat. In this view there is also an Alignment grip at the back of the block, as shown below. Click the Rotate grip and rotate the block 180˚ so it faces into the bathroom as shown in the diagram.
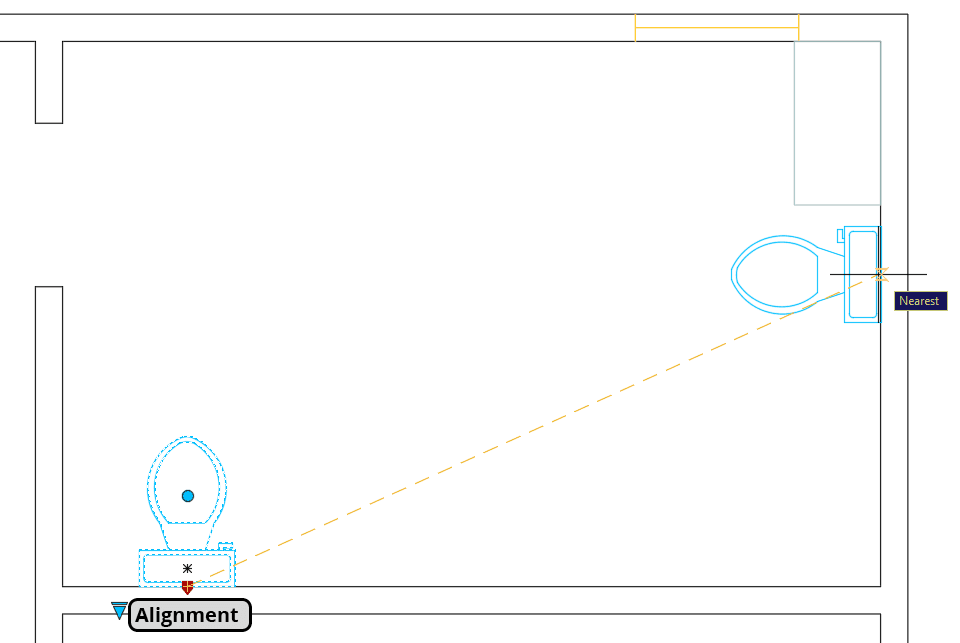
Now you will reposition the toilet against the far wall of the bathroom. The Alignment grip will make this easy. The Alignment grip will automatically rotate the edge of a Dynamic Block with the edge of another object. Click on the Alignment grip and move the block to the back wall of the bathroom. The block will rotate so the back of the block is against the wall and the Nearest snap will automatically be activated, and will deactivate when finished, unless you had Nearest turned on before clicked the Alignment grip.
The default Door-Imperial block is very useful, but can be difficult to place because of where its alignment grip is positioned. In order to place the Door block properly, you will need to use the Rotate tool
 . Click on the Door-Imperial block in the Architectural tab of the Tool Palette Window. Place the base point of the block at the lower-left corner of the bathroom door opening. The door will not be oriented correctly.
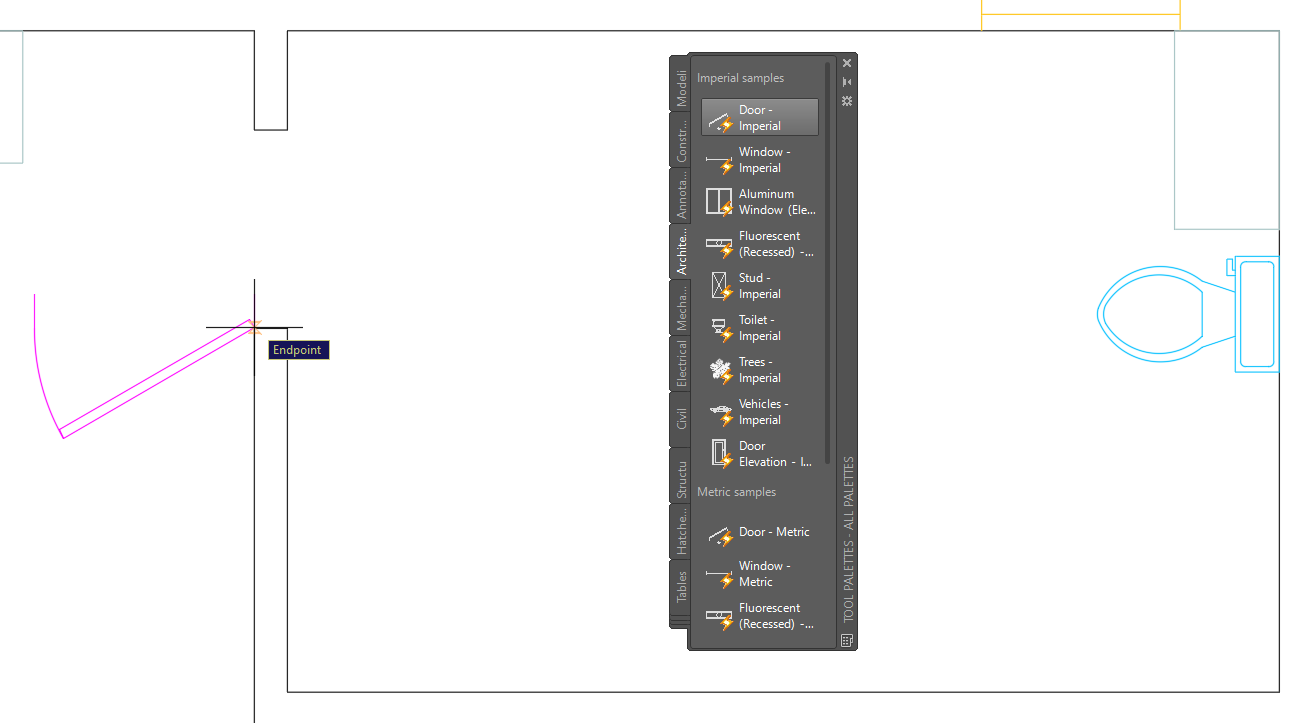
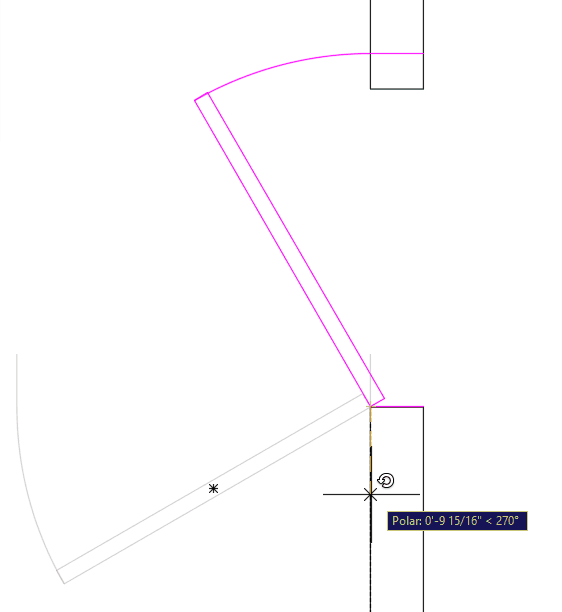
Start the Rotate tool
and select the Door.- For the base point, click on the hinge of the door, the same as the base point of the block.
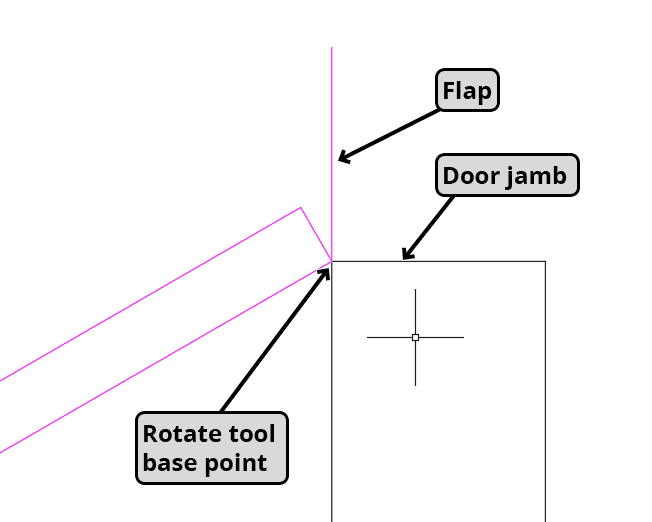
- The key to placing the Door block is to rotate the flap on the block so that it’s pressed against the door jamb.
Click on the Door-Imperial block to activate the Dynamic Block grips. Click on the Lengthen/Shorten grip and shorten the door to 3
'so it matches the door opening.- Click on both the Horizontal and Vertical Flip grips so the door will open on the inside of the bathroom and the door knob would be on the left when exiting the room.

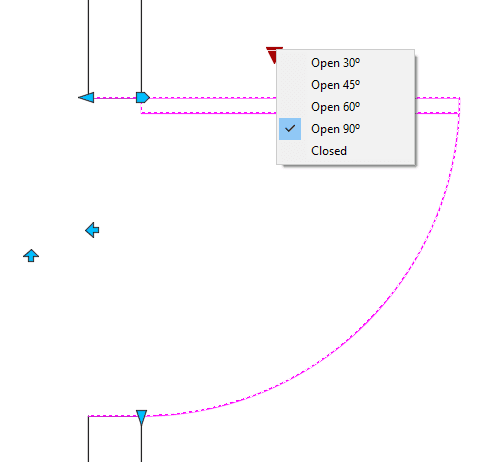
- Click on the List grip and choose Open 90˚. Press Escape to deselect the block.