April 1, 2026Kalika Kharkar Sharma/12 min read

Zoo Promo: Adding Subtitles & Exporting in Premiere Pro

Master Professional Video Subtitling and Project Management

Key Skills You'll Master

Professional Subtitling

Learn to add synchronized subtitles with proper typography and positioning using Premiere Pro's Type tool and Vector Motion controls.

File Management

Master project organization techniques including finding missing media, relinking files, and using Project Manager for file collection.

Export Optimization

Configure professional export settings with H.264 encoding, VBR 2-pass bitrate, and maximum render quality for client delivery.

Topics Covered in This Premiere Pro Tutorial:

Adding Professional Subtitles with the Type Tool, Finding and Relinking Missing Files, Collecting Project Assets with the Project Manager

Exercise Preview

ex prev zoo subtitles

Exercise Overview

In this comprehensive exercise, we'll complete the zoo promotional video by implementing professional subtitles and addressing critical client revisions. This workflow mirrors real-world post-production scenarios where accessibility requirements and client feedback drive final delivery specifications. You'll master essential file management techniques that prevent costly project delays and learn industry-standard subtitle formatting that ensures broadcast compliance.

Project Prerequisites

Ensure you have completed exercises 2A-2B before starting. If not, open 'ZooProject-Ready for Subtitles.prproj' from the Finished Projects folder to catch up.

Previewing the Final Video

  1. Open the revised final movie, Zoo-Promo-Revised.mov, from the Desktop > Class Files > Premiere Pro Class > Zoo Promo > Finished Movie folder.

  2. Play the video, taking special notice of the refinements we haven't implemented yet:

    • The beginning of the voice-over has been tightened (removing the Essex County New Jersey reference for broader appeal).
    • Professional subtitles appear throughout the video, precisely synchronized with the narration for optimal accessibility compliance.
  3. Keep this reference video accessible as you work—it serves as your quality benchmark for the final output.

  4. You should still have yourname-ZooProject open in Premiere Pro. If you closed it, re-open it now. We strongly recommend completing the previous exercises (2A–2B) before starting this one, as they establish the foundational timeline structure. If you haven't finished them, do the following:

    • Open ZooProject-Ready for Subtitles.prproj from Desktop > Class Files > Premiere Pro Class > Zoo Promo > Finished Projects.
    • Save the file as yourname-ZooProject.prproj into Desktop > Class Files > Premiere Pro Class > Zoo Promo.

Adding Subtitles

Modern video content requires accessible subtitles for compliance with broadcasting standards and to reach wider audiences. We'll create broadcast-quality subtitles using Premiere Pro's Type tool, ensuring proper placement within safe margins and optimal readability across all playback devices.

  1. With the Timeline panel selected, hit the Home key (or Fn–Left Arrow) to move the playhead to the beginning.

  2. In the Tools panel, choose the Type tool type tool.

  3. In the Program Monitor, draw a text box in the bottom portion of the text safe margin. This ensures subtitle visibility across all broadcast and streaming platforms:

    draw text box for subtitles

  4. In the Effect Controls panel, expand the Text section if it isn't already.

  5. Under Source Text, click into the font menu and choose Arial Regular. Arial remains the industry standard for subtitles due to its exceptional legibility at small sizes and universal availability.

  6. Below that, change the font size to 68. This size provides optimal readability on both large displays and mobile devices.

  7. Click the Center text icon center text.
  8. As shown below, click the Bottom align center icon. This positioning follows broadcast standards for subtitle placement:

    bottom align text

  9. Under Appearance, set the Fill color to white (#FFFFFF). White text provides maximum contrast against most video content.

  10. To streamline our workflow, we've prepared a formatted text file containing all subtitle content. On the Desktop, navigate to Class Files > Premiere Pro Class > Zoo Promo and open Zoo-script.rtf.

  11. Select and copy the first two lines:
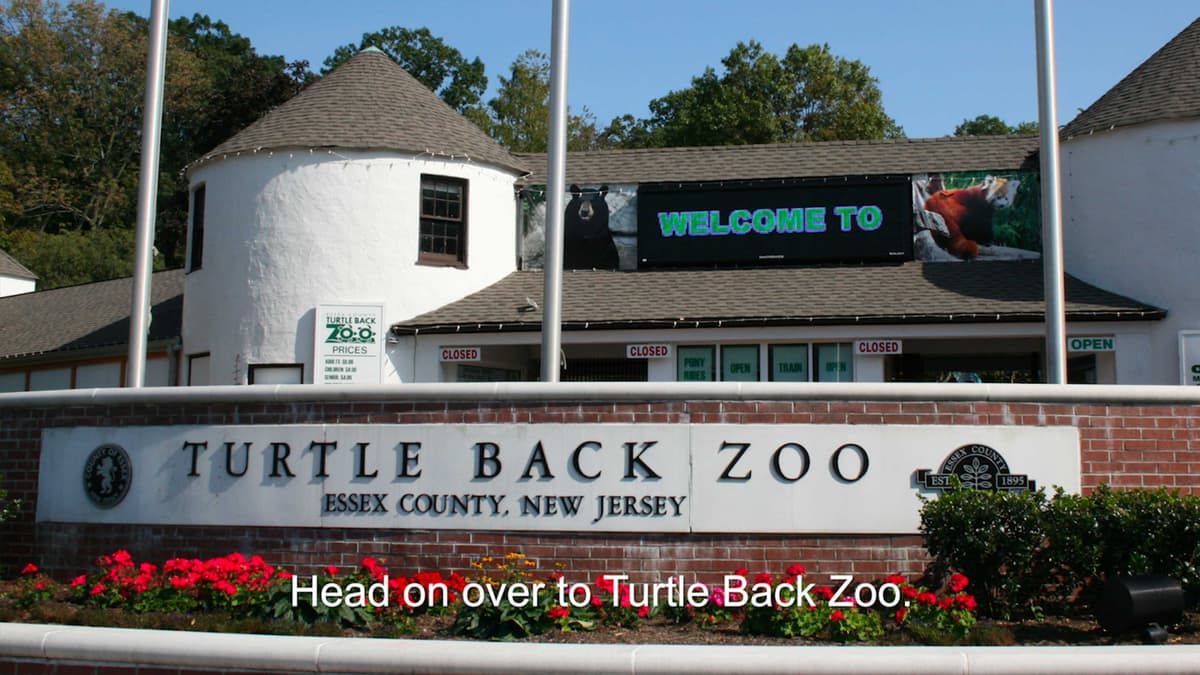
    Head on over to Essex County NJ's Turtle Back Zoo.

  12. Leave the text file open and switch back to Premiere.

  13. With the Type tool type tool, click into the text box and paste the text.

  14. Move the playhead forward so you can see the text overlaid on the intro image.

  15. Professional subtitles require enhanced legibility through drop shadows, especially when overlaying complex backgrounds. In Effect Controls, under Appearance, check on Shadow and configure these broadcast-standard settings:
    • Opacity shadow opacity icon: 50%
    • Angle shadow angle icon: 135°
    • Distance shadow distance icon: 5
    • Blur shadow blur icon: 59
  16. In the Effect Controls, expand the Vector Motion section if needed.
  17. Under Vector Motion, adjust the vertical positioning (2nd number to the right of Position) to prevent interference with the Turtle Back Zoo signage. We found that 960 607 provides optimal placement while maintaining visual hierarchy.

    Setting Up Professional Subtitles

    1

    Position and Typography

    Use Type tool to draw text box in bottom safe margin. Set Arial Regular, size 68, center-aligned with white fill color.

    2

    Add Drop Shadow

    Apply shadow with 50% opacity, 135° angle, 5 distance, and 59 blur for improved legibility over video content.

    3

    Precise Positioning

    Use Vector Motion controls to set vertical position to 960 607, ensuring text doesn't interfere with existing graphics.

Vector Motion Vs. Motion

Introduced in recent Premiere Pro versions, Vector Motion preserves the infinite scalability of vector text and graphics while eliminating the cropping and pixelation issues that plagued the traditional Motion transform options. This advancement is particularly crucial for subtitle work, where text clarity directly impacts accessibility compliance.

Throughout this course, we prioritize Vector Motion for all text and graphics transformations. If you're working with an older version of Premiere Pro, you can apply identical values to the standard Motion controls to achieve comparable results, though with some quality limitations.

Vector Motion vs Regular Motion

FeatureVector MotionRegular Motion
ScalabilityInfinite scale-ability maintainedLimited scaling before pixelation
QualityNo cropping or pixelationCropping and pixelation possible
File SupportOptimized for vector text/graphicsGeneral transform controls
Recommended: Always use Vector Motion for text and vector graphics when available in newer Premiere Pro versions.

Adding the Rest of the Subtitles

Now we'll segment our subtitle track to match the pacing of the voice-over, creating properly timed subtitle segments that enhance rather than distract from the viewing experience.

  1. In the Tools panel, choose the Selection tool selection tool.

  2. We need to segment the subtitle text to create individual subtitle clips that correspond to each voice-over phrase. This approach ensures precise timing control and professional subtitle pacing. Each phrase conveniently aligns with our existing video and photo clips, simplifying the editing process.

    In the Timeline, zoom out using the zoom slider zoom slider (drag the right circle rightwards) so you can see the entire Timeline.
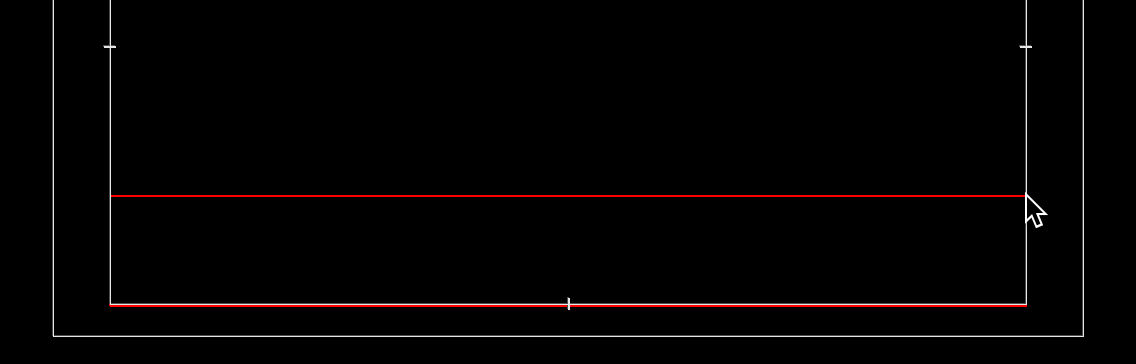
  3. Hover over the end of the text clip to reveal the red bracket right red bracket and extend the subtitle clip to cover the entire timeline duration.

  4. Using the Down Arrow key (for precise clip navigation) and the Razor (Cut) tool razor tool, segment the subtitles track to match the edit points of the video and photo clips (3;10, 5;21, 6;21, etc.). This creates synchronized subtitle segments that respect the natural rhythm of the content.

  5. Hit V to return to the Selection tool after completing the cuts.

  6. Time to customize each subtitle segment. Move the playhead to the beginning of the second clip at 3;10.

  7. Double–click the second subtitle clip to select it for editing.

  8. Return to the subtitle text file.

  9. Copy the next line: We have a wide variety of animals, including

  10. Switch back to Premiere.

  11. Choose the Type tool type tool.

  12. Click into the text box, select all existing text, and paste the new subtitle content.

  13. Click into the Timeline and hit the Down Arrow to advance to the next clip.

  14. For this simple one-word subtitle, we can type directly. Replace all text in the text box with giraffes.

  15. Continue this process for the following bears clip, replacing the subtitle text accordingly.

    NOTE: Remember to select the Timeline panel each time to enable the Down Arrow navigation shortcut.

  16. When you reach the peacock video segment, return to the text file and copy the line and seriously exotic birds.

  17. Back in Premiere, paste this text into the subtitle text box.

  18. Move the playhead to 9;22. We want this final subtitle to begin approximately halfway through the push transition for optimal visual flow.

  19. Double–click the final subtitle clip and change the text to Come visit us today.

  20. Switch to the Selection tool selection tool.

  21. Finally, create professional fade transitions for the subtitles. CTRL–click (Mac) or Right–click (Windows) on the right end of the final subtitle clip (Come visit us today) and choose Apply Default Transitions.

  22. Apply the same treatment to the opening. CTRL–click (Mac) or Right–click (Windows) on the left edge of the first subtitle clip and choose Apply Default Transitions.

    For future subtitle editing, remember to double–click the target clip in the Timeline, then access formatting options in Effect Controls.

  23. Preview your work to ensure subtitle timing and readability meet professional standards.

Subtitle Workflow Checklist

0/4

Finding Missing Files

File management represents one of the most critical aspects of professional video production. Understanding how to handle missing media prevents project delays and ensures smooth collaboration across teams and platforms.

  1. With our zoo promo complete, let's close the project and demonstrate essential file management techniques. Go to File menu and choose Close All Projects.

  2. Navigate to your Desktop and access Class Files > Premiere Pro Class > Zoo Promo > Capture > videos.

  3. We've discovered a filename inconsistency that mimics real-world scenarios! Rename the peacock file to peacock.mp4, removing any dashes or spaces to maintain consistent naming conventions.

  4. To verify our project's resilience, let's test the renamed file. Return to Premiere Pro and access File Menu > Open Recent > yourname-ZooProject.prproj.

  5. When the project opens, a Link Media dialog will appear indicating Missing Media for these clips. This scenario occurs because:

    • Premiere Pro maintains file references rather than embedding media directly into project files—similar to how HTML pages reference image folders or InDesign documents reference linked graphics and fonts.
    • Any file movement or renaming after import breaks these links, causing media to appear as "offline." This is why establishing consistent file naming conventions before import is crucial for professional workflows.
  6. To restore the link, click the Locate button in the Link Media window.

  7. In the file location window, ensure the Display Only Exact Name Matches checkbox remains unchecked—this allows Premiere Pro to suggest similar filenames.
  8. Navigate the folder hierarchy on the left to reach Desktop > Class Files > Premiere Pro Class > Zoo Promo > Capture > videos.
  9. With the videos folder selected on the left, click peacock.mp4 in the file listing on the right.
  10. Click OK to complete the relink process. Premiere Pro will automatically restore the connection.

    Understanding Media Offline Issues

    Premiere Pro references rather than embeds files. Moving or renaming imported files breaks these links, causing 'Media Offline' errors that require manual relinking.

    Relinking Missing Media

    1

    Access Link Media Dialog

    When project opens with missing media warning, click Locate button to begin relinking process.

    2

    Configure Search Options

    Uncheck 'Display Only Exact Name Matches' to find files with modified names or locations.

    3

    Navigate and Relink

    Browse to correct folder location, select the missing file, and click OK for automatic relinking.

Organizing Your Files

Professional video production demands meticulous file organization. Premiere Pro project files remain compact because they reference rather than embed media files—identical to how HTML documents link to image assets or InDesign layouts reference Illustrator graphics and photographs.

We recommend implementing the folder structure demonstrated in this course: position your Premiere Pro project file alongside a dedicated Capture folder containing all import-ready materials. Create logical sub-folders organized by content type (music, photos, graphics, videos, sound effects, voiceover) or by acquisition date (2026-01-01, 2026-01-02, etc.) for time-sensitive productions.

Critical best practices include: avoid moving or renaming footage after import to prevent relinking headaches, ensure each media file has a unique, descriptive name before import, and maintain consistent naming conventions across your entire production team. These practices prevent costly delays and ensure seamless project handoffs between team members.

Recommended Folder Structure

Subject-Based Organization

Create subfolders by content type: music, photos, graphics, videos, sound effects, voiceover alongside your project file.

Date-Based Organization

Alternative approach using date folders: 01-01 for January 1st footage, 01-02 for January 2nd, ensuring chronological organization.

File Management Best Practices

Never move or rename footage after importing to avoid relinking issues. Ensure each piece of footage has a unique name before import.

Collecting Files with Project Manager

For productions requiring asset delivery or archive creation, Premiere Pro's Project Manager provides an invaluable solution for collecting only the media actually used in your sequences, eliminating unnecessary files and reducing storage requirements.

  1. Access the File menu and choose Project Manager.

  2. At the top of the Project Manager window, select the specific Sequence for which you want to collect footage. This targeted approach ensures you're only gathering assets actually used in your final edit.

  3. Under Resulting Project, choose Collect Files and Copy to New Location. This option creates a self-contained project folder perfect for client delivery or long-term archival.

  4. Under Destination Path, click Browse. Navigate to Desktop > Class Files > Premiere Pro Class and click Choose (Mac) or Select Folder (Windows).

  5. Click OK to initiate the collection process. Premiere Pro will copy all referenced media and create a new project file.

  6. On your Desktop, navigate to Class Files > Premiere Pro Class to find the new folder Copied_yourname-ZooProject, containing a complete, self-contained version of your project with all utilized footage organized within a single directory.

  7. The collected project automatically links to the copied media within its folder structure, creating a portable, archive-ready package. This functionality proves invaluable for client deliveries, collaboration with remote teams, or long-term project storage.

Using Project Manager for File Collection

1

Select and Configure

Choose target sequence, set to 'Collect Files and Copy to New Location', and specify destination path.

2

Execute Collection

Project Manager creates organized folder with project file and all used footage, automatically linking to copied sources.

Exporting

Professional export workflows require precise in/out point setting and optimal encoding settings to ensure the highest quality delivery while meeting file size and compatibility requirements.

  1. Define the export range by setting precise In and Out points. Move the playhead to the timeline beginning and press i to establish the in point.

  2. Navigate the playhead to the timeline conclusion, ensuring it snaps to your final clip's end point (11;20).

  3. Professional practice demands additional black space at video conclusion for clean program transitions. Advance the playhead to 12;20 to provide this buffer.

  4. Press o to establish the out point.

  5. At the bottom of the Project panel, click the New Item new item icon button and select Black Video.

    NOTE: If the Project panel isn't visible, click the overflow arrows timeline overflow icon at the panel's top right and choose Project: yourname-Travel.

  6. Accept the default settings by clicking OK. Black video provides professional-grade spacing for program boundaries and smooth transitions.

  7. Drag the Black Video from the Project panel to V1, positioning it at your sequence conclusion.

  8. Use the red bracket right red bracket to trim the black video duration to align with your sequence out point (12;20).

  9. Save the project via File > Save.

  10. Initiate the export process through File > Export > Media.

  11. In the Export Settings window, expand the Export Settings section if it's not already visible.

  12. Set the Format menu to H.264—the industry standard for web delivery and broadcast compatibility.

  13. Configure the Preset menu to Match Source—High bitrate for optimal quality retention.

  14. Click the blue Output Name link to specify the export destination.

  15. Navigate to ZooProject > Exports folder.

  16. Name the file Zoo.mp4 and click Save.

  17. Access the Video tab in the Export Settings window for advanced configuration.

  18. Click Match Source to maintain original resolution and frame rate specifications.

  19. Locate the Bitrate Settings section.

  20. Set Bitrate Encoding to VBR, 2 pass for superior quality optimization and file size efficiency.

  21. Enable Use Maximum Render Quality at the window bottom. This setting ensures the highest possible output quality by utilizing Premiere Pro's advanced scaling algorithms.

  22. Click Export to begin the rendering process.

  23. After export completion, navigate to Desktop > Class Files > Premiere Pro Class > Zoo Promo > Exports to review your professionally finished video with broadcast-quality subtitles and optimized encoding.

Professional Export Workflow

1

Set Timeline Boundaries

Position playhead at start and press 'i' for in point. Move to end plus buffer (12:20) and press 'o' for out point.

2

Add Black Video Buffer

Create black video from Project panel, drag to V1 track at sequence end for professional finish with extra black screen.

3

Configure Export Settings

Set Format to H.264, Preset to Match Source High bitrate, enable VBR 2-pass encoding and Maximum Render Quality.

Export Quality Settings

H.264 with Match Source High bitrate, VBR 2-pass encoding, and Maximum Render Quality ensures professional output suitable for client delivery.

Key Takeaways

1Professional subtitles require proper typography (Arial 68pt), center alignment, white fill, and drop shadows with specific opacity and angle settings for optimal legibility
2Vector Motion maintains infinite scalability for text and graphics, preventing pixelation issues that occur with regular Motion controls in newer Premiere Pro versions
3Premiere Pro references rather than embeds media files, making proper file organization and avoiding post-import renaming crucial for maintaining project integrity
4The Project Manager tool automatically collects and copies only used footage with proper linking, creating organized, portable project packages
5Subtitle workflow efficiency comes from extending clips across the timeline, using keyboard shortcuts for navigation, and applying transitions for professional fade effects
6Missing media issues are resolved through the Link Media dialog by unchecking exact name matching and navigating to relocated or renamed files
7Professional export settings include H.264 format, Match Source High bitrate preset, VBR 2-pass encoding, and Maximum Render Quality for client-ready output
8Adding black video buffers at sequence ends provides professional finishing touches and prevents abrupt content cutoffs in final exports

RELATED ARTICLES