Music Video: Multi-Cam Editing in Premiere Pro
What This Tutorial Covers
Multi-Cam Sync
Sync multiple camera angles by audio waveform or timecode.
Real-Time Switching
Cut between angles in real-time playback.
Music Sync
Time cuts to the beats and phrases of the music.
Noble Desktop's Video Editing & Motion Graphics Certificate teaches Premiere Pro alongside After Effects, DaVinci Resolve, and the full motion design toolkit.
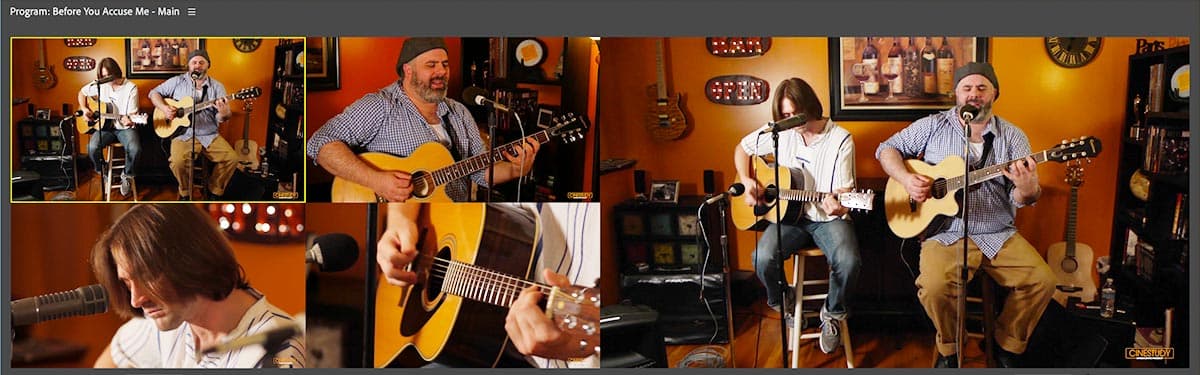
Delve into the world of multi-camera editing with Premiere Pro, learning how to create a multi-camera source sequence, refine your edit, and incorporate B-Roll footage, through this comprehensive tutorial.
Exercise Preview
Setting up for Multi-Cam Editing
Multi-cam sequences are not used like standard sequences. They are designed to work more like clips on the Timeline.
In the Project panel, CTRL–click (Mac) or Right–click (Windows) on the Before You Accuse Me—Multicam sequence and choose New Sequence From Clip.
In the Project panel, there are 2 things named Before You Accuse Me—Multicam with different icons:
- This icon
 is for the sequence we just made. It should currently be selected.
 - This icon
 is for the multicam.
- This icon
- CTRL–click (Mac) or Right–click (Windows) on the new (currently selected) sequence and choose Rename.
- Rename the sequence Before You Accuse Me—Main.
- Drag Before You Accuse Me—Multicam onto the New Bin button
 at the bottom right of the Project panel.
 - Rename the new bin 04—Nested Sequences
- In the Timeline panel, move the Playhead to 10:00
Let’s remove the part that comes before this. Press the Q key to ripple trim the previous edit line to the playhead.
Move the playhead to 3:44:20
Let’s remove the part that comes after this. Press the W key to ripple trim the next edit line to the playhead.
At the bottom right of the Program panel, click on the wrench button
 and choose Multi-Camera.
This switches the Program panel into multi-cam preview mode.
- Choose the Selection tool
 .
. - Click on the Before You Accuse Me—Multicam clip on the Timeline to select it.
- CTRL–click (Mac) or Right–click (Windows) on the clip and choose Unlink.
- Lock
 the Audio 1 track.
 - Click on any empty area of the Timeline to deselect the clip.
- Hold Shift and press the + (plus) key to expand the height of all of the video and audio tracks in the Timeline.
- Press the + (plus) key a few times to zoom closer in on the Timeline.
- Move the playhead to 1:00:00
Press M on the keyboard to add a marker to the timeline.
NOTE: The marker at 1 minute is there because in the next part of the exercise you will be cutting the first minute of the music video.
Choose File > Save or hit Cmd–S (Mac) or CTRL–S (Windows).
Editing a Multi-Cam Sequence
Now that everything is set up its time to edit this music video. When working with a multi-cam sequence the multi-cam preview in the Program panel allows you to choose which of your source clips is visible on the Timeline. You can use this to cut between them in a more intuitive fashion.

- Move the playhead to the beginning of the timeline.
In the Program panel click on Camera 4 in the multi-cam preview to make it the active camera.
Move the Timeline playhead to 5:09
- Hit Cmd–K (Mac) or CTRL–K (Windows) to cut the multi-cam clip.
- In the Program panel, click on Cam 2 (the top right in the grid of 4 cameras) to make it active.
Move the Timeline playhead to 10:14
TIP: To quickly go to a specific timecode, if you have a full-sized keyboard with a number pad on the right, simply start typing the timecode. Just make sure nothing is selected before typing (or else you’ll move it). You don’t have to click on the timecode to make it editable!
- Hit Cmd–K (Mac) or CTRL–K (Windows).
- Click on Cam 1 to make it active.
TIP: To choose a camera you can press the corresponding number in the row of numbers at the top of a keyboard (NOT the number pad of full-sized keyboards).
Move the Timeline playhead to 14:05
- Hit Cmd–K (Mac) or CTRL–K (Windows).
- Click on Cam 2.
Move the Timeline playhead to 17:05
- Hit Cmd–K (Mac) or CTRL–K (Windows).
- Click on Cam 1.
Play through the edits to see the camera switches. The edits are not perfect, but we’ll refine them later.
There are a lot more camera switches we want to make, but we’ll save you time by providing a file with all of them done.
Choose File > Save or hit Cmd–S (Mac) or CTRL–S (Windows).
Refining a Multi–Cam Edit
Making your initial edits is just the beginning. Very often you’ll want to refine your edits on the Timeline. The most important thing to keep in mind when working with a multi-cam edit is to never mess–up the sync between the audio and video.
Choose File > Close All Projects.
Let’s open a file where we’ve added some more camera edits for you.
Choose File > Open Project or hit Cmd–O (Mac) or CTRL–O (Windows).
Navigate to Desktop > Class Files > Premiere Pro Intermediate > Multicam—Music Video.
Double–click on Before You Accuse Me—Ready to Refine.prproj to open it.
Go to File > Save As and:
- Name the file Before You Accuse Me—Your Name.prproj
- Save it to Desktop > Class Files > Premiere Pro Intermediate > Multicam—Music Video (replacing any existing file).
At the bottom right of the Program panel, click on the wrench button
and choose Multi-Camera.- To open the Timeline Preferences:
- Mac: Go into the Premiere Pro menu and choose Settings > Timeline (instead of Settings it will be Preferences on older versions of macOS).
- Windows: Go into the Edit menu and choose Preferences > Timeline.
Check on Display out of sync indicators for unlinked clips and click OK.
Move the Timeline playhead to 5:00
Notice that the video is blurry here.
Move the Timeline playhead to 4:12
- Select the Rolling Edit tool
 .
. - Drag the edit line between the first 2 clips to the Playhead.
- Select the Rolling Edit tool
Press Shift–K to preview the area around the playhead. Notice that the first clip was shortened and the second one lengthened and both are still in sync with the audio.
Move the playhead to 57:08
- Notice that the end of the camera 4 clip
[MC4]shows some blurry lights.
- Notice that the end of the camera 4 clip
Move the playhead to 56:14
- With the Rolling Edit tool , drag the edit line (after MC4) to the Playhead to make it shorter.
- Press Shift–K to preview the area around the playhead. The edit has been corrected and everything is still in sync.
- With the Rolling Edit tool
- Choose the Selection tool .
Move the Timeline playhead to 46:06
- CTRL–click (Mac) or Right–click (Windows) on the clip to the right of the playhead and choose Multi-Camera > [1]BYAM cam 1.mp4 to switch the source for this clip.
Choose File > Save or hit Cmd–S (Mac) or CTRL–S (Windows).
Adding B-Roll to a Multi-Cam Edit
Just like interviews and other type of projects, music videos can use B-roll to break up the monotony of looking at the same footage over and over again and helps explain the story and meaning of the music to the viewer.
At the bottom right of the Program panel, click on the wrench
and choose Composite Video.This switches back to the normal preview mode.
Move the Timeline playhead to 22:09
- Press I to add an In point to the timeline.
Move the Timeline playhead to 28:19
- Press O to add an Out point to the timeline.
In the Project panel click on the arrow next to the 01—Video bin to expand it.
Click on the arrow next to the B-Roll bin to expand it as well.
Double–click Couple Having a Quarrel 01.mp4 clip to open it in the Source panel.
In the Source panel, move the playhead to 7:00
- Press I to add an In point to the clip.
Drag the Drag Video Only button
 into the Program panel and drop it onto Overlay at the top.
Move the Timeline playhead to 34:00
- Press I to add an In point to the timeline.
Move the Timeline playhead to 40:09
- Press O to add an Out point to the timeline.
In the Project panel, double–click Couple Having a Quarrel 02.mp4 clip to open it in the Source panel.
Drag the Drag Video Only button
into the Program panel and drop it onto Overlay.Because a new In point hasn’t been set, it uses the physical beginning of the clip for the 3–point edit.
Move the Timeline playhead to 49:09
- Press I to add an In point to the timeline.
Move the Timeline playhead to 55:05
- Press O to add an Out point to the timeline.
In the Project panel, double–click Couple Having a Quarrel 03.mp4 clip to open it in the Source panel.
In the Source panel, move the Playhead to 0:05
- Press the I to set an In point.
Drag the Drag Video Only button
into the Program panel and drop it onto Overlay.Play the first minute to see all the edits.
Choose File > Save or hit Cmd–S (Mac) or CTRL–S (Windows).
Real-Time Switching for Multi-Cam Editing
This exercise showed how to manually make cuts and switch cameras. Another approach is to visually make cuts in real-time while watching the footage. Here’s how:
- Make sure you’re in multi-cam preview mode where you can see the different cameras in the Program panel.
As you watch the video, choose a camera by either:
- Clicking on a camera in the Program Monitor.
- Pressing the keystroke for the desired camera (1,2, 3, etc.).
- You will not see the cuts being made in real-time, but when you stop the playback you’ll see all your cuts have been made!
- You’ll want to go back over your edits and use the Rolling Edit tool to adjust as needed.