Express Jeans Promo Video in Premiere Pro
What This Tutorial Covers
Edit Pacing
Cuts on the music to drive the spot's energy.
Color Grading
Lumetri color for a polished, branded look.
Title Design
Branded title cards integrated with the edit.
Noble Desktop's Video Editing & Motion Graphics Certificate teaches Premiere Pro alongside After Effects, DaVinci Resolve, and the full motion design toolkit.
Learn how to create a stop motion promo video for Express Jeans using Premiere Pro, covering topics such as creating a stop-motion photo sequence, rotating a nested sequence, the opacity mask, the ultra key effect, the basic 3D effect, the color workspace, and exporting high-quality video.
Exercise Preview
Getting Started
In Premiere Pro, go to File > Close All Projects to close any open projects.
To save time, we did some of the initial setup for you. Go to File > Open Project.
Navigate into Desktop > Class Files > Premiere Pro Class > Express Jeans, and double–click on Express Jeans Start to open it.
Premiere will probably ask you to set your Scratch Disk location. Next to each setting (Captured Video, Captured Audio, etc.), choose Same as Project from the menu (this should be the default).
Go to File > Save As.
Name the file yourname-ExpressJeans.prproj and save it into Desktop > Class Files > Premiere Pro Class > Express Jeans.
In the Timeline, notice that we’ve already created a sequence for you, jeans_seq with the background image and audio track we’ll be using.
Hit play to preview the music and get a sense of what we’re working with. You’ll notice that the guitar strums five times at the beginning, ending around 1:13. We’ll want our first jeans sequence to end by this timecode.
NOTE: Feel free to drag down on the bottom of the A1 track so that you see the waveforms better.
- Move the playhead to 1:13.
Select the clip on A1.
Hit the M key to add a marker
 at this point in time.
Creating a Stop-Motion Photo Sequence
In the Project panel, expand the photos bin, and the jeans_JPG bin within it. You’ll see that this folder contains all of our jeans images.
At the top of the Project panel, drag the right side of the Name column so that you can see the full name of all the images.
Drag the first image jeans_001_01_X1_001.jpg down to the New Item icon
 .
.This should open a new tab in the Timeline for this new sequence.
In the Project panel, locate the new jeans_001_01_X1_001 sequence
 . It should be within the jeans_JPG folder, below the images.
Rename the sequence to jeans-photos.
Drag it out to an empty space to its left, so that it’s released from the folder.
We want this sequence to match our jeans_seq in terms of frames per second. At the top of the Timeline, click on jeans–seq to return to its tab.
Go to Sequence > Sequence Settings and notice that:
- Timebase is set to 24.00 frames/second
- Display Format is set to 24 fps Timecode.
- Under Video Previews, notice the Width and Height of 1080. Take note that we can nest into this sequence any size footage or sequence that we want.
Click Cancel (we only came here to check the fps).
At the top of the Timeline, switch back to the jeans-photos tab.
Let’s open its Sequence Settings. Go to Sequence > Sequence Settings.
Set the Timebase to 24.00 frames/second.
Set Display Format to 24 fps Timecode.
Leave all the other settings as is, and click OK.
We need the audio track to sync our photos. At the top of the Timeline, switch to jeans–seq.
Select and copy the audio track on A1.
- At the top of the Timeline, switch back to the jeans-photos tab.
Paste the audio track. This will allow us to time the jeans photos to the audio track.
Drag the bottom of A1 down (to make it taller) and zoom into the Timeline so you can see where the waveform is peaking.
Wherever the waveform peaks, that’s where we will bring in each photo!
Rotating the Jeans Photos Sequence
In the final movie, the jeans images are vertical, but currently, they’re laid out horizontally. Let’s see how we can rotate them, and fix their alignment.
In the Timeline, close the jeans_photos tab.
In the Timeline, make sure you’re back in the jeans-seq tab.
Click the Source Monitor tab to your upper left-hand side, so it’s visible.
From the Project panel, drag jeans_photos to the Source Monitor so it’s visible there.
Drag the Drag Video Only button
 to the Timeline, dropping it at the beginning and on V2 (the topmost video track).
We’ve just created a nested sequence. In other words, one edit (the high-resolution jeans photos sequence) embedded inside another edit (our square-format Express Jeans sequence). This is also sometimes referred to as a subsequence.
- Before we move on, let’s do a little organizing in the Project panel. Drag jeans_photos into the subsequences folder.
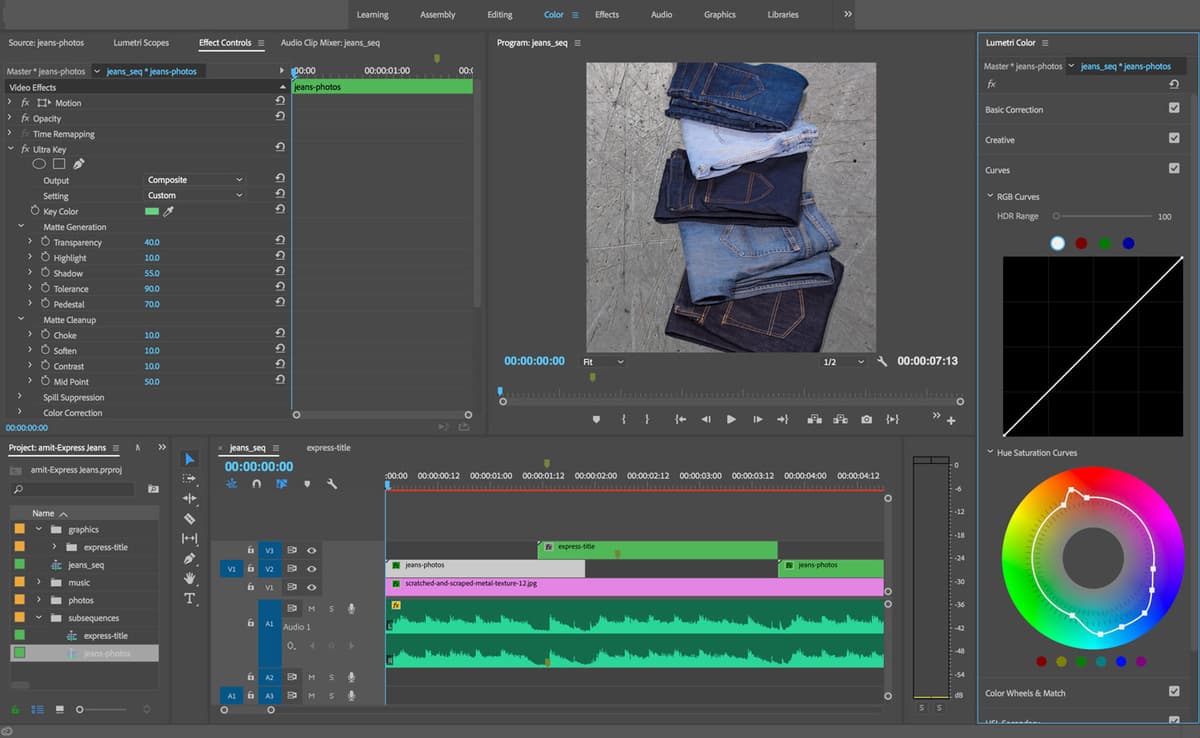
- In the Timeline, click on jeans-photos in the V2 track.
It’s enormous, so in the Effect Controls panel:
- Set Scale to 32.
- Set Rotation to –90°.
- Set Position to 482,522.
This gives the images a slightly better composition in this frame. Because we used a subsequence containing all our photos (one sequence within another), we only needed to make these position, scale and rotation changes once, rather than adjusting the photos one at a time.
The Opacity Mask
In the Timeline, make sure you are viewing the first frame (which has the most jeans in it).
We don’t want to accidentally cut any of our jeans off in the next steps!
Notice that we still have some visible tape in the frame in the top right, as well as the grommet in the top left. This will effect our greenscreen removal so to remove these areas, we’ll use an opacity mask.
In the Effect Controls panel, expand Opacity.
Below Opacity, click on the Create 4-point polygon mask
 .
.NOTE: The 4-point polygon mask
will work for our purposes, but take note that the Free draw bezier  option allows you to draw a free-form shape, which can be handy in some situations.
In the Program Monitor, you’ll see a blue rectangular mask appear. This is obviously not incorporating all of our jeans, so we’ll need to adjust the mask into more of a house-shape.
NOTE: Depending on the speed of your computer, you may need to wait a few moments between adjusting individual mask points.
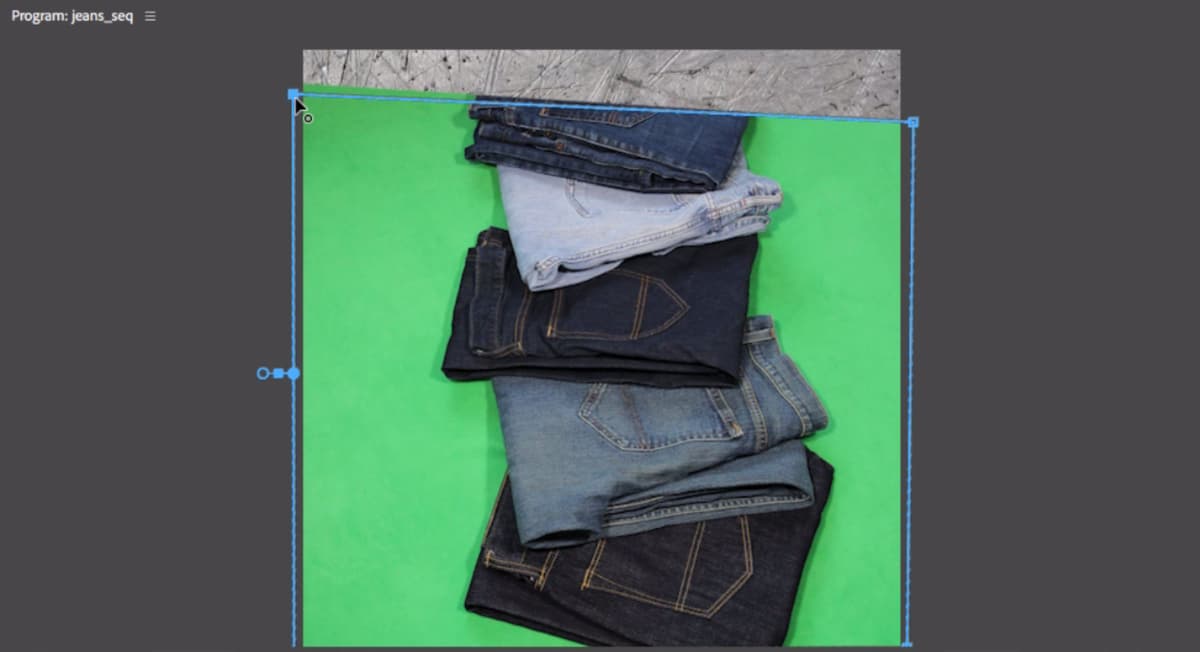
The easiest way to adjust masks is to adjust each of the corners first, making sure you can see all of the edges of the frame. Make sure you can see all the edges of the frame by setting the zoom level to Fit or smaller.
Drag out each of the corners to include the entire frame, avoiding the topmost section that includes the tape and grommet we want to eliminate. The only thing that should get cut off at this point, is the top of the first pair of jeans. It should look like the image below:
We want to add another point at the top of the mask. To add a point, click between the two existing points as shown below:
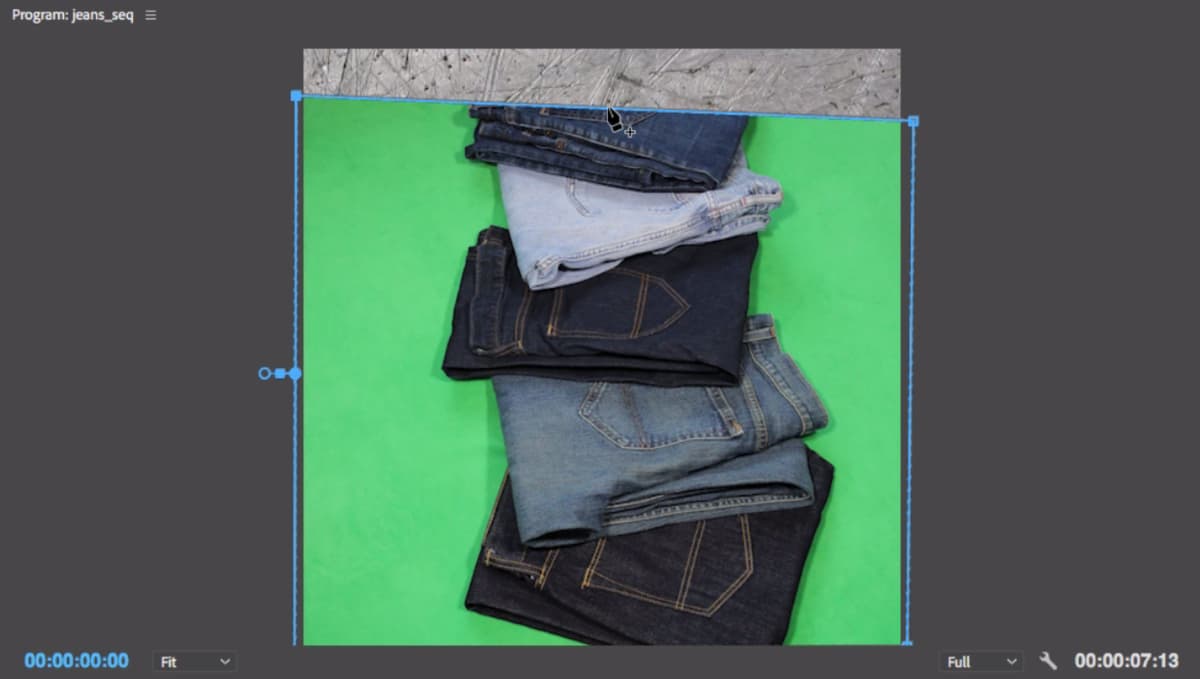
Drag that point upward above the frame so that you have a house-like mask.
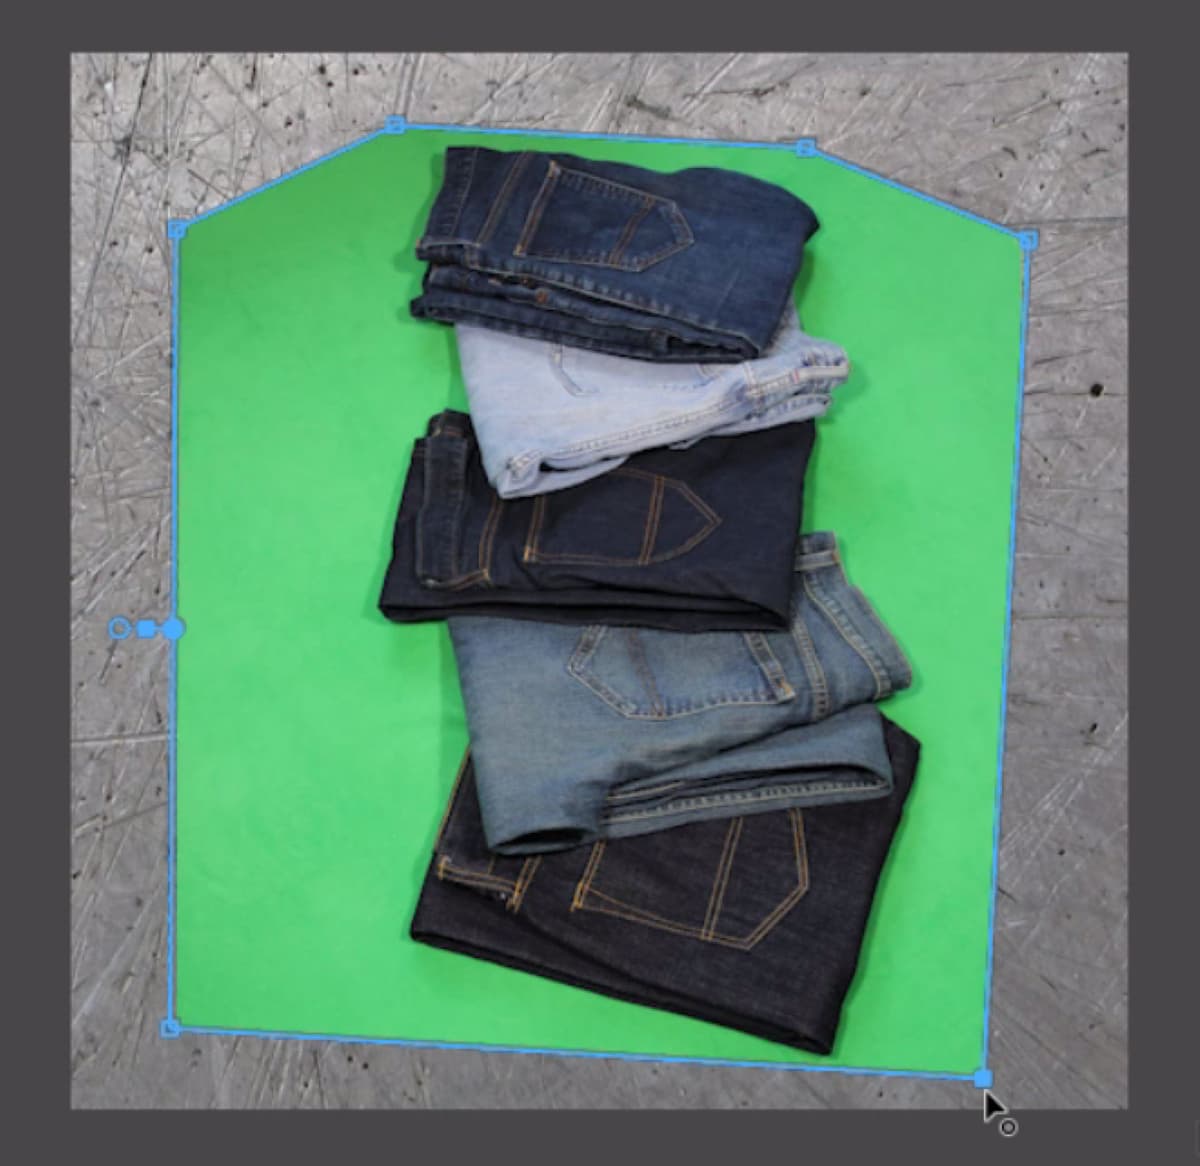
We’re not quite encompassing all of the jeans, so add another point as shown:

Drag the new point to the top of the screen so all of the jeans are included in the mask.
Let’s scale this down a little to check our work. In the Effect Controls panel, Motion section, set the Scale to 25.
Adjust the mask as necessary so that you’re including all of the jeans and their shadows. (You may need to adjust the bottom and top points a little.)
Now that we’re done adjusting the mask, we can return to our original scale value. Set the Scale to 32.
The Ultra Key Effect
Now that the jeans are on a nice solid green background, we can apply a key effect. In order to remove the green background, we’ll use a Keying effect. Keying refers to keeping or removing a unique color from a scene to create an area of transparency. It’s often referred to as bluescreen or greenscreen removal.
Open the Effects panel (Window > Effects).
In the search field near the top, type in ultra.
Under Video Effects > Keying, locate Ultra Key.
Drag Ultra Key on to the jeans_photos clip.
In the Effect Controls panel, swivel closed any effects you’re not currently using (such as Motion and Opacity) so that we can focus on the Ultra Key controls.
Click on the word Ultra Key to select it.
Below Ultra Key, to the right of Key Color click on the eyedropper
 . We’ll use this to select the green color we want to remove.
We want to select a representative sample of the green background. We don’t want just one pixel of color, we want an average. Hold the Cmd (Mac) or CTRL (Windows) key down and notice that the eyedropper gets bigger when you do so.
While holding Cmd (Mac) or CTRL (Windows), click on the green background to the left of the third pair of jeans. This spot should give you an average value of the green color.
The green background should have been removed, but let’s see if we need to do some more adjusting. In the Effect Controls under Ultra Key, set the Output menu to Alpha Channel.
This shows us which pixels are opaque (white), transparent (black), or semi-transparent (gray). You’ll see by all the gray that it didn’t do a great job so far.
To the right of Key Color, click on the color box to open the Color Picker window.
Set the color to #67D283 and click OK. We found this color to work well.
To the right of Setting, choose Aggressive. Notice that this does a good job of getting rid of a lot of the screen.
Expand Matte Generation to see some further settings.
Increase the Pedestal slightly to 70. That’s looking pretty good! The jeans area is a solid black (transparent), and the background area is white (or opaque).
The semi-transparent areas around the jeans are fine as is, as that’s the shadow.
If you see gray pixels in the corners of the frame, you can adjust your Opacity Mask points further in the Opacity section, by clicking on Mask (1) to make the points editable again. Switch back to the Ultra Key section when you’re finished.
In Ultra Key, switch back the Output menu to Composite. Here you can see more clearly that the shadows are still there, which is what we want. We’re done with our greenscreen removal!
Primary Vs. Secondary Color Correction
So far what we’ve done is called a primary color correction. This will effect the whole clip rather than portions of the clip. We’ll switch over to a little secondary color correction next. In secondary color correction, we can adjust individual colors that appear in the clip independently of one another. This can be done using the Lumetri panel’s Hue Saturation Curves, Color Wheels & Match and HSL Secondary. In this exercise we’ll be using Color Wheels & Match, but in the next we’ll look at others.
Click on Color Wheels & Match to expand the section.
In the topmost Midtones color wheel, drag the center crosshair slightly toward magenta (to the right and up a little). We’ve done this to avoid the shadows going a little green.
- Click on the word Color Wheels & Match to close it.
Expand Curves.
In Curves, we want to isolate orange (the color of the threads) and make these pop more. We’ll use the Hue Saturation Curves section as a keyer by choosing the color(s) we want to isolate, and then adjusting them.
If your monitor is not bright enough to see the thin gridlines behind the rainbow stripes, adjust your monitor settings.
We must set 2 new points to isolate the orange of the threads. Hover over the rainbow stripe and:
- Click on red (1/3 of a gridline in from the left).
- Click on yellow (1 and a half gridlines in from the left).
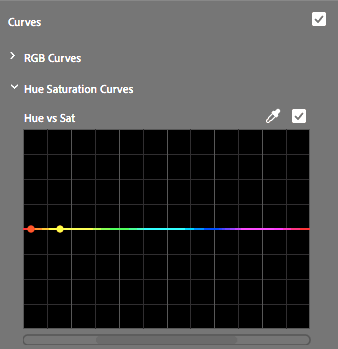
NOTE: These “protection points” are setting points on the outer range of what you may be adjusting (but you don’t actually move those points). They isolate any changes you make to only the hues between the protection points.
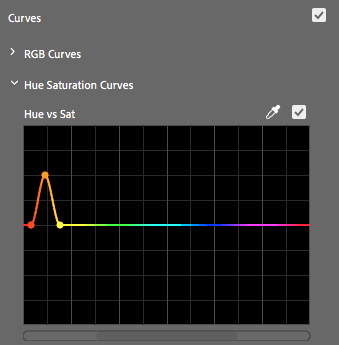
Create a 3rd point between the first 2. This is the point we’ll use to make the actual saturation adjustment.
To increase the orange saturation, drag this middle point upwards about 2 gridlines up, as shown below.
- We also want to include cyan and blue in our saturation adjustment. Click on the eyedropper to the right of Hue vs. Sat.
Click on the blue of the topmost pair of jeans. This will create 3 new points for us! The outer 2 are protection points, so we won’t be moving those to avoid shifting the other colors.
Drag the middle point up one and a half gridlines:
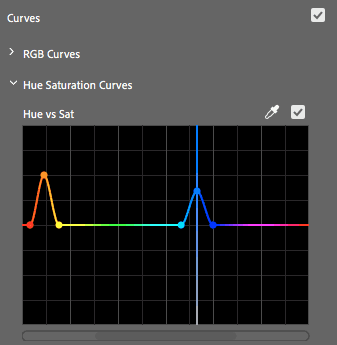
Now both the blues and oranges will pop a little more.
To compare the changes we just made, to the right of Curves, click on the check box to switch off the adjustments. (It may take a moment to update.)
Check on Curves again. Feel free to make additional adjustments if you wish.
Adding Text
To save time, we’ve provided you a sequence with the text. If you want to learn how to something like this, refer to the “Shanarra Title Card” bonus exercise.
Switch back to the Editing workspace.
In the Project panel, expand the subsequences folder, and double–click express_title.
In the Timeline, you’ll notice the text has already been animated to the music. Play through to see that it animates the same way the jeans do, over five lines. The animation begins just after the marker, and each line pops on one at a time.
At the top of the Timeline, click on jeans_seq to switch back to it.
We want the jeans-photos to last until 1:19 so move the playhead there now.
Drag in the right end of the clip so that it ends at the playhead.
There’s going to be a little overlap of the jeans and text. Move the playhead to 1:11.
Make sure Source Monitor panel is visible.
From the Project panel, drag express-title to the Source Monitor to view it there. We only want its video, not audio so this step is important.
Drag from the Drag Video Only button
 to the Timeline and drop it on V3 at the playhead. (Make sure it’s above the jeans-photos clip on V2.)
Adjust the position of the text by switching to Effect Controls and in the Motion section, change the Position to (540, 602)
If you see the red bar above the Timeline, go to Sequence > Render In to Out to render your work so far, otherwise it won’t play back normally.
Play back the section to see the jeans come on one at a time, followed by the text one line at a time, and the white overlap lasts 8 frames.
Move the playhead to 3:18 where we want the jeans photos to show up again.
Select the jeans-photo clip at the beginning of the timeline and copy it.
Paste the clip so that it begins at 3:18 on V2.
Move the playhead to 5:06 where the text will appear again.
Select and copy the express-title clip on V3.
We want this to paste on V3, so next to both V1 and V2, click the lock icon
 .
.Now when you Paste express-title it should appear at the playhead on V3. The clip should last the remainder of the audio track.
Go to File > Save.
Exporting High-Quality Video
Go to File > Export > Media. This time, we want to export at a very high quality.
Under Export Settings, set the Format to QuickTime.
The Preset should be automatically set to NTSC DV 24p. This isn’t used anymore, so let’s change it. Under the Video tab, scroll down using the scrollbar (you may accidentally change settings if using a scroll wheel).
Set the Video Codec to Apple ProRes 422. (In older versions of Premiere on Windows, use the Avid DNxHR/DNxHD codec instead, and under Resolution, choose DNxHR RGB 444 10-bit.)
NOTE: 422 and 4444 are both high quality formats. To learn more read:
- Apple’s comparison of them support.apple.com/en-us/HT202410
- 4:2:2 vs. 4:4:4 and ProRes codecs finalkid.com/which-prores-codec-to-use
- Apple’s in-depth look at ProRes (PDF) tinyurl.com/prores-pdf
Scroll down further (using the right scrollbar) and under Basic Video Settings click on Match Source so that the dimensions of the video match the sequence.
At the bottom of the window, check on Use Maximum Render Quality.
At the top of the window, next to Output Name, click on the blue name.
Navigate to Desktop > Class Files > Premiere Pro Class > Express Jeans > Exports.
Set the name to jeans-ProRes422.mov. It’s nice to let other people know which codec was used.
Click Save.
The default Audio settings should be fine, so click Export.
Creating a High-Quality Export Preset
- After adjusting the settings outlined above, go the right of the Preset menu, click on the Save Preset button
 .
. - In the Choose Name window, set the name to ProRes 422 and click OK.
You’ll be able to use this Preset for high quality exports in the future.
- After adjusting the settings outlined above, go the right of the Preset menu, click on the Save Preset button
After the export finishes, feel free to go into Desktop > Class Files > Premiere Pro Class > Express Jeans > Exports and check out the finished video.