Saving Photos for the Web as GIF/PNG
Save GIF/PNG for Web
Image → Trim
Removes empty pixels around the artwork — smaller file size.
File → Export → Save for Web (Legacy)
Choose GIF or PNG from the Preset menu on the right.
Pick a Color Palette
GIF: Perceptual or Adaptive base colors on the actual image; 16 Colors keeps file tiny.
Use PNG for Transparency
PNG-24 supports alpha transparency; GIF only supports 1-bit transparency.
Noble Desktop's Photoshop Bootcamp covers retouching, compositing, color correction, and pro editing.
Discover how to optimize images through GIF or PNG compression in this detailed Photoshop tutorial, guiding you through the process of saving as GIF and comparing GIF to PNG-8 files.
Exercise Preview
Saving As GIF
From the Photoshop Class folder, open the file corporate-logo.psd.
Although this image is already in RGB mode at 72 ppi, we should crop out the empty pixels to make the file size smaller. We could use the Crop tool
 and trim it manually, but there’s a better way. Go to Image > Trim and set the following:
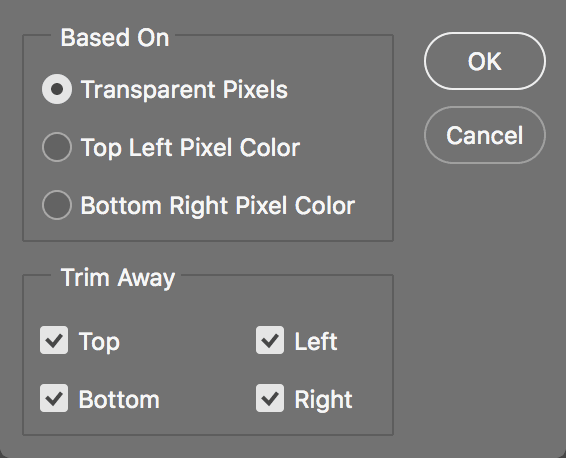
Click OK, and Photoshop quickly and precisely trims the image for you!
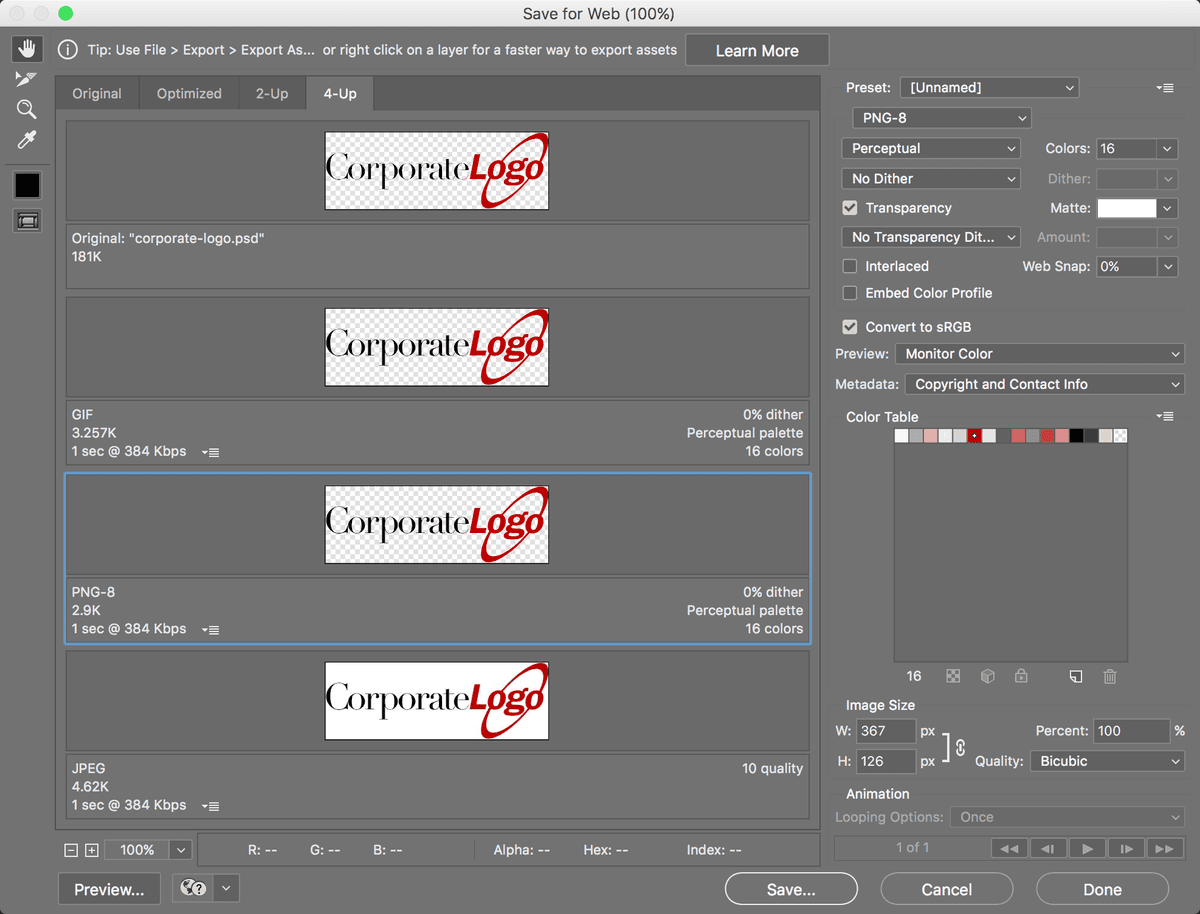
Go to File > Export > Save for Web (Legacy).
In the settings on the right, from the menu below Preset, choose GIF.
The GIF format shrinks file size by reducing the total number of colors in an image. GIFs may have up to 256 colors, but generally you’ll need far fewer than that.
From the Colors setting on the right, choose 16 Colors.
From the menu to the left of Colors, choose the Perceptual color palette.
Adaptive, Selective, and Perceptual base their color choices on the actual image. The other options are preset color palettes and therefore are typically not desirable. We chose Perceptual in this case because it was the smallest file size, and visually there was almost no difference between the three options.
The Dither option uses scattered pixels to represent intermediate colors and often makes gradual blends look smoother. We don’t need that in this image, so in the menu immediately below Perceptual, choose No Dither.
From the Matte menu, choose whatever color you’d want to use as the background of your imaginary website (in this case, white).
GIF transparency does not allow for partial transparency. Therefore, any partially transparent pixels must become opaque. The Matte color is used as a background blend color for any pixels that are partially transparent in the original image. Choosing a color similar to your background allows the edges to better blend with the background of the webpage it will be used on.
Make sure that the Transparency checkbox is checked.
Choose the Zoom tool
 on the left side of the window.
Click on the image to zoom in. The formerly translucent pixels around the edge of the logo have been blended with the Matte color to form completely opaque pixels!