Product Shot: Selecting Label Text
Isolate Label Text via Channels
Marquee + Intersect with Paths
Drag a rectangle around the label, then Cmd-Opt-Shift-click the bottle and label paths to intersect.
Pick the Highest-Contrast Channel
Channels panel → preview Red, Green, Blue. Blue often shows label text best.
Duplicate the Best Channel
Drag the channel onto the New Channel icon to copy it for editing.
Use Levels to Crush the Range
Image → Adjustments → Levels — push blacks/whites to isolate just the text.
Noble Desktop's Photoshop Bootcamp covers retouching, compositing, color correction, and pro editing.
Learn how to enhance brand visibility on product labels with our advanced Photoshop tutorial, which guides users through the process of selecting and color correcting text on a bottle's label.
Exercise Preview
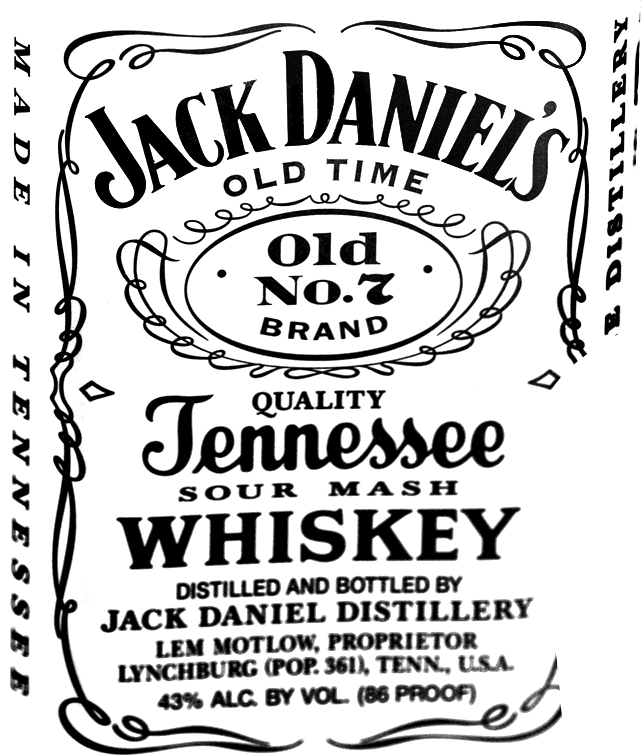
Selecting the Bottle’s Label
If it’s not still open, re-open yourname-product-Adobe RGB.psd.
Drag a Rectangular Marquee
 around the bottle’s label area that contains the text shown in the exercise preview above.
Go to the Paths panel.
Hold Cmd–Opt–Shift (Mac) or CTRL–ALT–Shift (Windows) and click the bottle path to intersect it with your selection.
Hold Cmd–Opt–Shift (Mac) or CTRL–ALT–Shift (Windows) and click the label and cap path to intersect that as well.
Hold Cmd–Opt (Mac) or CTRL–ALT (Windows) and click the tumbler glass path to subtract it.
You should now have the bottle’s label selected.
Selecting Only the Text on the Bottle’s Label
Go to the Channels panel and look through each one (red, green, and blue). Find which one has the cleanest, most contrast-y version of the type. In this case the Blue channel seems the best.
Duplicate the Blue channel by dragging it down onto the New channel button
 .
.Rename the new channel bottle text.
Do a Select > Inverse (Cmd–Shift–I (Mac) or CTRL–Shift–I (Windows)).
Make sure the background color is set to Black.
Hit Cmd–Delete (Mac) or CTRL–Delete (Windows).
Deselect (Cmd–D (Mac) or CTRL–D (Windows)).
Do an Image > Adjustments > Invert (Cmd–I (Mac) or CTRL–I (Windows)).
Do a Levels adjustment (Cmd–L (Mac) or CTRL–L (Windows)) and crank up the contrast so the background is clean white and the text is clean black.
As needed use the Brush
 or Dodge
  tools to clean things up a bit.
In the Channels panel, switch back to the RGB composite at the top.
Be sure to save the file so you can continue with it in a later exercise.