Lifestyle Shot: Selecting the Skin
Photo Retouching Steps
Camera RAW First
Global tone, white balance, and lens corrections in Camera RAW.
Spot Healing
Remove dust, blemishes, and small distractions.
Frequency Separation
Smooth skin texture without losing pore detail.
Final Color Grade
Curves and selective color for the final mood.
Noble Desktop's Photoshop Bootcamp covers retouching, compositing, color correction, and pro editing.
Explore the crucial skill of making selections in Photoshop with our in-depth tutorial, focusing on using alpha channels for precise skin selection and retouching.
Exercise Preview
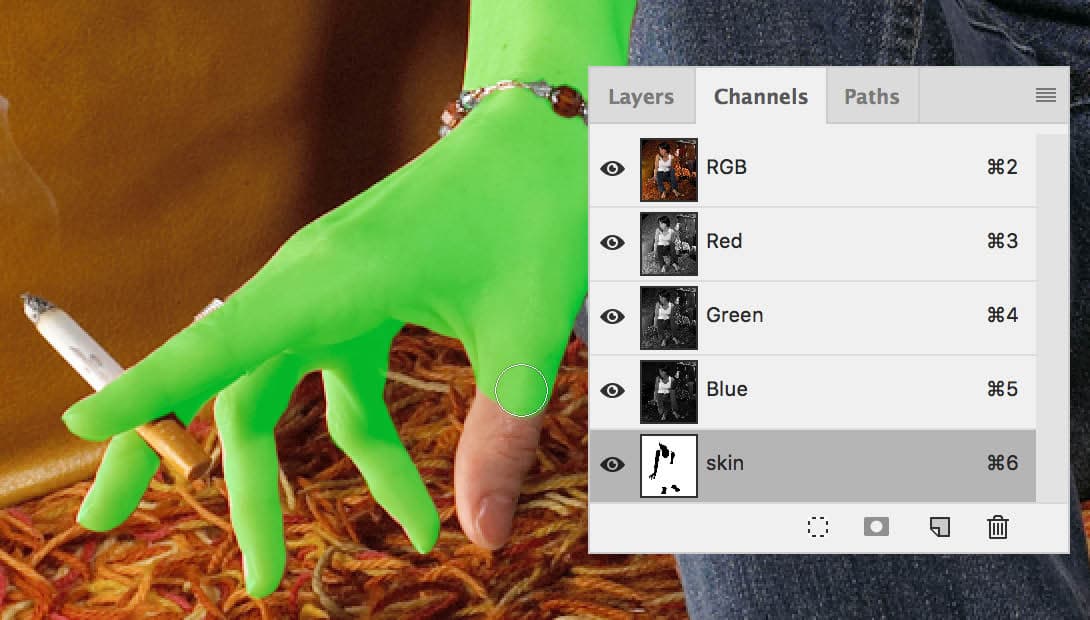
Selecting the Skin Using an Alpha Channel
From the Photoshop Adv Class folder, open lifestyle.psd.
Save the file back into Photoshop Adv Class as yourname-lifestyle.psd.
Go to the Channels panel. At the bottom, click the Create new channel button
 .
.- Double–click anywhere on the new channel (except on the name) to set its options:
- Name it skin.
- Under Color Indicates, select Selected Areas.
- Click the color swatch and choose a bright lime green.
- Set Opacity to 50%.
Click OK.
With the skin channel selected, click the Eye
 next to the composite RGB channel to show it.
Click the Default colors icon
 in the Tools panel so you have black as the foreground color and white as the background color.
Select the Brush tool
 .
.In the Options bar at the top of the screen, choose the second brush preset, Hard Round (it may be grouped under General Brushes). This preset ensures that Shape Dynamics are off. If you’re using a Wacom tablet, the size of the brush won’t change based on how hard you press with the stylus.
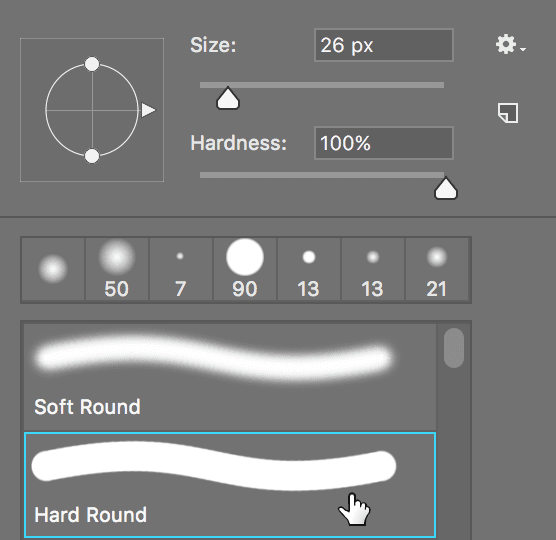
Change the brush to a more appropriate size (25–30 px is a good start).
- Use the Brush tool to paint over the skin with black (but read these notes first):
- Be sure to take your time when painting this alpha channel because later on you’ll be using it to create a selection for your retouching.
- Paint over all skin: the face, chest, belly button area, and don’t forget the feet!
- Do NOT include the jewelry, cigarette, hair, or anything else that is not skin.
- Your painting will show up as a green overlay on your image. Painting with black lays down color, while painting with white removes the color. (Hit the X key to toggle back and forth between the black and white.) Eventually this channel will be used to create a selection in which places that your channel has color will be selected, empty areas won’t be selected and semi-transparent areas will be partially selected.