Exporting Assets: PNG & GIF
What This Tutorial Covers
Save for Web
Photoshop's optimized export for web-ready assets.
PNG-8 vs PNG-24
Color depth tradeoffs for file size.
GIF Optimization
Reduced palettes for smaller animated GIFs.
Noble Desktop's Graphic Design Certificate covers Photoshop alongside Illustrator and InDesign.
Dive into this comprehensive Photoshop for Web Design tutorial covering topics such as transparent photos, 8-bit graphic formats, optimizing colors, and exporting 1x & 2x graphics, along with an exercise on optimizing graphics as PNG or GIF.
Exercise Preview
Transparent Photos
JPEG does not support transparency, so how do we optimize a photo with a transparent background? Let’s see.
- In Photoshop, close any files you have open.
- Go to File > Open or hit Cmd–O (Mac) or CTRL–O (Windows).
- Navigate to Desktop > Class Files > yourname-Photoshop for Web Class > Graphics to Optimize and double–click iphone-hand-mockup.psd.
- In the Layers panel, hide the bg color layer by clicking the eye
 .
. - We don’t need the excess transparent pixels, so choose Image > Trim.
- Set Based On to Transparent Pixels.
- Make sure Trim Away has all sides checked on.
- Click OK and Photoshop quickly and precisely trims the image for you!
- Choose File > Export > Save for Web (Legacy).
- On the right of the window, under Image Size, set W (width) to 400 px and hit Tab to apply it.
At the top right of the window, go into the Preset menu and choose PNG-24.
Unlike JPEG compression, PNG uses a lossless compression. That means it does not lose quality, so you don’t get ugly JPEG artifacting.
- Hit Cmd–Plus(+) (Mac) or CTRL–Plus(+) (Windows) a few times to zoom in so you can see the details closely.
- Notice the background has a checkerboard pattern indicating it’s transparent, and the edge of the hand blends into that transparent background.
Let’s try another file type. At the top right of the window, go into the Preset menu and choose PNG-8 128 Dithered.
PNG-24 has millions of colors (24 bits), whereas PNG-8 has up to 256 colors (8 bits).
- On the right, set Colors to 256.
Look closely at the following:
- The colors in the hand, burger, etc. are not as smooth as we’d like. This preset has some Diffusion dithering (which scatters pixels to help smooth things out) but you can still see some flat bands of colors.
- The edge of the hand now has a sharp white halo instead of blending smoothly into the transparent background. While both PNG-8 and PNG-24 support partial transparency, Save for Web only supports partial transparency in PNG-24. Save for Web is not capable of making a partially transparent PNG-8.
- Click Cancel.
- Choose File > Export > Export As.
- At the top right, set Format to PNG.
- Make sure Transparency is checked on.
- Make sure Smaller File (8-bit) is unchecked.
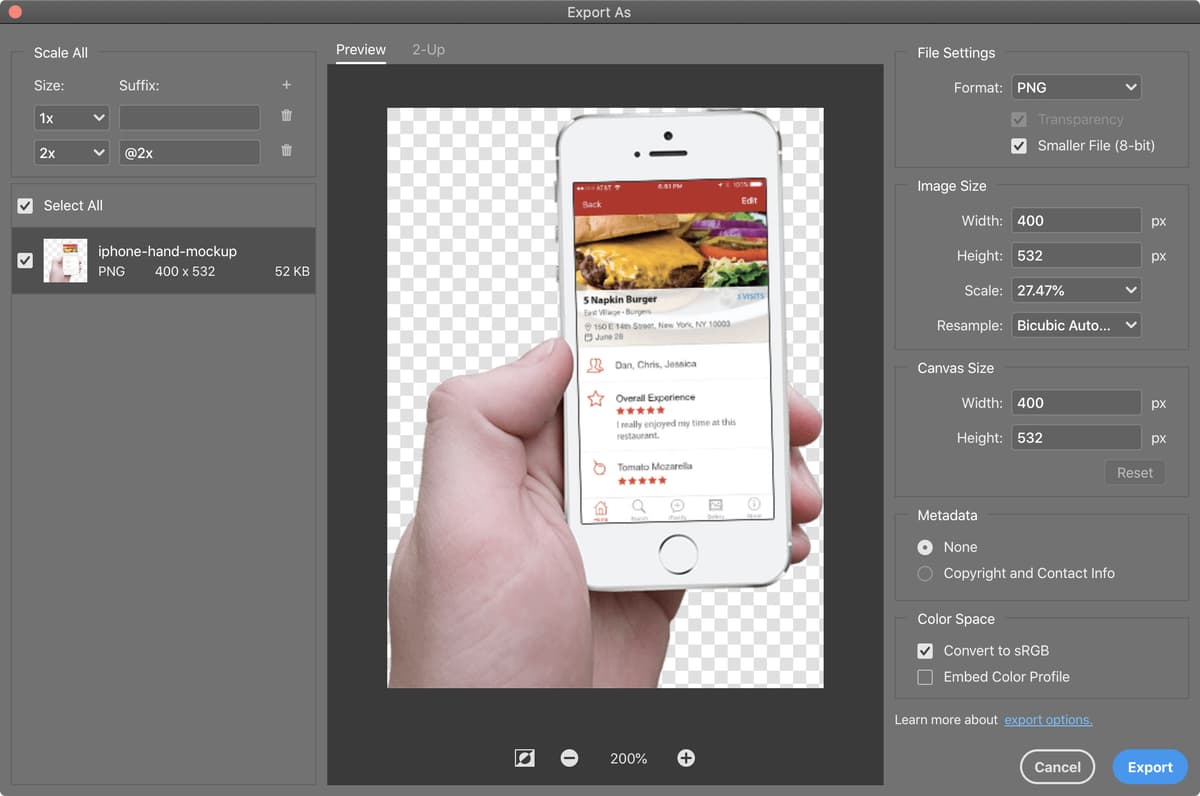
- Under Image Size, set Width to 400 and hit the Tab key to apply the change.
- At the bottom of the window, click the Plus (+) button a few times (until you can see the edge of the hand pretty well).
- On the left side, below iphone-hand-mockup notice the file size is around 206 KB.
- On the right, check on Smaller File (8-bit).
- On the left, notice the file size is around 52 KB. Wow, that’s a lot smaller!
- Notice the transparency still looks fine. Unlike Save for Web, Export As knows how to create a partially transparent PNG-8.
- Also notice that the color gradations look better than Save for Web. There is some banding because PNG-8 only has 256 colors, but the color reduction of Export As is much better than Save for Web.
At the bottom of the window, click on the zoom percentage (between the – and + buttons) to jump back to 100% zoom.
You can’t see the color banding at this size, so we can save a lot of file size by using PNG-8 instead of PNG-24 for this image!
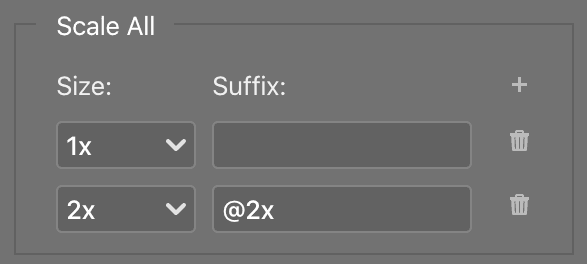
- This 400px wide image is what we need for 1x, but we also need a 2x version. At the top left of the window, click the Plus (+) button to the right of Suffix.
Set the second size to 2x so you end up with the following:
- Click Export.
- Navigate to Desktop > Class Files > yourname-Photoshop for Web Class > Graphics to Optimize > optimized.
- Click Open (Mac) or Select Folder (Windows).
Save the Photoshop file and close it.
8-Bit Graphic Formats: GIF Versus PNG-8
SVG files work great in webpages, but they’re not well supported in HTML email or mobile/tablet apps. PNG and GIF are well suited to optimizing graphics and work well in emails. PNGs are commonly used in mobile/tablet apps. Let’s see how to export PNG and GIF.
- Go to File > Open or hit Cmd–O (Mac) or CTRL–O (Windows).
- Navigate to Desktop > Class Files > yourname-Photoshop for Web Class > Graphics to Optimize and double–click nyc-logo@2x.psd.
- Let’s crop off the extra transparent pixels. Go to Image > Trim.
- Set Based On to Transparent Pixels.
- Make sure Trim Away has all sides checked on.
Click OK.
For our design, we need partial transparency. This graphic doesn’t have many colors, so PNG-8 might work well. As we just learned, the PNG-8 in Save for Web does not support partial transparency, but Export As does.
- Go to File > Export > Export As.
- Make the window as large as possible.
- At the bottom of the window, click the Plus (+) button until the preview fills the entire window.
Before we try PNG, let’s try GIF. At the top right of the window, set Format to GIF.
Unlike JPEG, GIF and PNG both use a lossless compression. While you won’t get ugly JPEG artifacting, the limited color palette of GIF or PNG-8 may in some cases degrade the appearance of images with many colors.
In the empty parts of the logo, you should notice a checkered pattern that indicates transparency. Look closely at the edges, noticing that some pixels are light orange or white. (Zoom in more if needed).
We need partial transparency, which means that some of the checkerboard pattern should be peeking through, as shown in the image below:
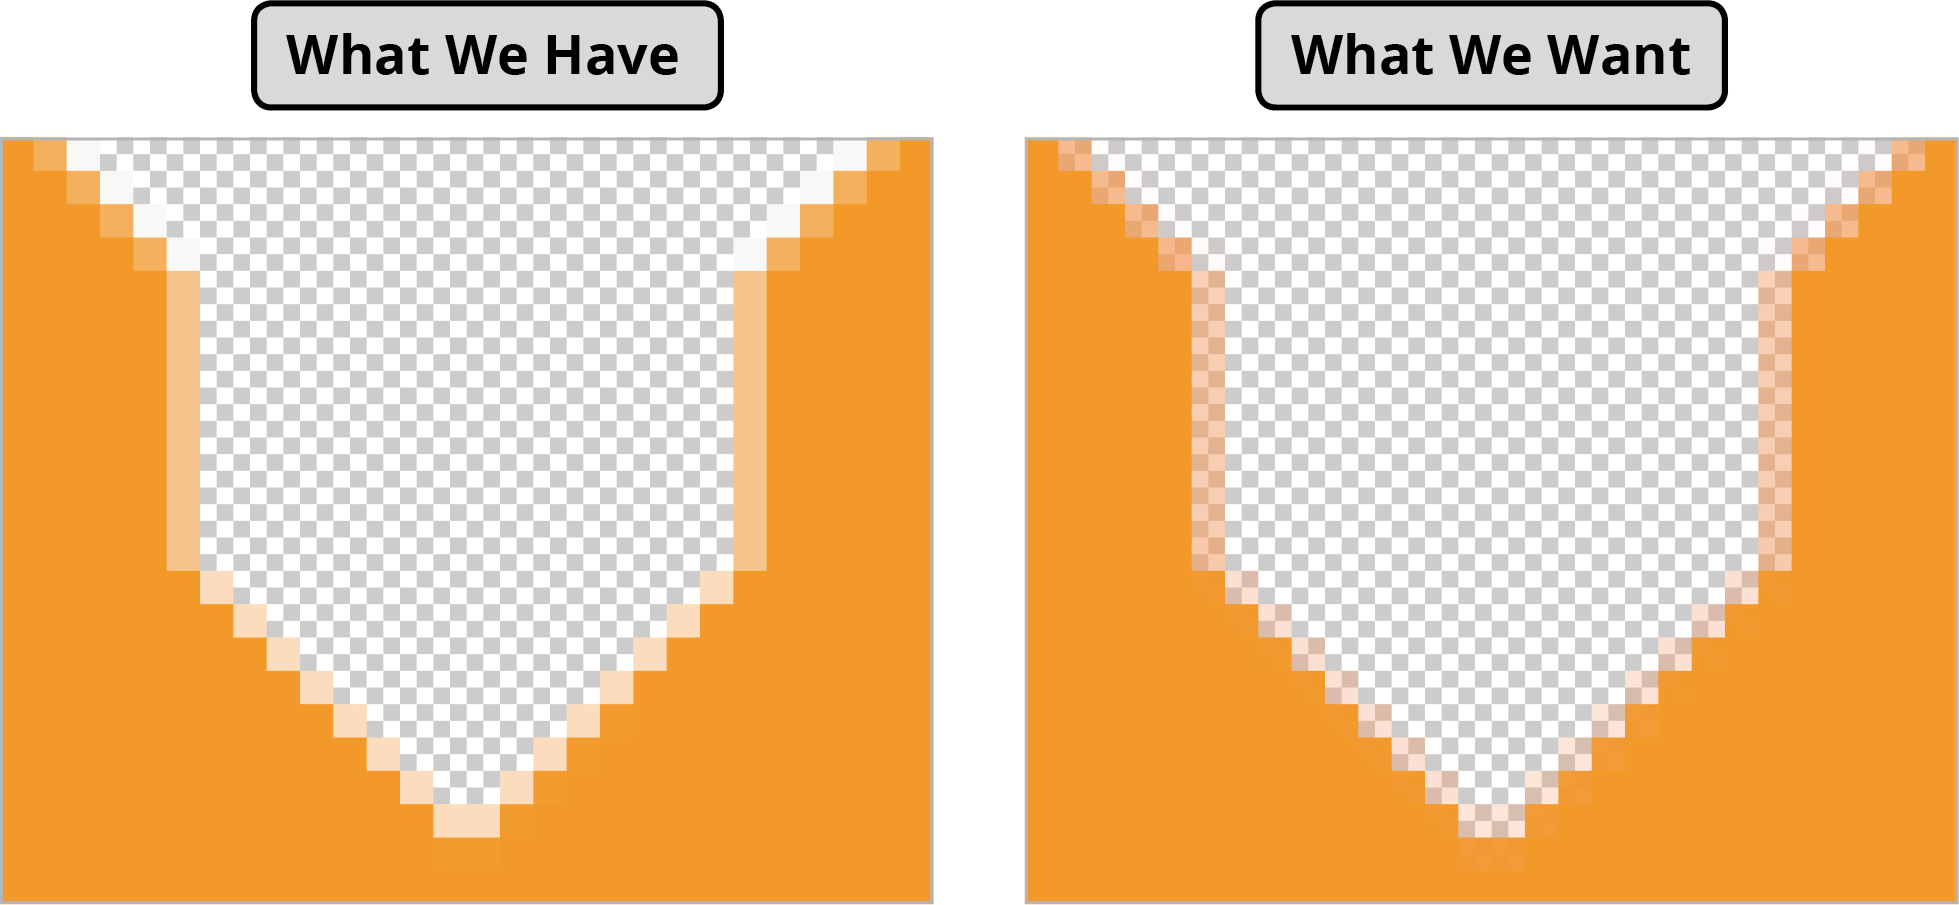
GIF transparency is all or nothing. Any partially transparent pixels become completely opaque, as shown above. This would create an ugly light halo effect when placed over a darker background. This is not usable. Sometimes GIF can be smaller than PNG for simple graphics with no transparency, but typically PNG is smaller and has a usable transparency.
- If you can’t see the entire graphic, click the Minus (–) button at the bottom of the window until you can.
- Change the Format to PNG.
To compare the file sizes, check and uncheck Smaller File (8-bit) a few times, while watching the file size on the left of the window.
The visual quality is the same, but the PNG-8 is around 1.1,000 and the PNG-24 is a little bigger at 1.4,000. Both support partial transparency, so we should use the PNG-8.
- Make sure that Smaller File (8-bit) is checked on before proceeding.
Click Export.
NOTE: For this graphic we’re only going to export a hi-res (@2x) version. As more displays become hi-res, sometimes we only use a 2x graphic and don’t bother making a 1x version (especially for small files like this).
- Navigate into Desktop > Class Files > yourname-Photoshop for Web Class > Graphics to Optimize > optimized. Keep the suggested filename nyc-logo@2x.png and click Save.
Save the Photoshop file and close it.