HTML Semantic Elements
What This Tutorial Covers
header, nav, main, footer
Structural elements that describe page regions.
article, section
Content-level semantic elements.
Accessibility & SEO
Semantic markup helps both screen readers and search engines.
Noble Desktop's Front-End Web Development Certificate teaches HTML, CSS, and JavaScript — the complete front-end foundation.
Dive into the world of HTML and CSS with our in-depth tutorial that covers everything from the outline algorithm and semantic elements to understanding articles, sections, and the main element, among other essential topics.
Exercise Preview
The Outline Algorithm
Every webpage has an outline. It’s similar to a table of contents. In the provided webpage, we’ve marked up some text and tagged the basic content, but, aside from the heading levels (h1 through h6) the page does not have as much semantic structure as it could. Let’s take a look at the document outline and see how it can be improved. There are various online tools and browser extensions to help you visualize a document’s outline. We’ll use one created by Geoffrey Sneddon.
- Open a web browser and go to: gsnedders.HTML5.org/outliner
- Under Input HTML, click the Choose File or Browse button (the button name differs between browsers).
- Navigate to Class Files > Web Dev Class > Structural Semantics.
- Double–click semantic-elements.html to choose it.
Click the Outline this! button just below the file.
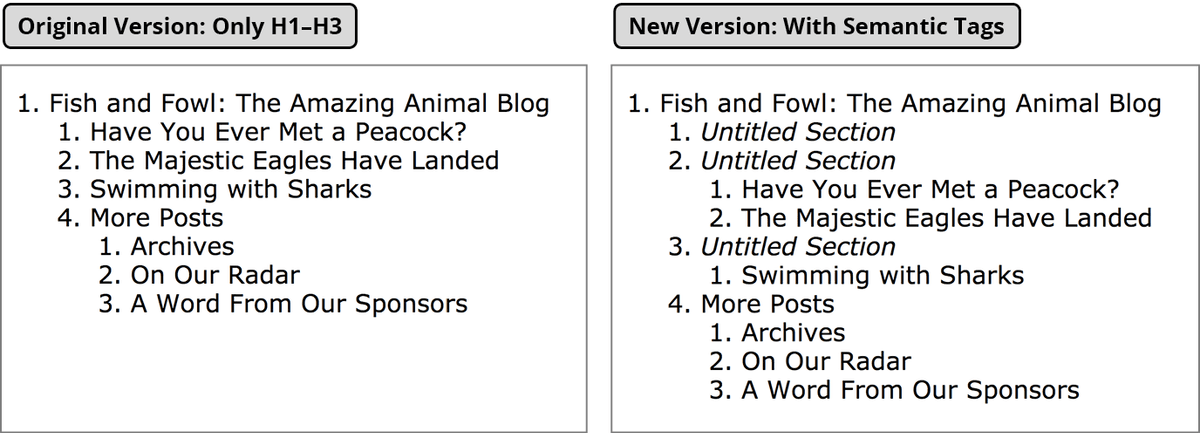
The outline you see reflects the structure indicated by our use of heading tags (currently we have h1, h2, and h3 tags). The top level (main topic) is an h1. That is broken into subtopics using h2 tags. Those subtopics are further broken into nested subtopics using h3 tags, as illustrated below:

In HTML4, this was the only way to outline a document. HTML5 semantic elements offer new tags for controlling the outline and creating a semantic structure that is more friendly for both developers and machines to read. Let’s investigate!
Checking the Updated Document Outline
In a browser, go back to gsnedders.HTML5.org/outliner
Under Input HTML, click the Browse or Choose File button.
Navigate to Class Files > Web Dev Class > Structural Semantics.
Double–click semantic-elements.html to choose it.
- Click the Outline this! button just below the file.
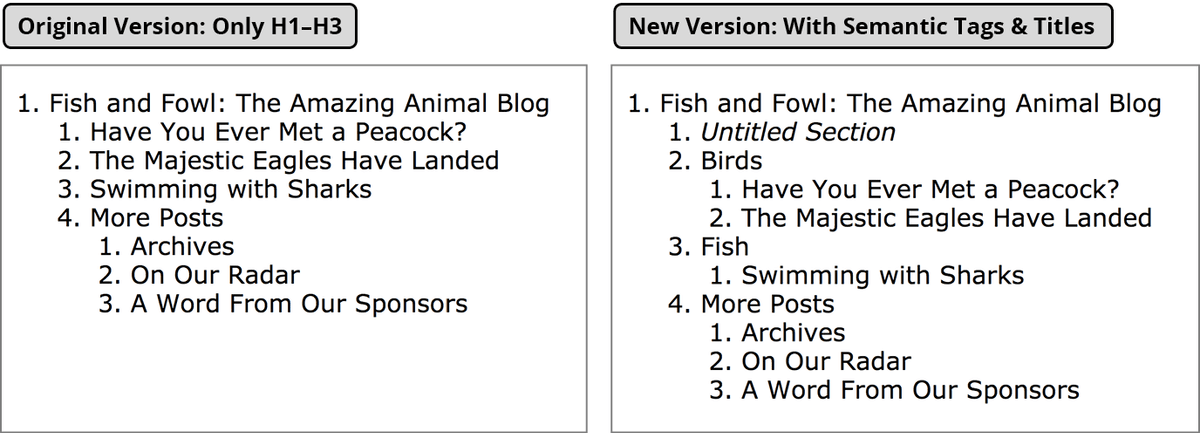
Notice that there are now 3 Untitled Sections. The first is for the nav, and the second and third are for the bird and fish sections.
Rechecking the Outline
In a browser, go back to gsnedders.HTML5.org/outliner
Under Input HTML, click the Browse or Choose File button.
Navigate to Class Files > Web Dev Class > Structural Semantics.
Double–click semantic-elements.html to choose it.
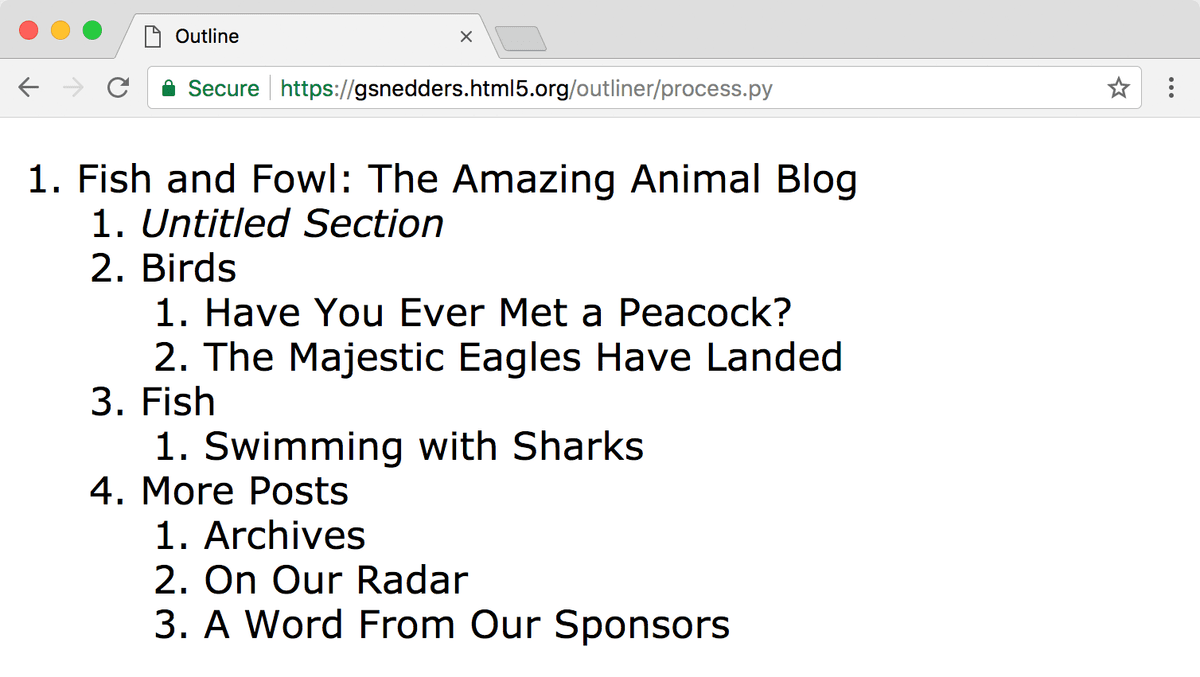
Click the Outline this! button just below the file. You’ll notice that the logical structure of the page has improved with our title sections.