Data Validation in Excel
Excel Power Features
Pivot Tables
Summarize and slice large datasets without writing formulas.
Power Query
ETL inside Excel — clean, reshape, merge, and load data sources.
Dynamic Arrays
FILTER, SORT, UNIQUE, SEQUENCE — modern Excel functions that spill.
XLOOKUP
Replaces VLOOKUP and HLOOKUP — exact match by default, works any direction.
Noble Desktop's Excel Bootcamp covers formulas, pivot tables, data analysis, and VBA.
Explore how to use data validation to set restrictions on cell entries, alert users, and prevent incorrect values from entering your data cells, with examples and step-by-step instructions.
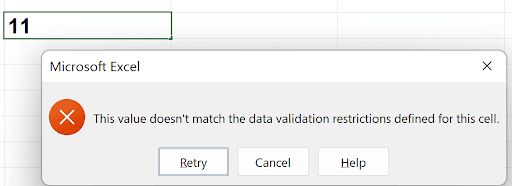
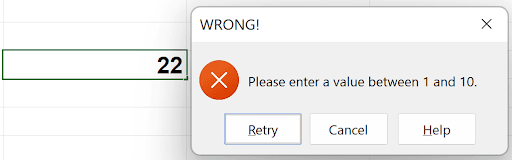
Data validation is a way of ensuring the data in cells meets your defined restrictions. As a simple example, you can set it so that a cell must be a number less than 10. If you enter 11, you can alert the user with an appropriate message, as well as prevent the value from going into the cell. You might see this:
There are many restrictions available. These are shown here:
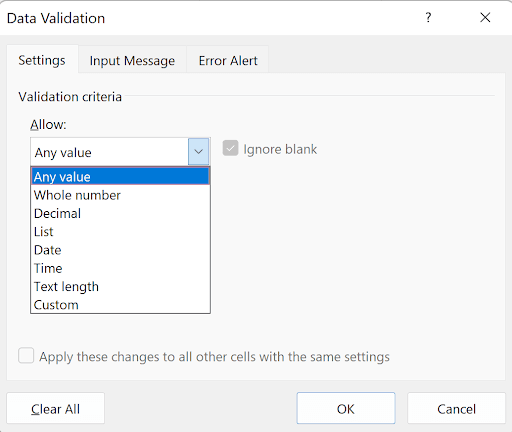
Notice there are 3 tabs: Settings (shown), Input Message, and Error Alert. We’ll explore them all in this article.
You might ask, why would you ever apply a data validation setting of “Any value”. Why bother? Well, you can alert the user with information from the Input Message tab. You could see this, for example:
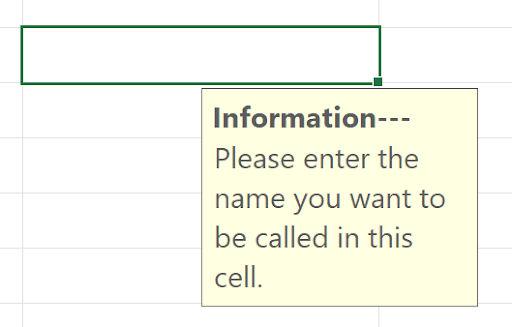
That message would only show when you click the cell (unlike a note or comment which shows when you hover the mouse over the cell).
Let’s go back to the beginning and look at each of the other choices, beginning with Whole number.
When you use this option, you will see this dialog:
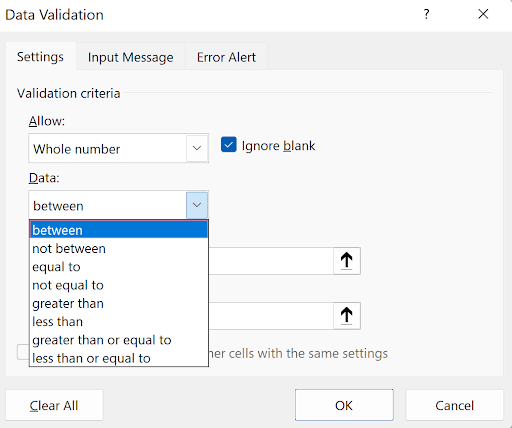
Notice all the choices available! The two edit boxes (covered) are for the values “between”… if you chose Greater than, for example, there would only be one edit box
If you click the Error Alert tab and enter your own message, like this, then that would be the error shown:
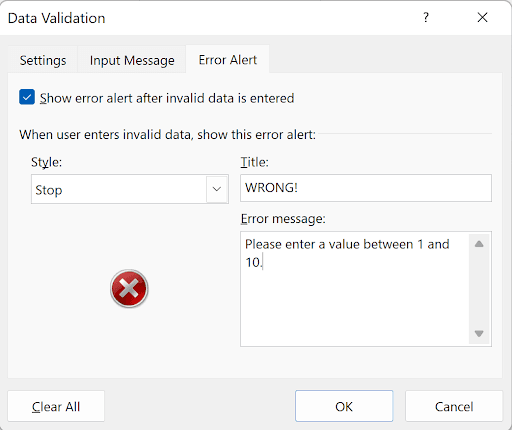
The next choice, Decimal, is the same as Whole Number, except you can enter values such as 2.5 or 7.123456 instead of being restricted to 2 or 8, for example.
Next is List. This shows
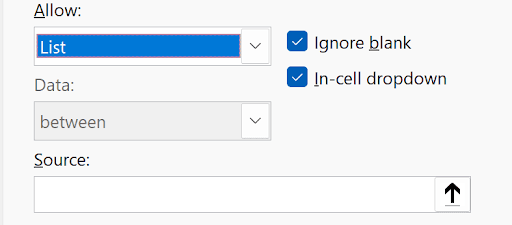
What goes in Source varies. You can type in a list, separated by commas such as:
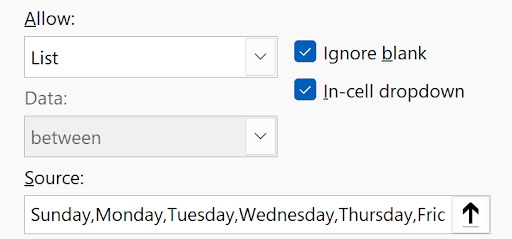
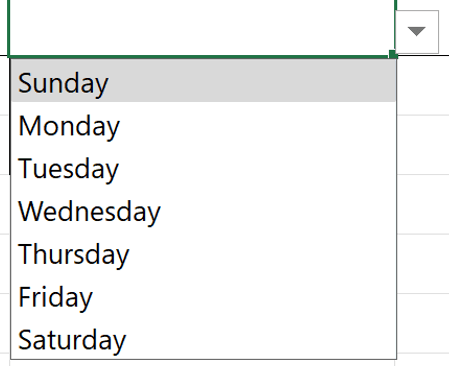
And you would see this when you click on the cell containing this validation rule:
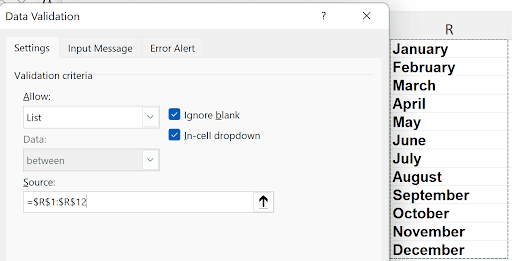
The Source can be a reference to cells, For example, this data validation:
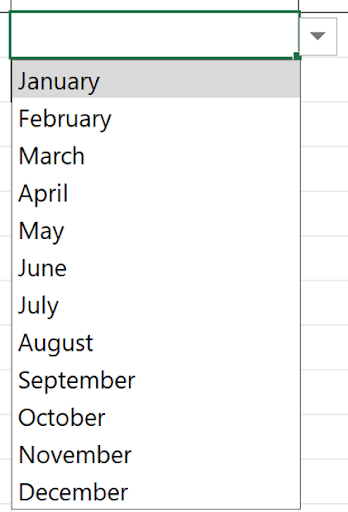
Would show the months when you click the dropdown containing this rule:
The source can also be a range name:
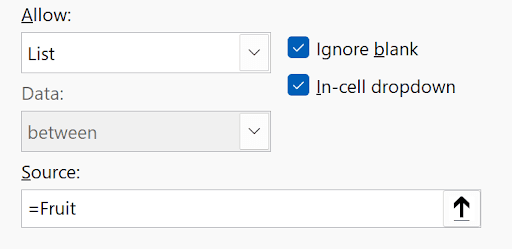
This could produce this list:
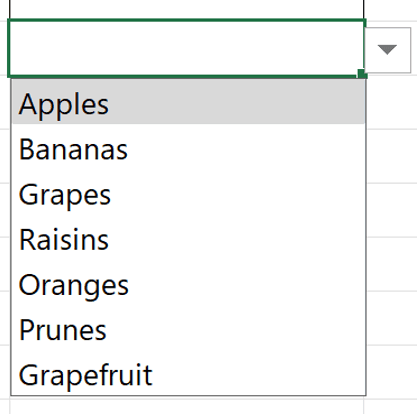
Next, let’s look at Date. When you choose this, you have another variation of choices:
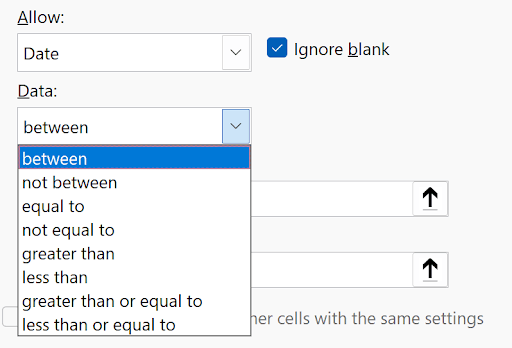
The rest of the dialog depends on this choice, similar to when you choose Whole Number. If you choose “between”, there will be 2 places to enter values. If you choose “greater than”, there will be one.
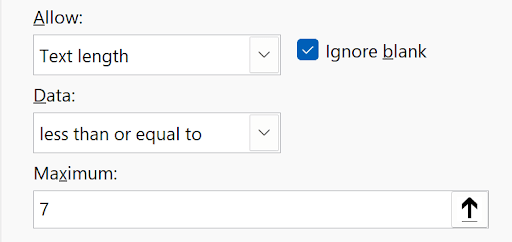
There are similar choices for when you choose Text Length. This, for example,
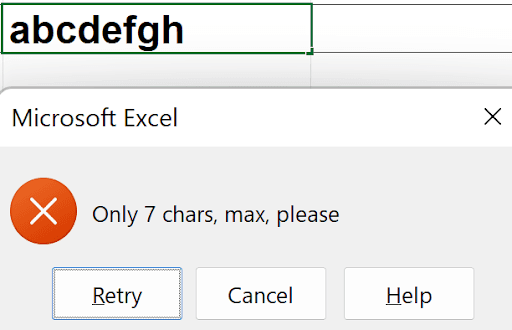
Is achieved from these settings:
Next, and the most possibly complicated, is the choice for Custom. Suppose you wanted to ensure that the user enters a social security number with the correct format. You would need to endure it’s 11 characters long (9 numbers, 2 dashes), that the 4th and 7th characters are dashes, and the other 9 are numeric. The solution presented here is making sure the 9 numbers, when put together (without the dashes) and multiplied by 1 is not an error. That is, 123-45-6789 would check that 123456789 * 1 is a number, whereas 12W-45-6789 would multiply 12W456789 by 1 which would be an error. Here’s the formula which does all that (the data validation cell is F2):
=AND(LEN(F2)=11, MID(F2,4,1)="-", MID(F2,7,1)="-", NOT(ISERROR(1*(LEFT(F2,3)&MID(F2,5,2)&RIGHT(F2,4)))))
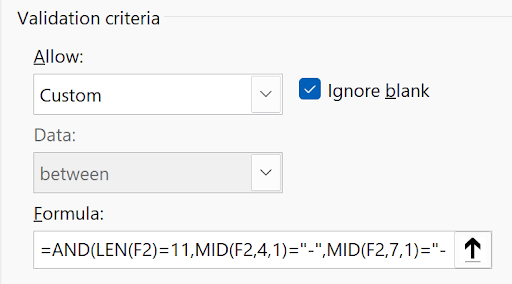
(the formula doesn’t all show!)
Let’s examine some real-world examples.
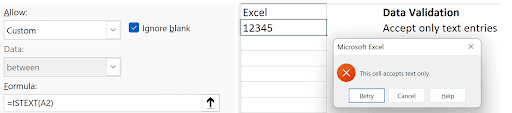
Allow only text:
Allow only larger-than-previous values
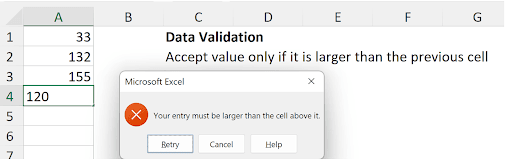
The rule here was set up by selecting A2:A10 (not A1 – there’s no previous from A1), then using the formula =A2>A1 (A2 was the active cell).
Don’t allow duplicate values.

Here, A1:C20 was first selected, and the rule shown was entered (note the absolute reference to A1:C20, and the relative reference to A1 (A1 was the active cell).
Cascading:
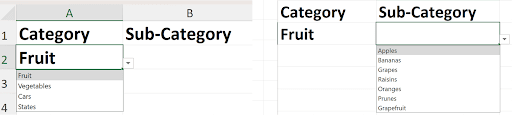
A2’s Data Validation is as shown, but B2’s depends on A2’s. Notice Fruit was selected in A2. Then the choices in B2 are as shown. But if Cars were selected in A2:
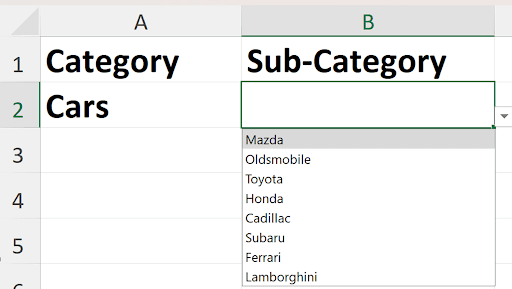
Then you see cars in B2. How is this done?
The solution is in the formula in the data validation:
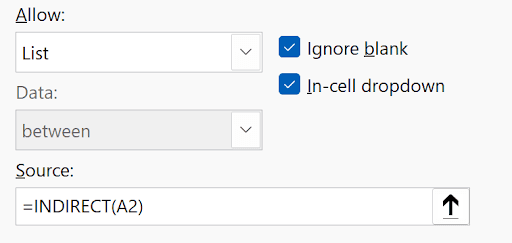
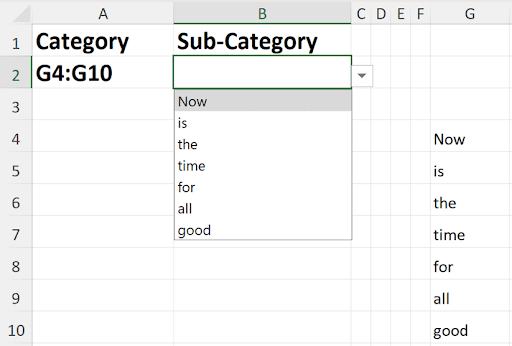
Perhaps the INDIRECT function is new to you. Here’s a simple explanation. =INDIRECT(A2) says treat the contents of A2 as a reference. If cell A2 contained G4:G10, then that text, treated as a reference, is the contents of those cells:
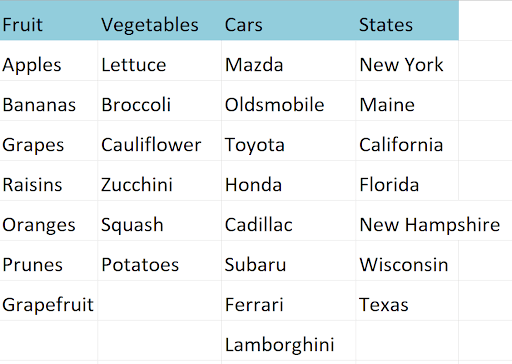
By naming ranges “Cars”, “Fruit”, “Vegetables”, and “States”, it fills the requirements:
These names were defined like this:
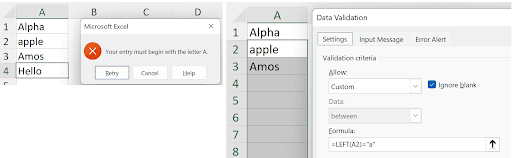
Allow entries only if it begins with a certain letter:
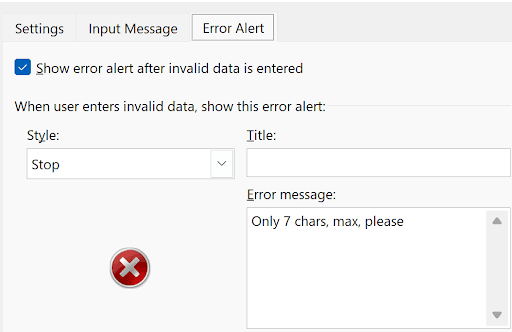
A few miscellaneous items to discuss. In the Error Alert tab, you can choose whether to prevent such an entry or allow it with a warning, or just give information:
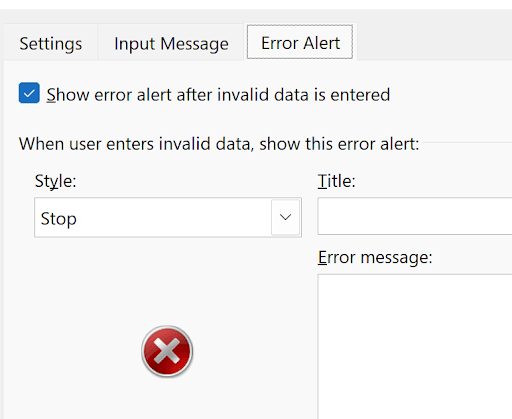
Each has its own icon. Above is the stop. Here’s the Warning:

Here’s the Information:

At the bottom of the Settings tab is a checkbox:
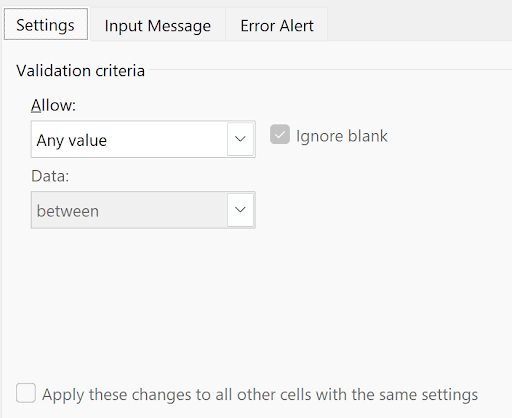
If you’ve selected many cells and put in some data validation rules, then decide you need to change something, selecting this checkbox will make the same changes to all cells with the same settings.
You’re now an expert in Data Validation!