Track Matte & Transparency in After Effects
What This Tutorial Covers
Track Mattes
Use one layer's alpha or luma to control another.
Inverted Mattes
Flip the matte direction for opposite effects.
Layer Modes
Combine mattes with blend modes for complex effects.
Noble Desktop's Video Editing & Motion Graphics Certificate teaches After Effects alongside Premiere Pro, Cinema 4D, and DaVinci Resolve.
Track mattes are a fun and powerful tool in After Effects that allows you to use a clip, still image, or text to dictate the transparency of the layer beneath. Simply put, you can shape a particular layer using the appearance of a track matte above it. Do you want a picture of a flower placed in your text? Or a graphic to hide your video clip until you want it to be revealed? Track mattes are your friend.
Now, you might be asking, why not use a mask? Here’s the main difference: Track mattes are not layer dependent, masks are. What that means for you is that if you put a mask onto a layer, then move the layer, the mask goes with it. If you use a track matte, no matter where you move your layer, the track matte stays in place. This is particularly useful in revealing graphics, as we’ll see later in this tutorial.

Importing and Layering Footage
- Launch After Effects.
- Navigate to After Effects Track Matte Files and open the Track Matte Tutorial.aep file. You’ll see in the file that there are only three layers: A top text layer, a larger bottom text layer, and a white solid for the background, which is locked to prevent editing. Let’s add some more files to work with here.
- Hit Command—I (Mac) or CTRL—I(Windows), which is a hotkey for Importing Files.
- Navigate to After Effects Track Matte Files and click on Cloud Footage. Make sure Footage is selected in the Import As dropdown menu.
- Click OK. You should now have that footage file in your Project files.
- Now that you have that footage file, click and drag it into your layers, right above the bottom text layer. You should now have a top text layer, then your footage layer, then your bottom text layer with the white solid beneath it all.

Using Transparency
In this section, we’ll create a precomp to organize our layers as well as make it easier to animate later on.
- Click on your footage layer.
- Shift+click on your bottom footage layer to have both selected.
- Right-click on either selected layer to bring up a list of options.
- Look near the bottom for the Pre-compose option. Click it. This will create a Precomp in your layers. A Precomp is like a container nested within your project that holds layers within it. The benefit to having one of these is organization, it’s easier to animate, and you can add all sorts of cool effects you can’t do otherwise.
- In the Precomp box that pops up, name it Transparency Windows.
- Hit OK.
- Now, double click the precomp layer within your project to navigate inside it. There you’ll see the two layers you selected earlier, all safe and ready to be used.
- Make sure the footage layer is above the text layer (and positioned to obscure the text layer at this point).
- Look for a little empty square to the right of the Modes. That will be the Preserve Underlying Transparency Option, denoted by a T at the top. If you don’t see it, click Toggle Switches/Modes, which should be at the very bottom of the layers bin.
- Click on the aforementioned empty square.
Ta da! Your footage is now contained within your text. Try moving your text around to see how it interacts with the footage. Neat, huh?
Animating and Using a Track Matte
Now we’re getting close to the Track Matte portion of the project. It’s a very simple technique that will allow you a whole new world of options for your animation projects, and requires very little setup.
- Let’s head back to our main comp, by either clicking Track Matte Tutorial.aep tab above the layers, or clicking the flowchart icon above the layers and finding your main comp there.
- Now we’ll add some simple animations to both text layers. First, let’s select our top text layer.
- Hit the P key to bring up the Position attribute of that layer.
- With your playhead at 0:00:00, click the diamond shape next to Position to enable keyframes.
- Raise the text layer to the top of the composition, to around 810, -12.
- Move the playhead to 0:00:02:00
- Drag the text layer down to 810,282.
- Select both keyframes and hit F9 to make an Easy Ease transition, which smooths out the animation for a more natural feel.
- Bring the playhead back to the beginning, 0:00:00:00.
- Now that top text layer is sliding in nicely, but it’s quite visible from the start of the project and pretty jarring. Let’s cover it up until it’s ready to be seen with a Track Matte.
- Go all the way up to the Layer option, above the toolbar. Click on it.
- Navigate to New > Shape Layer. That should change your cursor to a crosshair and some color options should appear in the toolbar. Ignore those for now.
- Drag out a rectangle shape over the top text layer, covering it completely.
- If you get an ellipse instead of a rectangle, find the Ellipse tool in the toolbar and click on it to reveal a dropdown menu. Select the Rectangle option.
- Rename the layer to Track Matte Box by selecting it and hitting Return (Mac) or Enter (Windows).

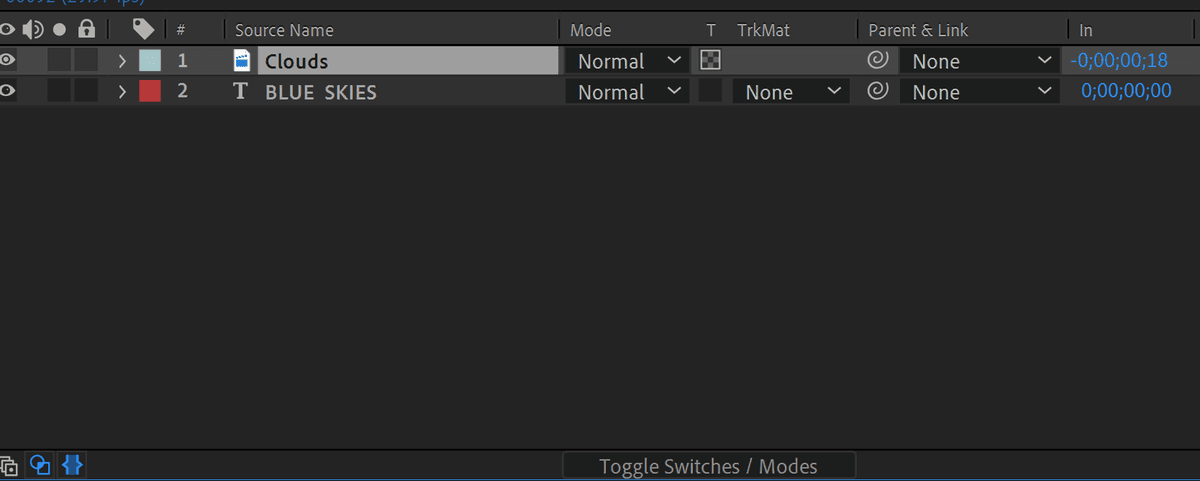
- Here’s the magic part. Focusing on the top text layer, look for drop down menu to the left of the parent picker and to the right of the Preserve Underlying Transparency box. That is the Track Matte tool.
- Click on it.
- From the options that appear, click on Alpha Inverted Matte > Track Matte Box. Bam! Your text has seemingly disappeared, but scroll along the timeline and you’ll see it’s only now hiding behind that shape layer until it slides out below.
- Now select your Precomp layer.
- Hit the T key to bring up Transparency.
- Move the playhead to 0:00:02:00.
- Click the diamond to the left of the stopwatch icon to enable keyframes.
- Lower the Transparency to 0.
- Then move the playhead three seconds ahead, to 0:00:05:00.
- Bring up the Transparency to 100%, to have the precomp fade in gently.
- Select both keyframes, and hit F9 to Easy Ease In.
Now we have our animation, with a spiffy reveal in and a cool footage effect. Let’s finish this off with some effects to really bring it home.
Adding Effects
- Go to the Effects panel all the way on the right.
- Type in Drop Shadow.
- Drag and drop the effect name onto your Precomp layer to activate it. Alternatively, you can right click on your Precomp layer > Effects > Perspective > Drop Shadow.
- In the Effects controls that appear on the left, change the Shadow Color to a dark blue.
- Adjust both Distance and Softness of the shadow to be 25.0 each.

- Next, we’ll add a vignette to frame our animation and call it done!
- Go to Layer > New > Solid.
- In the options that pop up, change the Color to a dark blue, #05204d.
- Click OK and you’ll have a solid blue layer appear in your composition.
- If not already situated above the rest of the layers, click on the layer name and drag it all the way to the top of the stack so it’s layer 1.
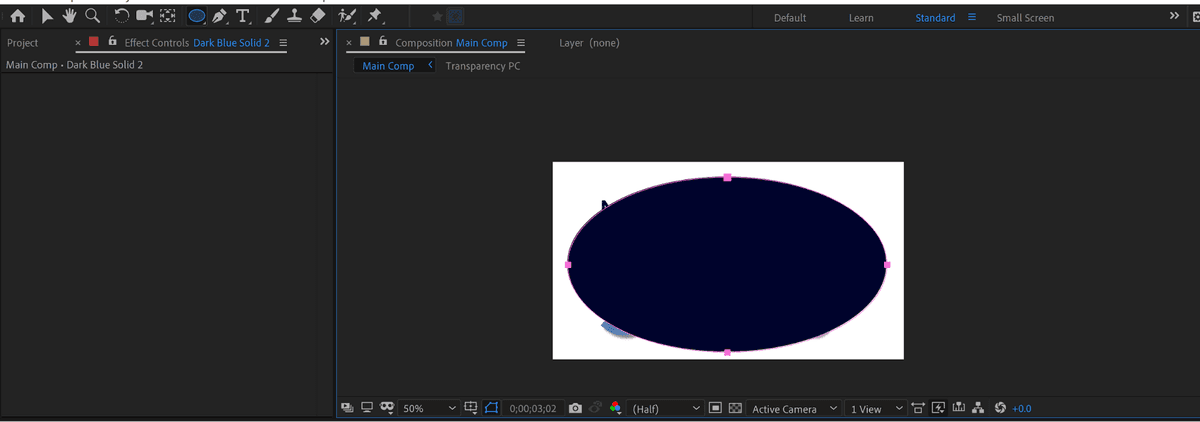
- Now with the blue layer selected, hit the Q key to activate the Ellipse tool (if it activates any other shape, keep hitting Q to cycle through the options till Ellipse is there).
- Then click the top left corner and drag out an oval onto your blue layer. This should create an oval shape, as if cut out from your solid blue layer.
- If you look at your solid layer’s name in the file stack, a Mask will have appeared. If for some reason it’s not visible in the file stack, select the solid layer and hit the M key to toggle open the Mask options.
- To the right of the Mask name should be a dropdown menu and a box with the word Inverted next to it. Click the box to invert the mask, thus creating a frame with an ellipse cut out of it.
- Right-click on the solid layer’s name and navigate to Effects > Blur > Gaussian Blur.
- In the effect options that show up, increase the Blurriness value to around 450 and check the box next to Repeat Edge Pixels. This will keep the frame from breaking up around the edges of the composition.
- Finally, with the solid layer still selected, hit T to bring up Transparency options.
- Lower it to about 50%.
And that’s it! You’ve learned how to use the Preserve Transparency tool to insert visuals into other objects and how to use Track Mattes to hide other objects during animations. With this knowledge, you can change the shape of your Track Mattes, switch up what you use Transparency with, and make a whole new host of cool effects.
Happy animating!