Superman: Guide Layers, Text Presets, & Reverse Parenting
What This Tutorial Covers
Guide Layers
Reference layers that don't render — for alignment and timing.
Text Presets
Pre-built animations to accelerate text work.
Reverse Parenting
Build animation hierarchies that propagate transforms.
Noble Desktop's Video Editing & Motion Graphics Certificate teaches After Effects alongside Premiere Pro, Cinema 4D, and DaVinci Resolve.
Learn advanced techniques in After Effects like rendering an animatic, using a guide layer as animation reference, converting PSD layers to editable text, and much more in this comprehensive tutorial.
Exercise Preview
Let’s preview the Superman-MAIN comp we’ve created for you. If it’s not already open in the Timeline, from the Project panel, double–click on Superman-MAIN.
Press Spacebar to preview the comp.
Notice that each static text layout is synced to an audio file. By the end of this series of exercises we’ll turn these basic layouts into an entirely animated movie.
Let’s check out the setup. In the Timeline, locate the bottommost [Superman-1940-no4.mp4] audio layer and notice it has triangular markers
 that say the abbreviated name of each layout.
To create the animatic, we’ve arranged the layers into an increasing “stair stack” so that each of the static layouts appear at the relevant marker. Just like with keyframes, the playhead can snap to markers. Press the J and K keys to try it out, and each time you’ll see the playhead move to the beginning of one of the layouts.
Let’s render the animatic so we can use it in our project. Go to Composition > Add to Render Queue.
Next to Render Settings, click the blue words Best Settings. In the dialog that opens, choose Resolution: Quarter.
Next to Output Module, click on Lossless.
In the Format menu, select QuickTime.
In the Post-Render Action menu, select Import. (Don’t forget this step!)
We don’t want our animatic to have sound, so go to the bottom left of the dialog. Click where it says Audio Output Auto and change it to Audio Output Off.
Make sure Video Output is checked, then under it click the Format Options button.
Set Video Codec to Apple ProRes 422 (Mac or Windows, AE versions 2019 and higher). If you’re on an older version of AE for Windows, you can use the default AVI settings.
Click OK, then OK again.
Next to Output To, click on the file name or Not yet specified.
Navigate to Superman > Assets, name it Superman-Animatic.mov and click Save.
We’re saving this to the Assets folder because this movie is being imported back into our project.
In the upper-right corner of the Render Queue, click the Render button.
Once the rendering is complete, go to the Project panel on the top left, and notice the new Superman-Animatic.mov file!
Drag Superman-Animatic.mov into the Assets folder to keep things organized.
Using a Guide Layer As an Animation Reference
Let’s clean up the Timeline. At the top left of the Timeline, click the small X to close the Render Queue tab, and return to Superman-MAIN.
Click on the [07-Cartoon Hero] layer and Shift–click the [01-Speeding Bullet] layer.
We no longer need these layers, as we’ll use the rendered animatic instead. Press Delete so that only the audio layer is left.
Press the Home key on your keyboard (or Fn–Left Arrow) to get to 0;00.
From the Project panel’s Assets folder, drag Superman-Animatic.mov to the lower left area of the Composition viewing panel.
With [Superman-Animatic.mov] selected, press the P key to bring up the Position property.
Change the Position values to 260,925.
The animatic should now be sitting in the bottom-left corner of the Composition panel so we can easily view it while we animate each layout.
Because we only want the animatic visible while we’re working, we’ll make [Superman-Animatic.mov] into a guide layer. In the Timeline, CTRL–click (Mac) or Right–click (Windows) on the layer and select Guide Layer.
In the Timeline, to the left of the layer name, notice the new guide layer icon
 .
.Guide Layers
As the name implies, guide layers are used to help you in some way while working. For instance, you can write notes to yourself so you don’t forget something, use them as a picture-in-picture timing reference to ensure your animation is impeccably timed, and much more. Guide layers do not get rendered, so you can only see them while working in After Effects.
We don’t want to accidentally move the layer, so let’s also lock it. In the Timeline, to the left of the layer name and to the right of the eye
 , locate the Lock switch
  . Click in the empty space to turn the Lock switch
  on.
on.Swivel closed the layer. We won’t be changing anything else.
In the Project panel, expand the Assets > Superman Layers folder and double–click 01-Speeding Bullet to open the composition in a new Timeline tab.
Select all the layers.
Copy them.
At the top left of the Timeline, find the 01-Speeding Bullet tab. Click its small X to close it and return to the Superman-MAIN tab.
Select [Superman-1940-no4.mp4] so the new layers will paste above it.
Paste the layers.
With the layers still selected, click on the colored square directly to the left of one of the layer numbers and from the menu that appears, choose Cyan so we know they all belong together.
In the Timeline, click into any empty area to deselect, or go to Edit > Deselect All.
Change the Resolution at the bottom of the Composition Panel, to Full.
Let’s get a sense of what we are working with. On the far left of the Timeline, toggle the Solo switch
 on and off for each layer to view each separately.
Notice that this layout is made up of a text layer, three shape layers, and a background layer. We’ll be animating them separately.
Scrub through with the playhead while holding the Command key (Mac) or CTRL key (Windows). You’ll hear that the “faster than a speeding bullet” audio is over by 1;09. In the final movie, the burst appears after the text has animated in. We’ll go ahead and animate the text first.
Converting PSD Layers to Editable Text & Adding a Text Animation Preset
When we animated text in a previous exercise, we used the Transform > Position property that every layer in After Effects has. That approach is fine when we want to move everything on a layer as a single unit, but it doesn’t give us fine-tuned control over the positioning of each text element inside the layer.
When we want to animate by line, word, or character, we apply a Text Animation Preset. We would like the text to animate on-screen one word at a time, so we’ll add a preset to the text layer. Then we’ll tweak its settings to refine the timing of the animation, so each word animates in sync with the audio.
Select the faster than a SPEEDING BULLET text layer.
Despite it being editable in Photoshop, right now the text is not editable in After Effects. To enable editing capabilities, go to Layer > Create > Convert to Editable Text.
In the Timeline next to the layer name, notice the new T symbol
 . Once text is converted to Editable Text, any changes you make in Photoshop will no longer affect the After Effects file. Take note that this also converts the text into a vector layer.
Move the playhead to 0;00 if it isn’t there already. This is where we want to begin the animation, so we’ll add the preset here.
Go to Animation > Browse Presets to browse the animation presets in Adobe Bridge.
In Bridge, double–click the Text folder to open it.
Double–click the Animate In folder to open it.
Make sure the Preview panel is showing in the top right.
If you see the Publish tab is active instead, click the Preview tab to switch to it.
Click on Straight In By Word.ffx once to preview the animation.
NOTE: The latest versions of Bridge, on some computers, have been unreliable or slow in playing back text animators. If Bridge acts up, you can view GIF previews of the text animators on Motion Island’s blog: tinyurl.com/motion-island-text-gifs. Then you can add them to your text layer from After Effects itself, by searching for it by name in the Effects and Presets window (Window menu > Effects & Presets).
CTRL–click (Mac) or Right–click (Windows) on Straight In By Word.ffx and select Place In Adobe After Effects CC 2019. Bridge will automatically add the effect to the text layer in After Effects.
Return to After Effects (you should automatically) and click OK to any errors.
Notice that the text has been moved off center, but only a little. We want the text to come in from completely off-screen.
If Adobe Bridge Doesn’t Work
While it’s very handy to be able to preview and browse animation presets, we’ve noticed some issues with Adobe Bridge. If you were unable to use Bridge to add the animation preset, follow these alternate steps using After Effects’ Effects & Presets panel:
- Go to Window > Effects & Presets to open the Effects & Presets panel.
- In the Effects & Presets panel’s search field
 , type the name of the preset (eg. Straight In By Word).
 - Double–click the name of the preset to apply it to the layer.
Use the arrows
 to expand into the text layer’s Text > Animator 1 property.
Below Range Selector 1, find the new Position property (not the Transform > Position property we usually animate!). This controls how much the text animator moves the text away from its final resting place. Let’s tweak this value so the entire text is horizontally off-screen before it starts animating.
Change the Position values to 1460, 0 so it animates in from off-screen right.
Press Spacebar to view the text animation. This is looking good so far, but notice how the text is animating in too slowly compared to the audio. Let’s fix that.
TIP: Shortening your work area will speed up previewing.
Move the playhead to 0;18.
Swivel open the Range Selector 1 property that is associated with a text animation preset, and find its Start and End values.
The Range Selector Properties for Text Animators
The group of properties under Range Selector allow you to tweak a text animation preset’s default values to get a more customized result. This is like Mission Control for the entire preset—we can use its grouped properties to tell the text (our “rocket”) to speed up, slow down, and more.
To control how much of the text will be moved by the text animator’s Position change at a given point in time, we need to change the difference between the Start and End values.
Let’s see how these values change over the course of our animation. Keep your eyes on the Start and End values while scrubbing through with the playhead. You should notice the following:
- Only the Start value has keyframes, and the End value stays static.
- The Start value is initially 0%, meaning that the Range Selector bracket is at the start of the text. As its value grows, it gets closer to the End property value. This means that less and less of the text is affected by this text animator’s Position offset.
- The closer the Start and End values are, more of the text ends up back “home”—where it was prior to applying the text animator.
We want the first three words to already be on-screen at this point (0;20). To do so, swivel open Animator 1 > Range Selector 1 > Advanced.
Next to Units, change the menu from Percentage to Index.
Make sure Based On is set to Words. Now our Range Selector values are counting words rather than percentages of total words being animated.
With the playhead still at 0;18, change the Start value from 2.5 to 3. Setting a keyframe here will speed up the text animation.
Move the third keyframe to 1;03. Text looks best when words appear on their first syllable.
Press Spacebar to preview the new speed. Looking good!
Swivel the layer closed as we are done with it.
Animating Shape Layers
The stripe will animate in with the text, and the burst shape will appear immediately after. To animate these shapes, we’ll use another effect called Linear Wipe, as well as the Scale property.
Switch on the Solo icon
for both the Rectangle 1 with outline and bg layers.Select Rectangle 1 with outline (not Rectangle 1).
We don’t need to see the mask at the moment, so go to the bottom left of the Composition panel and make sure Toggle Mask and Shape Path Visibility
 is turned off (gray).
So that we don’t accidentally change the mask shape, expand the Rectangle 1 with outline layer to view its Masks properties.
To the left of Mask 1, click in the empty space to turn on the Lock switch
.With the layer selected, go to Layer > Mask and make sure Hide Locked Masks is checked on.
Swivel closed the layer, keeping it selected.
If the Effects & Presets panel isn’t already open on the right, go to Window > Effects & Presets.
In the Effects & Presets panel’s search field
, type linear wipe.Under the Transition heading (NOT Animation Presets > Transitions—Wipes), locate Linear Wipe and double–click it to apply it to the layer.
In the Effect Controls panel, change the Transition Completion value to 50%.
NOTE: Unlike how the Opacity property works, the layer will be fully invisible at 100% Transition Completion. To make it easier to understand, think of 100% Completion as “100% Wiped Away”. If something is 100% wiped away, you wouldn’t see it at all. If it’s 0% wiped away, you’d see all of it.
We want to change the angle at the left side of the stripe to match the text. Next to Wipe Angle, change the value to 0x+75°.
Our text layer has a Rotation value of –15° (feel free to check the property). So subtracting 15° from our current stripe angle (90–15) has given us a matching angle.
Move the playhead to 0;00 if it isn’t already.
Just like the text, we want the stripe to animate from off-screen. In the Effect Controls panel at the top left, change the Transition Completion value to 80% so that it’s not showing at this time.
To the left of Transition Completion, click the stopwatch
 to add a keyframe here.
Move the playhead to 0;10 where we want the stripe to complete its transition, and be completely on-screen.
In the Effect Controls panel at the top left, change the Transition Completion value to 0%.
Press the U key to view the two new keyframes.
Turn on the Solo switch
for the faster than a SPEEDING BULLET text layer.Scrub through with the playhead to see the text animate in with the stripe.
We want to copy this same effect to Rectangle 1, which hides the middle section of the burst. Press the Home key on your keyboard (or Fn–Left Arrow) to get to 0;00.
In the Effect Controls panel at the top left, click on the word Linear Wipe to select it.
Copy the effect.
In the Timeline, select Rectangle 1.
Press Cmd–V (Mac) or CTRL–V (Windows) to paste the effect with all of the keyframes and settings we added.
With Rectangle 1 still selected, press the U key.
Double–click the first keyframe
 and set Transition Completion to 100%, so the two linear wipes align.
Turn off the Solo switch
for all the layers.Swivel closed any expanded layers.
The last layer to animate in is the burst, so select it now, and expand its Transform properties.
Scrub through while holding the Command key (Mac) or CTRL key (Windows), to hear the gunshot sound at 1;24. We will be setting a keyframe to scale the burst here, but we need to move its anchor point first. Move the playhead to 1;24 if it isn’t there already.
We want to move the anchor point
 to the top left of inside the letter N (the center of the burst shape). Either use the Pan Behind (Anchor Point) tool
  or change the Anchor Point values to 675,536 and Position values to 916,519.
To the left of Scale, click the stopwatch
to add a keyframe (at 1;24).Move the playhead to 1;14.
Change the Scale value to 0%.
The burst will now scale up when the gunshot sounds!
Adding an Overshoot
We’ll add a little extra motion to our burst shape by adding an overshoot. An animated overshoot mimics the motion of real objects which move past (overshoot) the place where they’ll eventually end up, before settling in their final destination. We’ll add another scale keyframe so that the burst scales up to its overshoot size, before returning to its final size.
Move the playhead to 1;28.
Select the second Scale keyframe
 (at 1;24) and copy it.
With the playhead still at 1;28, paste the keyframe.
Press the J key to move the playhead back to 1;24.
Change the Scale value to 110%.
With the keyframe at 1;24 selected, go to Animation > Keyframe Assistant > Easy Ease.
Let’s preview how the animation is looking so far, by hitting Spacebar. Looking good!
Let’s add a little motion blur. Locate the Motion Blur column and turn on the Motion Blur switch
 for the text and three shape layers (Layers 2–5).
So that the motion blur is visible when we preview, go to the top middle of the Timeline and click the big Motion Blur button
:
We’re done animating the individual layers for this layout, so let’s pre-compose them. Select all the cyan layers.
Press Cmd–Shift–C (Mac) or CTRL–Shift–C (Windows).
Name the pre-comp 01-Speeding Bullet-PC, make sure Open New Composition is unchecked, and click OK.
In the Project panel (if you just see Effect Controls, close it to get back to the Project panel), drag 01-Speeding Bullet-PC into the Pre-comps folder.
Using Reverse Parenting for Dramatic Layout Transitions
Whenever you’re unsure how to transition between two layouts that contain different elements inside, the first question to ask yourself is “what do these two layouts have in common?”. If they share an element (such as a shape or color), you can use that element as a “stabilizer” of sorts. While everything else changes, the stabilizing element stays the same, giving your composition a sense of continuity.
Both the Speeding Bullet layout we just finished animating and the More Powerful Than a Locomotive layout we want to transition to contain a dark blue color, so let’s keep that the same. This poses a challenge. The dark blue in the first layout is the Speeding Bullet text that covers a small fraction of that layout, but the second layout’s blue is the background color, which is the size of the entire comp!
To make our transition look seamless, we’ll need to place the second layout inside one of the letters in our first layout so it appears to be part of that letter. This means we need to make our second layout radically smaller. We’ll then zoom into this letter, making the first layout grow monumentally until the second layout covers 100% of the screen. We’ll accomplish this using a technique we call Reverse Parenting.
In the Project panel’s Pre-comps folder, double–click Superman PSD comp.
To see that the 02-Locomotive layer’s background color is the same color as the first layout’s “speeding bullet” text, go to 0;00 and toggle its Solo switch
on.Yep, that’s our familiar dark blue! Turn off the Solo switch
.Switch to the Superman-MAIN tab.
When using parenting, we usually establish the parent-child relationship before animating the parent. To learn why we don’t want to do this yet, read the sidebar:
The Parent-Child Relationship in After Effects
The Parent attribute has no stopwatch. Once you establish the parent-child relationship, it extends both after and before the point in time when the relationship was set up. This ensures that whenever the parent’s Transform properties change, the child will automatically follow along for the ride.
For most animations (such as a null object parent gently scaling up a few child layers from 100% to 120%) it’s easiest to parent the layers, then animate the parent. However, our first layout’s animation will be much more dramatic—scaling up from normal size to super huge. If we create the relationship before doing the needed animation, the child will match the scale, making it way too large! This is why we’ll do our work in reverse—animation before parenting.
Let’s animate the prospective parent so it’s able to adopt the child when it’s done expanding. Select the [01-Speeding Bullet-PC] layer.
Move the playhead to 2;13 and expand its Transform properties.
We’re going to transition to the second layout by zooming in through the letter B of B ullet. In the Tools panel, select the Pan Behind (Anchor Point) tool
and drag the anchor point to the center of the back stem of the letter B. (If it’s hard to see, set your Resolution to Full.)The Anchor Point and Position values should both be approximately 1109,500.

If it is not on already, turn on title safety by clicking the Choose grid and guide options button
 and selecting Title/Action Safe.
As we zoom in, we’re also going to rotate the entire layout so that the horizontal stem of the B fills the entire screen. To the left of Position, Scale, and Rotation, click the stopwatch
to add three new keyframes (at 2;13).NOTE: Remember that when parenting layers, the child layers inherit Position, Scale, and Rotation from their parent layer, but not Opacity or effects.
Move the playhead to 2;19.
Change the Rotation value to 0x–75° (that’s negative 75). The text should now be vertical!
Change the Scale to 5135%, to fill the screen with the letter B’s blue color.
The screen isn’t quite completely blue, so change the Position values to 964,580.
Scrub through between the two keyframes to view what is happening. The whole layout rotates so that we can zoom in through the letter B. We’re also zooming in on blurry letters—not so good!
In the Timeline, above the layers, locate the Continuously Rasterize icon
 and switch it on for the [01-Speeding Bullet-PC] layer.
Much sharper! This is because turning on Continuously Rasterize tells After Effects to continuously recalculate the number of pixels in a vector layer. (Remember that we converted this layer into Editable Text, which made that layer vector.) For more info about this switch, go to tinyurl.com/ae-cont-rasterize
This movement is happening a little too quickly at the moment. To slow things down, draw a selection box around the first column of keyframes (at 2;13) and press Cmd–Shift–F9 (Mac) or CTRL–Shift–F9 (Windows) to add an Easy Ease Out.
Now that we’ve animated the transition from our first layout, we need to bring in the second layout. We’ve animated this layout already to save you some time, so move the playhead to 2;13 to add it.
In the Project panel’s Assets > Pre-renders folder, select 02-Locomotive.mov
To make the second layout start where the playhead currently is, drag 02-Locomotive.mov to the right side of the Timeline between the [Superman-Animatic.mov] and [01-Speeding Bullet-PC] layers. Do not release yet. When the new playhead is close to 2;13, hold Shift to snap it there and release.
Turn off the audio
 for the 02-Locomotive layer.
Now that our first layout’s animation is done and the second layout is present, we need to create the parent-child relationship. It’s very important to note that we need to do this at or after a specific timecode! Read the sidebar below to learn why.
How to Choose the Best Timecode for Parenting
Like how it tends to work in real life, things go smoothest for a child layer when it gets adopted by a fully grown parent layer. When you establish the parenting, After Effects looks at all the parent’s attributes—such as its scale—and calculates how different they are from the child. Assigning a layer at,000% scale to be the parent of a layer at 100% scale locks in a 40:1 relative size relationship.
Remember that this ratio exists not only at the point in the timeline when the two were connected, but also prior to that timecode. It cannot be changed, so we need to do reverse parenting either At or After the point in the Timeline when the enlarged parent layer is as big as it’s going to get.
Move the playhead to the end of the parent’s expansion at 2;19. At this point, the first layout is completely blue, so we are ready for the second layout, with the same background color.
Make sure the Parent & Link column is showing in the Timeline.
If you can’t see it, CTRL–click (Mac) or Right–click (Windows) on the Layer Name or Source Name column. Go to the Columns menu and check on Parent & Link.
To create the transition, we want to parent [02-Locomotive.mov] to [01-Speeding Bullet-PC] so that they move at the same rate. In the [02-Locomotive.mov] layer, go to the Parent & Link menu on the right and change None to 3. 01-Speeding Bullet-PC.
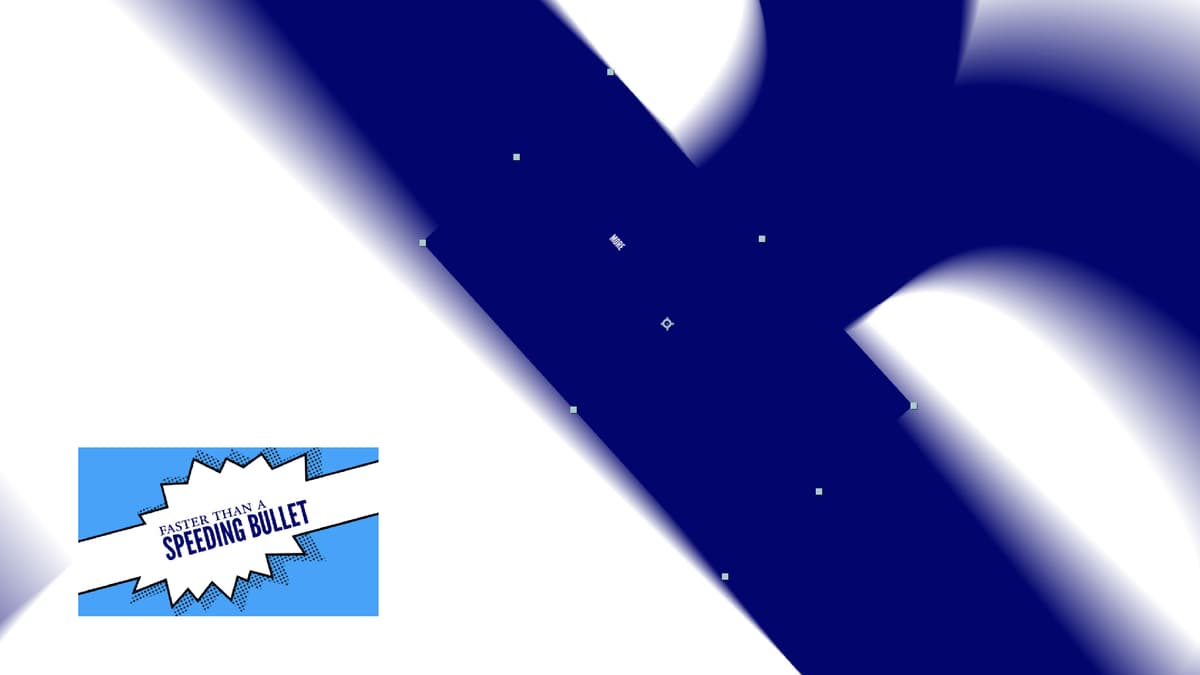
To check that the layouts are moving together, scrub backwards to see the “more powerful than a locomotive” layout is appearing within the first layout’s text. Halfway between the two keyframes it should be sitting within the letter B’s stem as shown below.
To fix those sharp edges, next to [02-Locomotive.mov], switch on Motion Blur
.Press Spacebar to preview your work so far. You may need to wait for the frames to cache (load into the computer’s memory) before it will play back smoothly. The first layout is done, and transitioning nicely into the second!
Do a File > Save and leave this project open. We’ll continue working on it in the next exercise.