Particle Skateboards: Using 3D Cameras
What This Tutorial Covers
Camera Setup
Add and configure 3D cameras in your composition.
Camera Animation
Animate camera position, rotation, and focal length.
Depth of Field
Simulate camera focus blur for dimensional effects.
Noble Desktop's Video Editing & Motion Graphics Certificate teaches After Effects alongside Premiere Pro, Cinema 4D, and DaVinci Resolve.
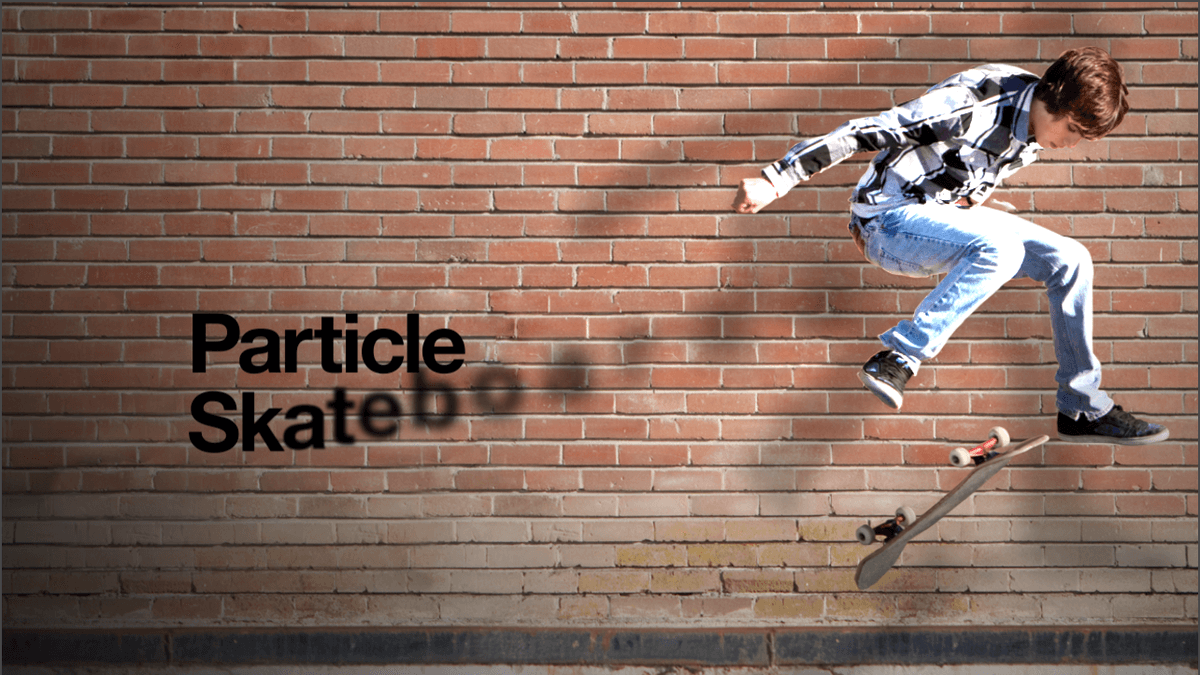
Discover how to create a realistic two-dimensional skateboard scene in After Effects through this detailed tutorial, which covers adding a camera layer, applying and modifying a text animation preset, combining text animators, and using the light sweep effect.
Exercise Preview
Adding a Camera Layer
You should still have yourname-Particle Skateboards.aep open in After Effects. If you closed it, re-open it now. We recommend you finish the previous exercise (B1) before starting this one. If you haven’t finished it, do the following:
- Open Particle Skateboards-Ready for 3D Camera.aep (from the Particle Skateboards > Finished AE Projects folder).
- Save the file as yourname-Particle Skateboards.aep in the Particle Skateboards folder.
Now we’re ready to add a camera we can animate. Go to Layer > New > Camera.
Make sure Type is set to One-Node Camera, Preset is set to 50mm, and Enable Depth of Field is OFF (unchecked). Then click OK.
Using a Camera Layer to Control 3D Layers
For the most part, Camera layers only affect 3D layers (they can only affect 2D layers if they have certain effects applied). Manipulating a camera layer allows us to change a 3D layer’s angle or positioning. Moving the “camera” is usually the easiest way to move 3D layers in the composition frame.
To make our camera adjustments easier, we’ll parent the camera to a null object. Rather than factor in all the various camera properties, it will be far easier to animate a null object. Go to Layer > New > Null Object.
In the Timeline, select [Null 1] and rename it: Camera Move
Check the 3D Layer switch
 to the right of Camera Move.
Select Camera Move and hit P to bring up the Position property. The Position coordinates should be 640,360,0.
Collapse all of your layers in the Timeline.
In the Timeline, to the right of Camera 1, set the Parent & Link menu to 1. Camera Move.
Now wherever we move the null object, our camera will move with it.
Expand into Camera Move > Transform.
Set the playhead to 0:00.
Next to Position, click the stopwatch
 .
.Set the playhead to 9:29.
By either dragging the X-, y-, and z-axes in the Composition panel or entering the numbers manually in the Timeline, set the Position coordinates to 650,347,120.
Set the playhead back to 0:00.
In the Composition panel, switch to 1 View.
Press Spacebar to view your work. Hmm, kind of bland and linear for the camera move. Let’s fix this.
Let’s smooth out our camera work. Expand into Camera Move > Transform.
Click the word Position to select all the keyframes on that property, and go to Keyframe Assistant > Easy Ease.
To keep things tidy, collapse the layers in the Timeline.
Applying a Text Animation Preset
At the bottom of the Composition panel, click the Choose grid and guide options button
 and select Title/Action Safe to display the safe areas.
Change the text to be editable After Effects text, by CTRL–clicking (Mac) or Right–clicking (Windows) the name of the text layer and choosing Create > Convert to Editable Text from the dropdown menu there.
We’ll animate the text using what’s called a Text Animation Preset. These are pre-built animations for text that install automatically with After Effects.
Move your playhead to 4:00, and hit the left bracket key [ to start the Particle Skateboards text layer there.
Go to Animation > Browse Presets. This will launch Adobe Bridge, where we can browse all the available presets and choose one to apply to the text.
NOTE: Once we apply an animation in Bridge it will automatically start in After Effects from wherever the playhead is parked, so make sure the playhead is at 4:00 in the Timeline.
If you get a dialog that asks if you want to locate and import preferences from a previous version of Bridge, click Yes.
If you get a dialog about accessing Creative Cloud Libraries, click Dismiss.
Go to Window > Workspace and make sure Essentials is checked on.
In Bridge, double–click the Text folder to open it.
Double–click the Blurs folder to open it.
Clicking once on any effect will open a preview of that animation on the right (make sure you are in the Preview tab). Click on a few effects to sample what’s available before moving on.
We’re going to use Evaporate. Click on it once to preview the animation, then CTRL–click (Mac) or Right–click (Windows) on it and select Place > In Adobe After Effects. Bridge will automatically add the effect to the text layer in After Effects.
In After Effects, if a dialog about a reference error pops up, click OK to dismiss it.
Close Bridge. We’re done with it.
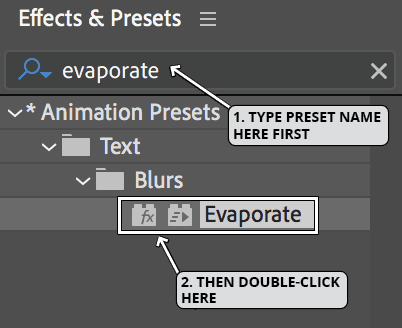
NOTE: The latest versions of Bridge, on some computers, have been unreliable and slow in playing back text animators. If Bridge acts up, you can view GIF previews of the text animators on Motion Island’s blog: tinyurl.com/motion-island-text-gifs. Then you can add them to your text layer from After Effects itself, using the Effects and Presets panel (Window menu > Effects & Presets) as shown below:
- Switch back to After Effects.
Press the U key 2 times fast UU to see the new keyframes and anything that was changed from the defaults.
Go to the start of this layer by hitting the i key, and then hit B to set the Timeline’s work area to B egin here.
Hit Spacebar to play this section back. The text is only onscreen for a moment before it evaporates off! This “animating off” is different from what we want – we wanted the text to animate on, and each letter in order from left to right rather than randomly.
Under the Particle Skateboards text layer in the Timeline, locate the property called Shape (located within Evaporate Animator > Range Selector 1 > Advanced) and change its dropdown from Ramp Down to Ramp Up.
In the same section, locate the property called Randomize Order, and change it from On to Off.
Play back the animation with Spacebar once again. Much better, but let’s add more complexity to it!
You can add more properties to a text layer’s animation preset. Locate the Add flyout menu next to the Evaporate Animator, as shown below.
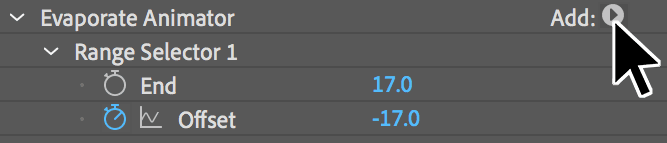
Click the Add flyout and choose Properties > Tracking.
Anytime you add a property to a text animator, it affects the transformed version of the text, in this case the text before and during the animation onto the screen. To view changes to the text preset, your playhead needs to be between the keyframes of the animation. Move your playhead to 5:00.
Scroll down in your timeline and change Tracking Type to After and Tracking Amount to 150. Now the letters start off further apart from each other.
Next we’ll adjust the placement of the letters vertically, as they come into place. Click the Add flyout once more, and choose Position.
Change the Position value to (0.0, -240.0) to move the transformed text upwards.
Save your project. In the next section we’ll add more properties to our Text Animator and it would be good to have a solid version of the animation to File > Revert to.
Rendering
Let’s export our video and save it for publishing! In the Timeline, make sure you are in the Skateboarder-MAIN tab.
Go to Composition menu > Add to Render Queue.
In the Render Queue panel that appears at the bottom, next to Output To, click on the file name or Not yet specified.
Navigate to Desktop > Class Files > After Effects Class > Particle Skateboards > Renders, name it Particle-Skateboards.mov and click Save.
At the top right of the Render Queue panel, click the Queue in AME button.
This should launch Adobe Media Encoder—an application specifically designed to encode and process content for your desired output.
Let’s make sure we’re looking at the same thing by going to Window > Workspaces > Default Workspace
Then go to Window > Workspaces > Revert Workspace to reset to factory settings.
On the right you should see that skateboarder-MAIN has been added to the Queue.
Below the Format column, click the small arrow
 and choose H.264 if it isn’t already.
Below the Preset column, click the small arrow
and choose Match Source-High Bitrate from the menu.Click the words Match Source-High Bitrate to customize these settings.
In the Export Settings window that opens up, a little further down, make sure you’re viewing the Video tab.
Click the Match Source button to make sure our export is the same dimensions as our sequence settings.
Scroll down in the Video section and check on Render at Maximum Depth so that our video exports at a high quality.
Below that, find the Bitrate Settings.
Set Bitrate Encoding to VBR, 2 pass. This refers to a Variable Bit Rate and number of encoding passes.
Further down in the Video section, under Advanced Settings, check on Key Frame Distance and set it to 30 to match it to our project’s frame rate.
At the bottom of the Export Settings window, check on Use Maximum Render Quality.
At the bottom of the window, click OK to exit out of the Export Settings.
Below the Output File column you’ll see the filename and location where it’s going to save your file should already be set to your Renders folder. If it isn’t already, click the blue filepath text, and set it to Desktop > Class Files > After Effects Class > Particle Skateboards > Renders.
To start the rendering/exporting process, in the top right of the Queue window, click on the green Start Queue button
 .
.When the progress bar below the Queue panel is completely blue, the rendering is complete! Once it’s done, you can click the blue filepath below the Output File column, to go to the folder where the file is located.
Open the Particle-Skateboards.mp4 movie and watch your new masterpiece!