Making an Animated GIF: Intro to After Effects
What This Tutorial Covers
Composition Setup
Frame size, duration, and frame rate for GIF.
Simple Animation
Position, scale, and opacity keyframes.
GIF Export
Render to formats compatible with GIF conversion.
Noble Desktop's Video Editing & Motion Graphics Certificate teaches After Effects alongside Premiere Pro, Cinema 4D, and DaVinci Resolve.
Master the art of animation with this After Effects tutorial, providing an in-depth step-by-step guide on creating a short animation and converting it to an animated GIF using Photoshop.
Exercise Preview

Getting Started
You can create designs in After Effects, but people commonly create the layout in Photoshop or Illustrator and then use After Effects to animate it. We created a design in Photoshop. Before we import it, we must ensure After Effects will create compositions that are the correct length. After Effects defaults to the length of a previous composition, so we’ll create a dummy composition with the correct length.
- Go to Composition > New Composition. Alternately, you can click the big New Composition button near the middle of the screen.
We don’t care about most of these settings. You only need to set the following:
Resolution: Full Frame Rate: Click the arrow  and from the menu, choose 30
Duration: 30:00 This assumes After Effects is showing you Timecode (which looks like 0:00:30:00). If you’re seeing frame numbers instead (a number with no colons such as 00900), then enter 900. - Click OK.
- At the top left of the screen, locate the Project panel. Click on the dummy Comp 1.
- Press the Delete key to remove it.
- Now we can import our design (a Photoshop file). Choose File > Import > File.
- Navigate to Desktop > Class Files > After Effects Class > Classes in a Day GIF > Assets and double–click on PSD Layout.psd to choose it.
In the dialog that appears, set these options (we’ll explain them in a later exercise):
Import Kind: Composition – Retain Layer Sizes Layer Options: Merge Layer Styles into Footage Click OK.
The Project, Composition, & Timeline Panels
- The Project panel at the top left displays all the assets in your project. Look there and you should see a PSD Layout composition and a PSD Layout Layers folder.
Double–click the PSD Layout composition to open it in the Composition viewing panel in the top middle of the screen.
This is the main viewing panel where you can preview the changes you make to a composition as you work. A composition (or comp for short) is a container that stores one or more assets. Putting video files, still images, etc. into a comp allows us to do work such as edit and add effects.
Below the Project panel, locate the Timeline (the long horizontal panel located at the bottom of the screen). Notice that the composition also got loaded into the Timeline. Because we imported a layered PSD, multiple layers are visible here!
This panel shows all of the layers in the composition you’re working in. It also allows you to add animation to these layers at specific times, and otherwise modify them in various ways we’ll cover throughout the class.
At the top left of the Timeline, the current time display will be showing either Timecode (0:00:00:00) or Frames (0,000).
We want it to display Frames (0,000), so if it’s displaying Timecode (0:00:00:00), hold Cmd (Mac) or CTRL (Windows) and click on it to toggle it to Frames (0,000).
NOTE: At the bottom left of the Composition viewing panel below the video preview, there is also a smaller display of the Frame numbers
 .
.- Go to Composition > Composition Settings.
Most of the settings will already be correct, but make sure you set the following:
Resolution: Full (so our layers appear as sharp as possible on-screen) Duration: 500 Why 500? After creating the animation in After Effects, we’ll take it into Photoshop to export the final animated GIF. Photoshop cannot export animated GIFs longer than 500 frames, so we’re using 500 frames as the maximum length. 500 frames at 30 fps (frames per second) will give us over 16 seconds, which is plenty of time. We will trim off the extra time when we’re done creating the animation.
- Click OK.
Let’s save this After Effects project. Choose File > Save and:
- Navigate to Desktop > Class Files > After Effects Class > Classes in a Day GIF.
- Save the project as yourname-classes-in-a-day.aep.
Animating with Keyframes
We’ll start by animating the list of class names, so that each class name falls in from the top and then the entire list slides left.
- In the Timeline, find the Class Names layer.
If Class Names does not have square brackets around its name, look directly above the layer names and click on the Source Name column heading to switch it to Layer Name instead.
Now the name should be displayed as [Class Names].
- In the Timeline, double–click on [Class Names] to open that composition.
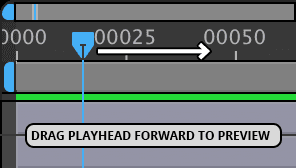
At the top of the Timeline notice there is a blue playhead
 (called the Current Time Indicator).
We want the class names to animate in over the course of a half-second, and end up where they currently are placed. We’ll set the keyframes at frame 15.
Drag the playhead to frame 15. (Watch the current time display at the top left of the Timeline to make sure it says 00015.)
Click once on the SEO layer name to select the layer.
NOTE: If you double–click it, a Layer panel will open on top of the Composition panel. If you accidentally opened it, close it now by clicking the small X next to the Layer panel’s tab.
- Hold Shift and click on the UX Design layer so all the layers are selected.
- In the Timeline, to the left of SEO, click the arrow
 to expand all the layers.
 - Under SEO, click the arrow next to Transform to expand the Transform under the SEO layer.
- Any property that can be animated in After Effects has a little stopwatch
 directly to its left. Click the stopwatch next to Position.
 On the right-hand side of the Timeline at frame 15 under the SEO layer and to the right of the Position property, notice the keyframe
 . A keyframe indicates the beginning/end of a transition of the property it’s adjacent to (Position in this case).
Using the Stopwatch
Turning on the gray stopwatch next to a property allows that property to animate. Click it only once. After that, simply changing the value of the property automatically creates a new keyframe. Beware, clicking the stopwatch again (when it is blue) will make all the keyframes for that property disappear!
All you need to do to make a transition is create keyframes at key moments in an animation sequence, and After Effects will create in between values for you. Because we want our move to last exactly 15 frames, go to the right side of the Timeline and drag the blue playhead to frame 0.
To the right of the Position property, find the two comma-separated numerical values:
- The first one is the X-coordinate (distance from the left).
- The second is the y-coordinate (distance from the top).
NOTE: After Effects uses the top-left corner as the origin point for all coordinates including those for the Position property.
Hold down the Shift key and press the Up Arrow key on your keyboard. Watch how the second value (the y-axis position) changes over time.
Keep pressing Shift–Up Arrow (or Up Arrow without Shift to go in smaller amounts), until the SEO layer’s Y position value is around –238.
NOTE: By changing the value of a property that already had keyframes, After Effects automatically added a new keyframe at the current playhead position.
On the Timeline’s right side, notice a new keyframe
 was automatically added at frame 0. A transition takes place between two keyframes of the same property.
If you see dots
 instead of diamond-shaped keyframes next to any of your layers, there’s a quick way to display keyframes instead:
- Do an Edit > Select All.
- Press the letter U on your keyboard.
NOTE: This keystroke shows any kind of keyframe (in our case it’s Position, but it works for others as well). To help you remember the U key, think of it as a u niversal keystroke that shows all types of keyframes!
Why the Two Keyframes Look Different
You may have noticed that the first keyframe on each layer, now looks like  . Keyframes in After Effects look different depending on their place in a sequence, and the first one shows that it’s the start of a transition. Selected keyframes are blue, and the currently selected one
  means that it’s the end of the transition.
Previewing in Real-Time
Let’s preview our video in real-time using the Preview panel!
To the right of the video, locate the Preview panel that allows you to preview in real-time. (It should be below the Info panel and above the Effects & Presets panel).
Make the Preview panel taller, by dragging down its bottom border until you see all its options.
Make sure the following options are set:
- Set Shortcut to Spacebar.
- Next to Include, make sure both the Video
 and Audio
  icons are blue (which means they’ll both be included in the preview). Even though this video has no audio track, we’ll add audio in a later project.
 - Uncheck Cache Before Playback.
- Set Range to Work Area.
- Set Play From to Start Of Range.
- Set Skip to 0 so it doesn’t skip any frames on playback.
- Set Resolution to Auto so it previews using the resolution you set when creating the composition.
At the top of the Preview panel, click the Play button
 . The text should slide down into position.
When done, click the Stop button
 (where the Play button used to be).
The Play/Stop Button
The button is technically called Play/Stop, and its icon can look like a Play button
(when first loading the video) or a Stop button (when it’s playing in real-time). If it takes time for After Effects to store each frame into RAM (which is likely not the case with this simple animation), it can also look like  .
.- In the Timeline, click the arrow to the left of the SEO layer to collapse all the selected layers.
Click in a blank area of the Timeline to deselect the layers.
Animating in the Class Names
- Currently all the class names slide in at the same time, but we want them to slide in one after the other. We can do this by offsetting each individual class name animation by a few frames. Move the playhead back to frame 0.
On the keyboard, press Cmd–Right Arrow (Mac) or CTRL–Right Arrow (Windows) to go forward by 1 frame. Neat!
TIP: Instead of holding Cmd (Mac) or CTRL (Windows) and using the Left Arrow and Right Arrow keys to move the playhead, you could use Page Up and Page Down if you prefer.
Press Cmd–Left Arrow (Mac) or CTRL–Left Arrow (Windows) to go back by 1 frame, so you are back at frame 0. We’ve just uncovered a trick of the trade to fine-tune the playhead’s location in the Timeline!
Press Cmd–Right Arrow (Mac) or CTRL–Right Arrow (Windows) 3 times to move the playhead forward 3 frames. The Current Time Display should show 00003.
- The bottom layer (UX Design) is the bottom class in the list. We want that to come in first, so we’ll keep that starting at frame 0. Moving up the list, select the Adobe XD layer.
- Press the [ key (left square bracket) to snap the layer to the current playhead position.
- Again, press Cmd–Right Arrow (Mac) or CTRL–Right Arrow (Windows) 3 times to move the playhead forward 3 frames. The Current Time Display should show 00006.
- Select the HTML Email layer.
- Press the [ key (left square bracket) to snap the layer to the playhead.
Repeat this process for the remaining layers (so your Timeline ends up as shown below). Here’s a quick review of the steps:
- Press Cmd–Right Arrow (Mac) or CTRL–Right Arrow (Windows) 3 times to move the playhead.
- Select the next layer (moving up the list).
- Press the [ key.

- Move the playhead to frame 0.
- As a quicker way to preview the animation, press the Spacebar. That looks much more interesting!
Press the Spacebar again to stop the playback.
Trimming Vs. Shifting Layers
- Do a File > Save.
- Press Cmd–A (Mac) or CTRL–A (Windows) to select all your layers.
Press the U key to show the keyframes
for the selected layers.Click in a blank area of the Timeline to deselect the layers.
Notice how all of the keyframes are shifted over with the start of their layer? That’s because we used the [ key to offset their timing in the previous section.
- You can also do this manually by dragging the layer bar. To do this, go to the Tools panel and choose the Selection tool
 .
. - Hover inside any layer bar. Your cursor should look like a black arrow
 . Drag the layer bar either to the left or right. Notice that again the keyframes are shifted with the layer.
 - Undo (Cmd–Z (Mac) or CTRL–Z (Windows)) when done.
- You can also trim the start or end of a layer, which shortens or lengthens the layer’s duration, leaving the keyframes in place. Move the playhead to 40 frames.
- Click on the HTML Email layer to select it.
- Press Opt–[ (Mac) or ALT–[ (Windows) to trim the layer.
- Press Spacebar to play it back and see the result.
- Let’s see how we can do this manually. Hover over the left end of the layer until you see a resize icon
 and drag it to the right.
 - When you’re done experimenting with trimming and shifting layers in time, go to File > Revert.
- In the dialog that pops up, choose Yes to revert back to the last saved version.
Leave this project open. We’ll continue working on it in the next exercise.