Installing Themes
Install a Theme
Appearance → Themes
Click the Add New button at the top of the Themes page.
Search the Theme Directory
Browse themes from WordPress.org/themes — search by name or feature.
Preview Before Installing
Hover any theme and click Preview to see it applied to your site.
Install & Activate
Click Install, then Activate to switch your site's look.
Noble Desktop's WordPress Bootcamp teaches themes, plugins, and custom site development.
Learn how to customize your WordPress site with this detailed tutorial, covering everything from downloading a theme to manually installing one.
Exercise Preview
Using WordPress’s Automated Theme Installer
A quick and easy way to install a new theme in WordPress is by using the automated theme installer built into WordPress. It allows you to browse themes stored in the WordPress Theme Directory (WordPress.org/themes) and install them automatically.
- Open Chrome and go to:
- Mac: localhost:8888/mrpBlog/wp-admin
- Windows: localhost/mrpBlog/wp-admin
If asked, enter your username and password.
On the left side of the Dashboard, find the Appearance button. Mouse over the Appearance button to open its submenu, then click Themes.
At the top of the Themes page, click the Add New button (or click Add New Theme below the themes). From this page, you can search all the themes stored in the theme directory.
Monteith Restoration & Performance is interested in creating a simple blog that has a prominent header and a gray color scheme. In the search field, type: simple header
Scroll down the page until you see the Simple Catch theme, then mouse over it.
Click Preview to see a preview of the theme and its various styles.
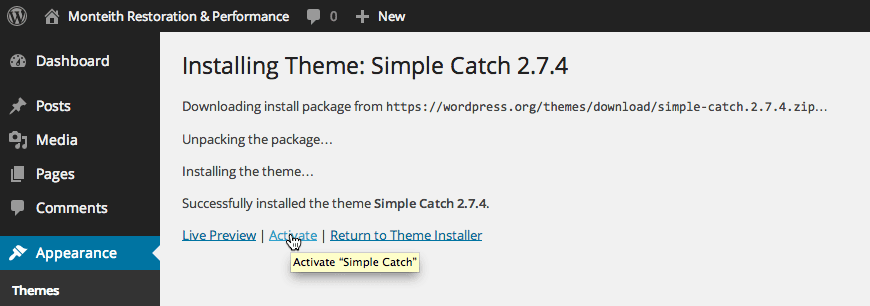
Looks good, let’s install it. Click the Install button on the top left.
As shown below, once the files have finished downloading, click Activate.
Click on the Monteith Restoration & Performance title at the top of the screen to see the changes.
Manually Installing a Theme
In addition to the WordPress theme directory, there are tons of free and paid themes available online for you to download and use in your site. Let’s see how themes can be manually installed into a WordPress site.
To save time, we have already downloaded the theme Obscure for you. This was a free theme from wpcrunchy.com (a newer version is available for purchase but it hasn’t been updated in a while).
Navigate to the Desktop, go into the Class Files folder, then the WordPress.org Class folder.
Select the obscure folder.
Hit Cmd–C (Mac) or CTRL–C (Windows) to copy it.
- Go to your mrpBlog themes folder:
- Mac: Hard Drive > Applications > MAMP > htdocs > mrpBlog > wp-content > themes
- Windows: C: > xampp > htdocs > mrpBlog > wp-content > themes
Hit Cmd–V (Mac) or CTRL–V (Windows) to paste the obscure folder.
Nice job, you just manually installed a theme to your site. However, this theme will not be visible until you activate it. So let’s activate the theme!
- Go back to the Dashboard:
- Mac: localhost:8888/mrpBlog/wp-admin
- Windows: localhost/mrpBlog/wp-admin
If asked, enter your username and password.
In the Appearance menu, click on the Themes link.
Obscure is now an available theme. As shown below, hover over the theme and click on Activate.
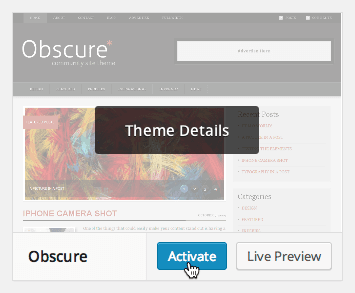
Click on the Monteith Restoration & Performance title at the top of the screen to see your changes!