Shadows/Highlights
Shadows/Highlights Adjustment
Convert Layer to Smart Object
Layer → Smart Objects → Convert to Smart Object so the adjustment is non-destructive.
Image → Adjustments → Shadows/Highlights
Defaults often help; check Show More Options for fine control.
Brighten Shadows, Tame Highlights
Move sliders to recover detail from dark or blown-out regions.
Mask Out Unwanted Adjustments
Smart Filter mask paints black where you don't want the effect (e.g. sky).
Noble Desktop's Photoshop Bootcamp covers retouching, compositing, color correction, and pro editing.
Discover how to brighten and balance your images using the Shadows/Highlights adjustment and Smart Objects in Photoshop with this detailed tutorial, including step-by-step instructions and helpful images.
Exercise Preview
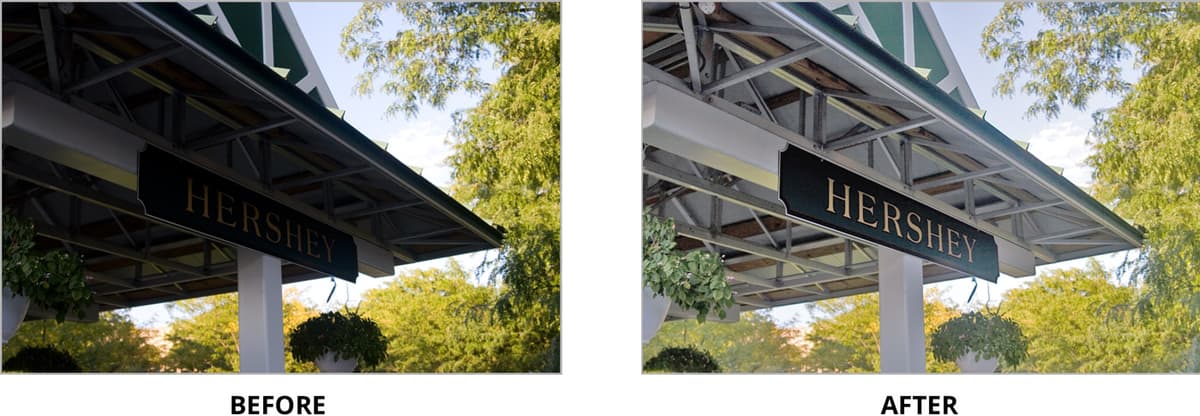
Photo by Dan Rodney
The Shadows/Highlights Adjustment
There are many dark parts of the image that need to be lightened. Go into Image > Adjustments > Shadows/Highlights.
Even the default options make the image look better, but we can tweak things more. At the bottom of the window, check on Show More Options.
Play around with the settings to adjust the image as desired. If you need some advice, here are some settings we think look nice:
ShadowsHighlightsAmount: 45% Tone: 57% Radius: 34 px AdjustmentsAmount: 6% Tone: 73% Radius: 39 px Color: +20 Midtone: +5 Click OK when done.
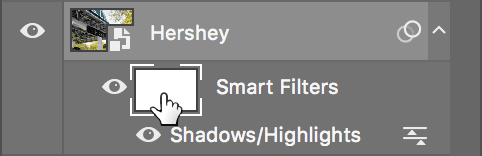
Let’s see how much of a difference we made. In the Layers panel, under the Hershey layer, you should see the Shadows/Highlights adjustment listed.
Click the eye
 next to Shadows/Highlights a few times to see the before/after.
Make sure the Shadows/Highlights adjustment is visible
before continuing.
Removing the Adjustment Where You Don’t Want It
There may be some parts of the image where you don’t like the adjustment. We’ll use the Smart Filter’s mask to hide it. That way we can un-hide it later if we decide we want the adjustment back.
As shown below, in the Layers panel, click on the Smart Filters layer mask. The brackets around it indicates the mask thumbnail is selected.
Choose the Brush tool
 .
.In the Tools panel, click the Default colors icon
 .
.Also in the Tools panel, click the swap colors icon
 .
.The Foreground color should now be pure black and the Background color pure white. It’s important to remember how layer masks work:
- Painting with black = hide.
- Painting with white = reveal.
- Painting with a shade of gray = partially hide.
Paint anywhere you want to hide the adjustment such as the shadow area of the trees on the right of the image.
If you hid some of the adjustment and then realized you shouldn’t have, you can either go to Edit > Undo or paint with white to reveal the adjustment again.
Nice—that looks so much better! You can close the file, saving if you wish.