Advanced Modify Tools
Essential AutoCAD Commands
OFFSET
Create parallel lines at a set distance — fundamental drafting move.
TRIM / EXTEND
Clean intersection of geometry — speeds up every drawing.
MIRROR
Reflect geometry across an axis — symmetric layouts in seconds.
ARRAY
Rectangular or polar duplication — handles repeating elements.
Noble Desktop's AutoCAD Certification teaches drafting, layouts, blocks, and dimensions.
Explore the intricacies of using the Trim command in AutoCAD, improving your ability to create complex drawings from simple shapes, in this detailed guide.
Exercise Preview
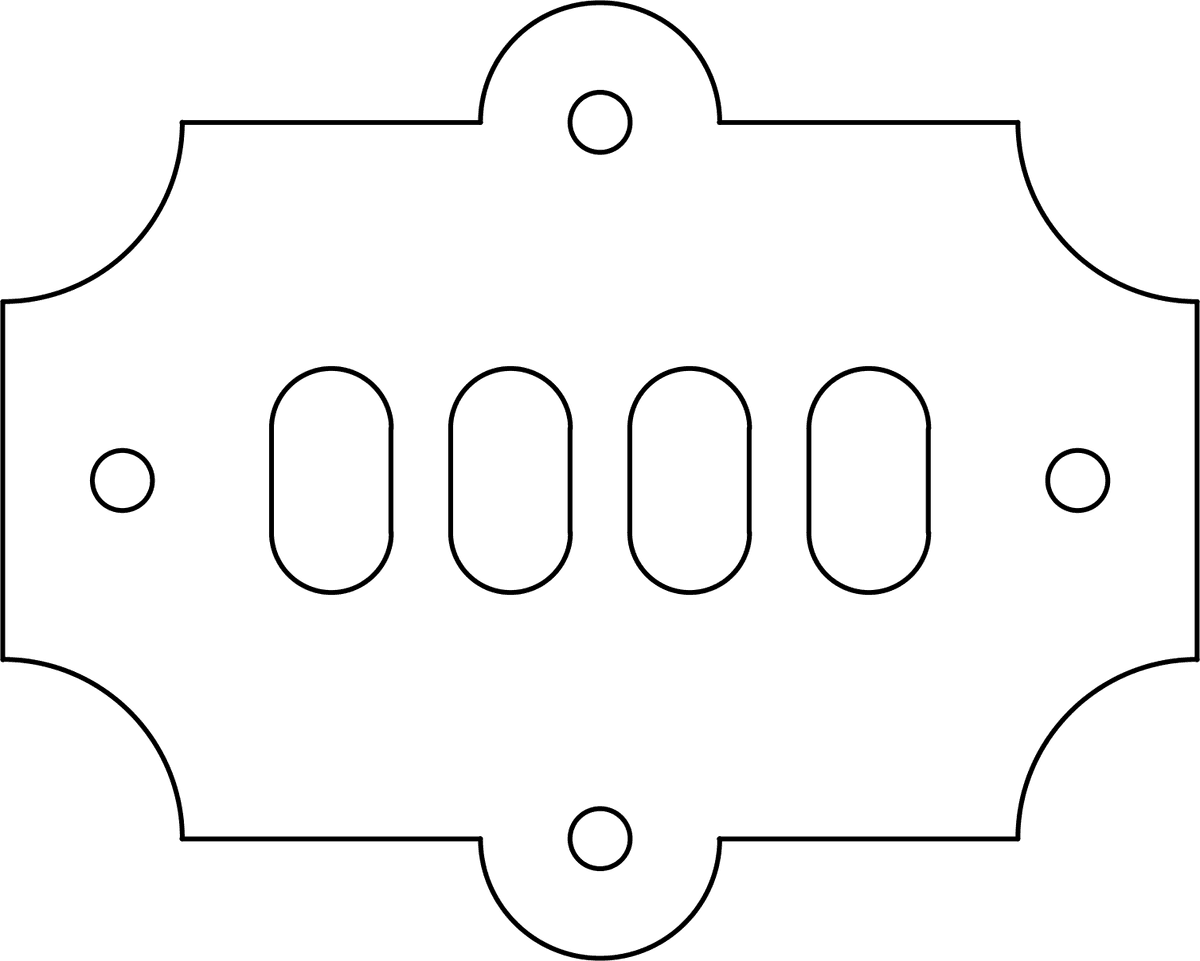
The Trim Command
Open the file Trim-Ventilation Plate.dwg. This drawing consists of overlapping circles, rectangles, and lines. You will use the Trim command to delete excess lines so that the remaining sections will form the drawing of the ventilation plate.
In the Trim command, by default you must select objects to act as cutting edges first, and then select the lines to cut away that intersect with the cutting edges. However, the Select All option will allow you to simply click on any section of line you would like to cut away and that portion of line up to the point that it intersects with another object will be deleted. The Trim command can be started by pressing TR Enter or clicking on the
 icon in the Modify ribbon panel or toolbar. When you start the Trim command, you will see the
 <select all>option in the Command Line, because it’s in the <> brackets, you can press Enter to choose Select All.Press TR Enter to start the Trim command and choose the Select All option.
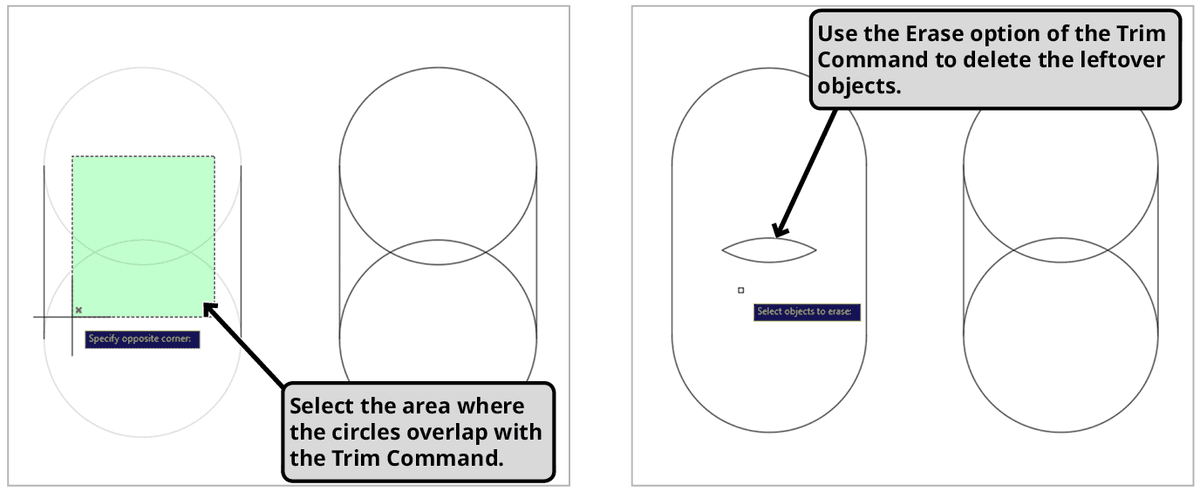
Zoom in on the leftmost vent slot, the overlapping circles connected by lines to make a capsule shape. Make a Crossing Selection (green selection box) and select the area where the circles overlap. Do not include the straight lines on either side in your selection. The sections of the circles between the points where they intersect each other and the lines will disappear. There will be leftover pieces of the circles between where they intersected. If you click to select them with the Trim command, they will not be deleted. This is because the Trim command will only delete portions of an object intersecting other objects. If an object can be deleted on its own, Trim will have no effect by default, as is the case with these leftover sections. In the Command Line, you will see the eRase option. Press R Enter to select the erase option. Select the leftover pieces and press Enter. The objects will be deleted and Trim command will resume. You can also delete any leftover objects when the Trim command completed.
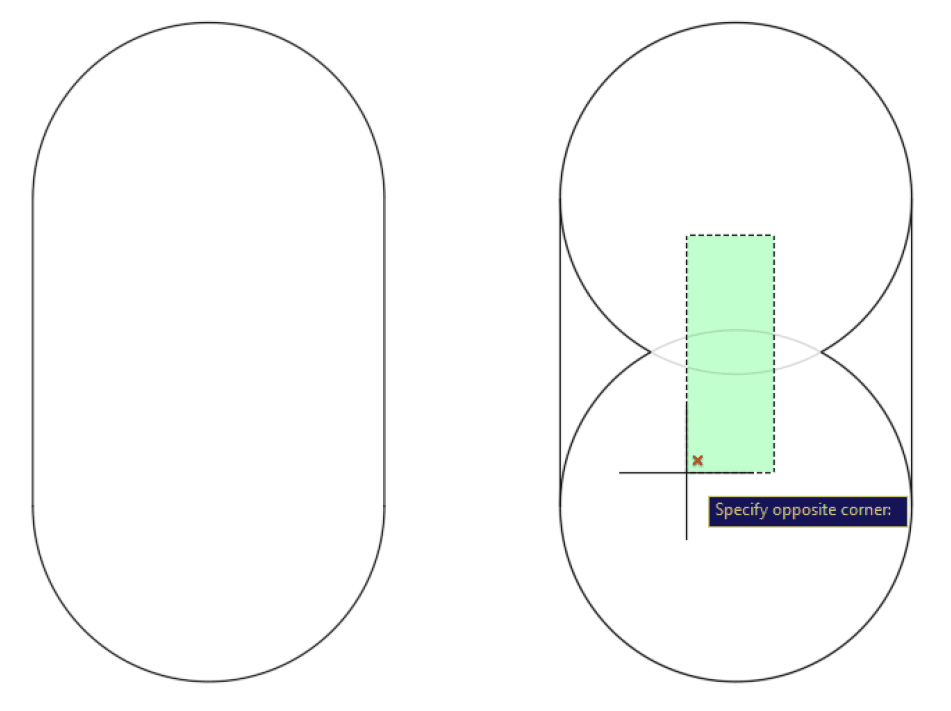
You should still be in the Trim Command, but if not, repeat the Trim command with the Select All option. Now you will repeat the last step on the vent next to the one you just used the Trim command on, but this time make a more narrow crossing selection box that only touches the overlapping edges in the center that were left over in the last step as shown in the diagram below. Because you selected these sections first, they will be deleted by the Trim command. With practice, you will be able to identify potential leftover objects and select them first with the Trim command so you won’t have the erase option or delete them afterward. Finish trimming all the excess lines in the other vents. Stay in the Trim command for the next step.
Keep using the Trim command to delete the excess line work around the edges of the ventilation plate to complete the drawing as shown below.
Once you’re done, press Enter or Escape to end the Trim command. Then close and save the drawing.