Audio Spectrum in After Effects
What This Tutorial Covers
Audio Spectrum
Generate live waveform visuals tied to a sound layer.
Style Controls
Customize bands, hue, polar shape, and thickness.
Sync to Audio
Reactive visuals that pulse with music or voice.
Noble Desktop's Video Editing & Motion Graphics Certificate teaches After Effects alongside Premiere Pro, Cinema 4D, and DaVinci Resolve.
After Effects is known for its amazing visual effects, but it can also work in tandem with audio! By importing audio files into the program, you open up a whole new set of possibilities for your projects. This tutorial will take you through the step by step process of using a particular effect called Audio Spectrum. This one effect alone can produce super cool visual accompaniment to all your audio tracks.
File Setup
- Upon opening the file, you’ll see a couple of layers already in the project. They’re just there to get you started and add a bit of sheen to the look, so don’t worry about them. We’ll be making our own layers in this tutorial mostly and using those. So first things first, select the text layer in the layer stack.
- Find the Layer > New > Solid option in the top toolbar.

- Click on Solid.
- For the name, type in inner audio circle.
- Click OK.
- This will create a new Solid layer in your composition, covering the rest of your objects depending on where it is in the layer stack.
- Locate the Shape Tool in the toolbar.

- Click on it.
- If the Ellipse isn’t active, click Q on your keyboard to cycle through the options until you land on it.
- With Ellipse now activated, Shift-Click and drag on the new Solid, creating a perfect circle.
- In the layer stack, you should see that a Mask has been added to your Solid. If you don’t see it, click M on your keyboard with the Solid layer selected.
- Next to Inverted, there should be a box. Click it.

- This will invert your Masked layer from an opaque circle to a Solid layer with a hole in the middle. This is because the Mask containing your Solid layer got “flipped inside out” or as After Effects, inverted.
- Select the inner audio circle layer.
- Click and drag the layer until the circle looks to be about in the middle, centering around the smaller circle. My coordinates are 960,480, but yours can be different depending on how you have created your circular Mask. To check your coordinates, clickP on your keyboard with the inner audio circle layer selected. This will bring up the Position attribute so you can alter and see the coordinates of your layer relative to the canvas. It doesn’t have to be perfect, but the main idea is to have it visually look centered.
- With inner audio circle still selected, go up to Effect > Generate > Audio Spectrum
- Click on Audio Spectrum. This will add the effect to your selected layer, inner audio circle.
- In the Effect Controls that appear, we’ll be adjusting some settings. For a start, let’s connect this audio effect with its, well, audio. Click on the dropdown menu next to the Audio Layer setting.
- Locate theXtasy by Lahar layer, which should end in mp3.
- Click on it.
- This will connect the Audio Spectrum effect to the audio it’s visually responding to! You can check it out by dragging the Playhead back and forth over the Timeline.
- We do need this effect in a circular shape, though. Luckily, we’ve prepared for that. Locate the dropdown menu besides Path.

- Click on Mask 1. This will shape the Audio Spectrum effect to the circular Mask we placed down before.
- Looks cool, right? You might be surprised, but this is actually most of the work already. We’ll just be adjusting settings and copy-pasting from here on out! Let’s change the Frequency Bands to 65.
- Change the Maximum Height to1150.
- For Thickness, change that to5.
- Softness, we’ll turn that all the way down to0.
- Now for Inside Color, click the square to bring up a color picker.
- Enter #E800FF in the hex code.
- Click OK.
- And Outside Color, click the square to bring up another color picker.
- This hex code will be#FF00D1.
- Finally, down at Display Options, change it to Analog Lines. That’s the first and most complex circle done! We’ll just add one last detail.
- The blue-green circle that was there before actually has some keyframes put in for your convenience. You can’t tell because it’s a circle, but it’s revolving in a 360 circle. Select the circle layer with the Selection Tool.

- Hit R to open up the Rotation keyframes so you can see that it’s animated.
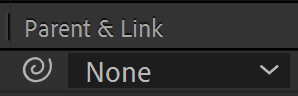
- In theParent and Link column, in the inner audio circle layer, you’ll see a little swirly icon.
- Click and drag from the swirly Pick Whip to the circle l ayer. This will have your inner audio circle layer imitate whatever animation is applied to its parent layer, the circle layer. Now it’ll be rotating around!
- Click and drag the Playhead
 back to 00;00;00;00
 - HitSpacebar to preview your animation.
Outer Circle
- This one will be easier. Select the inner audio circle layer.
- Cmnd-D (Mac)/ Cntrl-D (PC) will duplicate yourinner audio circle layer.
- With the duplicate layer selected, press Return (Mac)/ Enter (Windows).
- Rename the layerouter audio circle.
- Press S on your keyboard to bring up the Scale property.
- We want this circle to be bigger, so let’s resize it to about 125% in the Scale attribute.
- In the Parent Picke r options, our new layer has also duplicated which layer it’s parented to. However, we want this circle to remain in place, so click on the dropdown menu beside the swirly Pick Whip.

- Click on the None option.
- Ok, now let’s pretty up this layer by going into its Effect Controls in the top left.

- The Maximum Height will be1330.
- The Thickness we’ll change to
- For Inside Color, click the colored box beside it to bring up the color picker.
- Enter hex code#00FFFC.
- Hit OK.
- Outside Color, click the colored box for another color picker.
- This hex code is#00FFC5.
- ClickOK.
- In Display Options, click on the dropdown menu to show options.
- Click onDigital.
- Now for Side Options, click on that dropdown menu.
- Choose Side B. This will restrict the jumping lines to the outer or top side of your circle. Your new layer is all done! Pretty easy, right? We’ll just add one more instance of the effect, then call it complete!
Audio Spectrum Line
- Go up to the top toolbar, findLayer > New > Solid.
- Click on Solid.
- Name the new layer audio line
- Click OK
- Now your new layer should be automatically selected, but if not, click on it.
- Go up to Effects > Generate > Audio Spectrum.
- Click S on your keyboard to show the Scale attribute.
- Enter 22%
- HitP to open up the Position attribute.
- Enter 960,540 for the coordinates, which should center it. You can also click and drag on the layer in the composition to center it.
- In the Effect Controls for the new layer, we’ll change some settings. For Start Frequency, change it to 1
- End Frequency will be 150
- Maximum Height, change that to 3550
- Thickness is 50
- And Softness, change that to 0
- Click on the dropdown menu besides to Display Options
- Choose Analog Lines
- Click on the dropdown menu besides Side Options
- Choose Side B
- Move the Playhead to 00;00;06;05
- Hit N on your keyboard to trim your animation to those six seconds.
- Bring the Playhead back to 00;00;00;00.
- Hit the Spacebar to play your animation. Looks cool, right?
And with that, your project is all done!